[title] Xbox® One
[path] SUPPORTED DEVICES/
Cronus Zen supports all versions of the Xbox® One console, and all official Xbox® One controllers.
:::hint{type="success"}
Remember, when using Cronus Zen, any supported device *(controllers, mice, keyboards)* will work with your Xbox® One console! 🎮🚀
:::
# Xbox® One Consoles
***

| **Console Version** | **Supported** |
| --------------------------------- | -------------------------------- |
| Xbox® One | YES |
| Xbox® One S | YES |
| Xbox® One S (All Digital Edition) | YES |
| Xbox® One X | YES |
# Xbox® One Controllers
***
Cronus Zen supports all variants of the Xbox® One controllers *(USB & *[Xbox Wireless Adapter](https://cronus.shop/products/xbox-one-wireless-adapter)* - Bluetooth is not supported)*.

| **Controller Model** | **USB** | [Adapter](https://cronus.shop/products/xbox-one-wireless-adapter) | **Bluetooth** |
| ---------------------- | -------------------------------- | ----------------------------------------------------------------- | ------------------------------- |
| Xbox® One (1537, 1697) | YES | YES | NO |
| Xbox® One S (1708) | YES | YES | NO |
| Xbox® Elite (1698) | YES | YES | NO |
| Xbox® Elite Series 2 | YES | YES | NO |
# Licensed Controllers
***
The following are third-party licensed Xbox® One controllers that have been verified to work with Cronus Zen either by USB or [Xbox Wireless Adapter](https://cronus.shop/products/xbox-one-wireless-adapter).
**Note: **Some Xbox® One and Xbox® Series X|S controllers share identical names, but one may be supported by Zen and the other may not, so it's a good idea to know which model you have. They're easy to identify by the extra 'Capture' button *(see image below)*.

If you're using a licensed Xbox® One controller that works but not listed here, we'd love to know! Reach out to us at [cronus.support](https://cronus.support). 🥰
| **Xbox One Controller** | **USB** | **Bluetooth** |
| --------------------------------- | -------------------------------- | ------------------------------- |
| GameStop Wired | YES | NO |
| GameStop Metallic Limited Edition | YES | NO |
| Hori Horipad | YES | NO |
| PowerA Enhanced | YES | NO |
| PowerA Mini | YES | NO |
| PowerA Fusion 2 | YES | NO |
| PowerA Fusion Pro | YES | NO |
| PowerA Pro Ex | YES | NO |
| PowerA Spectra | YES | NO |
| PowerA Star Wars Stormtrooper | YES | NO |
| PDP Afterglow Prismatic | YES | NO |
| Razer Atrox Arcade Stick | YES | NO |
| Razer Atrox Dragon Ball Fighter Z | YES | NO |
| Razer Wildcat | YES | NO |
| Razer Wolverine Tournament Ed. | YES | NO |
| Razer Wolverine Ultimate | YES | NO |
| Scuf Prestige | YES | NO |
:::hint{type="danger"}
These controllers are ***NOT*** currently compatible with Cronus Zen:
- Xbox® One ThrustMaster ESWAP S PRO
- Xbox® One ThrustMaster ESWAP X PRO
- All unlicensed Xbox controllers
- All Flight Sticks
:::
# Controller Setup
***
This guide will show you how to connect any controller to an Xbox® One console.

First make sure your Zen is updated to . If it isn't, you'll need to visit [STEP 1: Update Firmware](docId:9U47MtFRK1z6gjIle0uv5).
OK, Let's get after it.
1. Connect the Cronus Zen to your PC using the `PROG` USB port.
2. Open Zen Studio .
3. Select the **Device** panel.
4. Set the **Emulator Output Protocol** to **XBOX ONE X/S**.

- **Xbox® One Controller (USB):**
- Connect to the `A1` USB port. That's it. 😁
- **Crossover Gameplay:**
- Other devices such as non-Xbox® controllers, mice, keyboards etc. use the `A3` USB port, and also the `A2` port if you need to connect two devices.
- You can also use a secondary device alongside an Xbox® One controller such as a mouse for enhanced aiming, or a keypad with dozens of assigned MACROs.
- **Crossover Note:**
- An Xbox® One controller must be connected to `A1` while using any crossover device on an Xbox® One console.
- **Bluetooth Pairing:**
- Tap Zen's Bluetooth pairing button (P2) for pairing mode, then...
- **DualSense****®** **Controllers:** There is currently no Bluetooth support. Use USB.
- **Xbox**®** Controllers:** There is currently no Bluetooth support. Requires [adapter](https://cronus.shop/products/xbox-one-wireless-adapter).
- **Nintendo**® **Switch**** Controllers:** Hold down sync button for pairing mode.
- **DualShock®**** Controllers:** Hold down `SHARE + PS` for pairing mode.
- **Wireless Adapters:**
- To achieve wireless support for Xbox® controllers, the [Xbox Wireless Adapter is required](https://cronus.shop/products/xbox-one-wireless-adapter). Plug it into `A3`, connect the Xbox® controller to `A2` for a few seconds, then unplug. Soon, the LED on the Adapter and controller will turn solid white, indicating successful pairing.
- The Astro® C40 adapter can also be connected to `A3`.
:::hint{type="success"}
**🔋 IMPORTANT**
Your controller might not charge when connected via Zen. Ensure its fully charged or equipped with fresh batteries to prevent disconnections.
:::
:::hint{type="info"}
🎧 **WIRED HEADSETS**
Considering the wide variety of headsets, controllers, and consoles, we can't promise full audio functionality for every combo, especially third-party controllers. However, many official controller USB setups are compatible.
Give yours a try and find out! 🎮
:::
[title] Xbox® 360
[path] SUPPORTED DEVICES/
Cronus Zen supports original Xbox 360, and most licensed third-party Xbox 360 controllers. They can all be connected to Xbox, PlayStation, and Nintendo Switch consoles, including support for PC and Android gaming, all with full MOD & GPC scripting capabilities!
- [Official Xbox 360 Controllers](docId:8LFT2W7C8gkDo5_wJFGlb)
- [Third-Party Xbox 360 Controllers](docId:8LFT2W7C8gkDo5_wJFGlb)
::Image[]{src="https://archbee-image-uploads.s3.amazonaws.com/IwUlH55FdaPsVELSqm1Fc/SjLENJMbThPAM5rnMNPMV_image.png" size="96" width="700" height="488" position="center" showCaption="false"}
# OFFICIAL XBOX 360 CONTROLLERS
***
All special editions and variations of the official Microsoft Xbox 360 Controller are compatible with Cronus Zen.
**Note:** Connecting an unsupported controller can cause an [E3 Error Code](docId:-MNg8vXAlWo3m3CIRbyN5).
| **Controller Model** | **Audio** | **A1 Donor** |
| ----------------------------------------------- | ------------------------------- | -------------------------------- |
| Xbox 360 Wired | NO | YES |
| Xbox 360 Wireless* | NO | NO |
**If you wish to use an Xbox 360 wireless controller with an Xbox 360 console, or any non-Xbox 360 controller, you will need a hard-wired Xbox 360 controller as the license donor connected to A1.*
*Any original or third-party Xbox 360 Wireless Receiver should work.*
:::hint{type="danger"}
The Xbox 360 console and controllers do not support audio with Cronus Zen.
:::

# THIRD-PARTY XBOX 360 CONTROLLERS
***
Heads up: the market's full of off-brand Xbox 360 controllers. Some gel with Zen, others fall flat. With countless serial numbers and brands out there, it's honestly a roll of the dice. If you've got a third-party Xbox 360 controller that syncs up with Zen, drop us a line. We'd like to feature it here.👍🎮
[title] Synch Flash, Please Wait - Fix
[path] TROUBLESHOOTING/
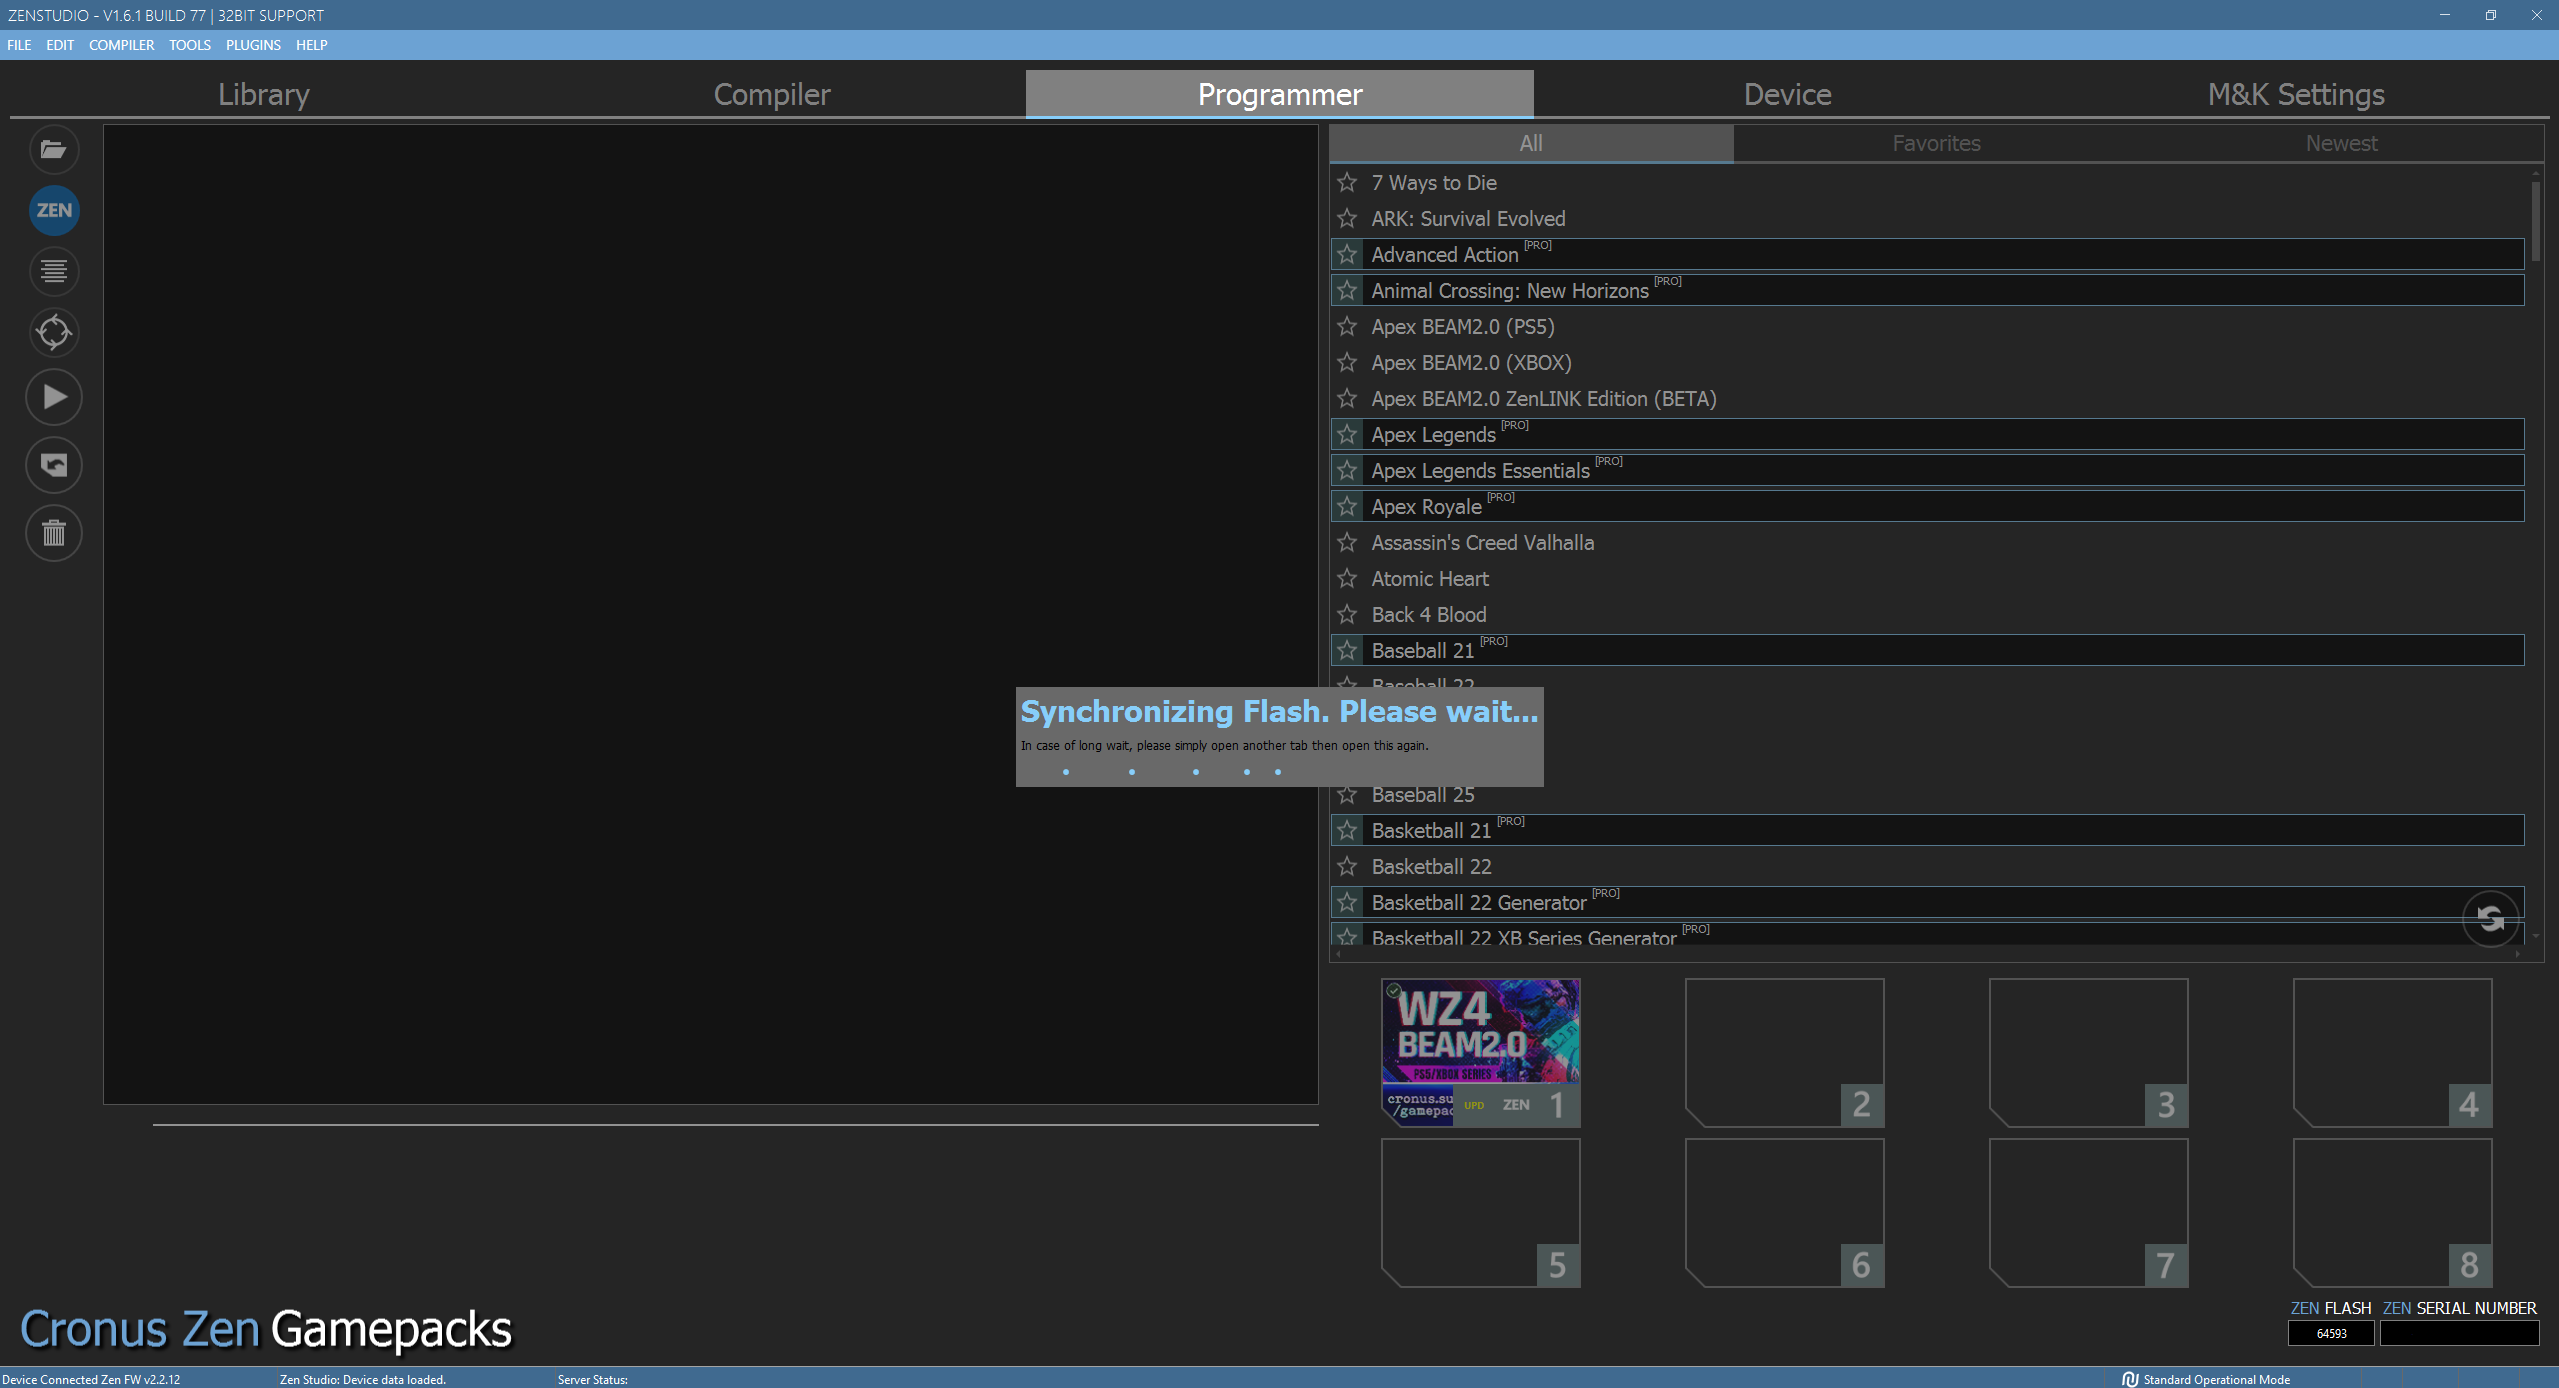
If you're **stuck **on this screen — Don’t worry, this can be fixed easily.
***
### ❌Close ZEN Studio
- If you see the error message, the first step is to completely **close ZEN Studio**
### 🔌Check Physical Connection
- Make sure your Cronus ZEN device **remains connected** to your PC/Laptop
- Confirm it is plugged into the correct port on the device
- the** PC PROG** port (right-sided USB port)
### 🛜Use the Cronus ZEN Marketplace
- Open a web browser (e.g., Google Chrome)
- Navigate to the **Cronus Zen Marketplace** webpage [https://marketplace.cmindapi.com ](https://marketplace.cmindapi.com/)
- On the left side of the Marketplace page, click the **Connect button**
- From the options that appear, choose** Cronus Bridge** and click **Connect**
### ⚡Flash a Random GamePack
- Once connected, go to the Game Packs section and **drag-drop any GamePack** onto any slot on your device
- If a new window opens during this process, simply close it
### 👨💻Program the Device
- Click the **Program button** located on the left side of the page
- A message box will appear saying "flashing device please wait."
- **Wait a few seconds **for this message to disappear, then close the web browser and open ZEN Studio again
- The error message will be gone
[title] Zen DS4 Back Button
[path] SUPPORTED DEVICES/
Transform your DualShock4 into a gaming beast with the [Cronus Zen DS4 Back Button](https://cronus.shop/collections/cronus-zen/products/cronus-zen-back-button). Think of it as a next-gen [PS4 Strike Pack Eliminator](https://cronus.shop/collections/strike-pack/products/ps4-strike-pack-eliminator), but now with full Bluetooth support!
When paired to the Cronus Zen, you can also use your boosted DualShock4 controller on any model PlayStation or Xbox, even the Nintendo Switch!

OK, here's what you'll get:
- Four ultra-responsive, mappable action buttons.
- Ergonomically designed for comfort.
- A similar upgrade to the [PS4 Strike Pack Eliminator](https://cronus.shop/collections/strike-pack/products/ps4-strike-pack-eliminator).
- And a standout feature: while [Strike Packs](https://cronus.shop/collections/strike-pack) are USB-only, this rocks Bluetooth!
Dive into our premium button mapping system:
- Map all 17 controller functions directly.
- Integrate seamlessly with Cronus Zen MODS for the Action Buttons.
- And no PC needed! Adjust on the go using the Cronus Zen OLED screen.
Make it yours today [for an unbeatable $29.99](https://cronus.shop/collections/cronus-zen/products/cronus-zen-back-button) 🛒.
# How to Setup
***
Connect the Zen Back Button to a DualShock4 controller. It clips on pretty easily.

Pair the DualShock4 controller to Cronus Zen (Press Zen's P2 Button then hold SHARE + PS). The LED's will flash for a few seconds then change to a solid color indicating Bluetooth pairing is successful.

Press the left Mapping Button (as shown in the above image) until a menu appears on Zen's OLED screen.
Hold the mappable button you wish to map then press one of the 17 controller functions - it will show up on the OLED screen.
Once you have finished mapping, press B/CIRCLE to save and exit.
Now connect your Cronus Zen to any PlayStation, Xbox or Nintendo Switch. Connect the correct AUTH controller connected to `A1`
**Note:** If you wish to use the Back Button on a PS4 using Bluetooth, you will also need to have a second DualShock4 connected to A1. This doesn't affect a PS4 USB setup, simply connect your DS4+Back Button to `A1`.
[title] Xbox® Series X|S
[path] SUPPORTED DEVICES/
Cronus Zen supports all versions of the Xbox® Series X|S console, and all official Xbox® Series X|S controllers.
:::hint{type="success"}
Remember, when using Cronus Zen, any supported device *(controllers, mice, keyboards)* will work with your Xbox Series® X|S console! 🎮🚀
:::
# Xbox® Series X|S Consoles
***

| **Console Version** | **Supported** |
| ---------------------- | -------------------------------- |
| Xbox® Series X | YES |
| Xbox® Series S Digital | YES |
# Xbox® Series X|S Controllers
***
Cronus Zen supports all variants of the Xbox® Series X|S controllers *(USB & *[Xbox Wireless Adapter](https://cronus.shop/products/xbox-one-wireless-adapter)* - Bluetooth is not supported)*.

| **Controller Model** | **USB** | [Adapter](https://cronus.shop/products/xbox-one-wireless-adapter) | **Bluetooth** |
| ------------------------------ | -------------------------------- | ----------------------------------------------------------------- | ------------------------------- |
| Xbox® X\|S (1914) | YES | YES | NO |
| Xbox® X\|S Elite Series 2 Core | YES | YES | NO |
# Licensed Controllers
***
The following are third-party licensed Xbox® Series X|S & Elite Core controllers that have been verified to work with Cronus Zen either by USB or [Xbox Wireless Adapter](https://cronus.shop/products/xbox-one-wireless-adapter).
**Note: **Some Xbox® Series X|S and Xbox® One controllers share identical names, but one may be supported by Zen and the other may not, so it's a good idea to know which model you have. They're easy to identify by the extra 'Capture' button *(see image below)*.

If you're using a licensed Xbox® Series X|S controller that works but not listed here, we'd love to know! Reach out to us at [cronus.support](https://cronus.support). 🥰
| **Xbox® Series X\|S Controller** | **USB** | [Adapter](https://cronus.shop/products/xbox-one-wireless-adapter) |
| --------------------------------------------------------------------- | -------------------------------- | ----------------------------------------------------------------- |
| Gamesir G7 SE (see [GameSir® Fix](docId:2tfnAXTXBSld273tZAxKL) guide) | YES | NO |
| Nacon RIG Pro Compact | YES | NO |
| PDP Afterglow | YES | NO |
| PowerA Fusion Pro 2 | YES | NO |
| PowerA Fusion Pro 3 | YES | NO |
| PowerA Spectra Infinity | YES | NO |
| PowerA Enhanced | YES | NO |
| Razer Star Wars (Boba Fett) | YES | YES |
| Razer Star Wars (Mandalorian) | YES | YES |
| Razer Star Wars (Rebel) | YES | YES |
| Razer Wolverine v2 | YES | NO |
| Razer Wolverine v2 Chroma | YES | NO |
| Scuf Instinct | YES | YES |
| Scuf Instinct Pro | YES | YES |
| Turtle Beach Recon | YES | NO |
| Turtle Beach REACT-R | YES | NO |
| Victrix Gambit Dual Core | YES | NO |
:::hint{type="danger"}
These controllers are ***NOT*** currently compatible with Cronus Zen:
- Xbox® Series X|S ThrustMaster ESWAP S PRO
- Xbox® Series X|S ThrustMaster ESWAP X PRO
- All unlicensed Xbox controllers
- All Flight Sticks
- All H.O.T.A.S.
:::
# Controller Setup
***
This guide will show you how to connect any controller to an Xbox® Series X|S console.

First make sure your Zen is updated to . If it isn't, you'll need to visit [STEP 1: Update Firmware](docId:9U47MtFRK1z6gjIle0uv5).
OK, Let's get after it.
1. Connect the Cronus Zen to your PC using the `PROG` USB port.
2. Open Zen Studio .
3. Select the **Device** panel.
4. Set the **Emulator Output Protocol** to **XBOX ONE X/S**.

- **Xbox® Series X|S Controller (USB):**
- Connect to the `A1` USB port. That's it. 😁
- **Crossover Gameplay:**
- Other devices such as non-Xbox® controllers, mice, keyboards etc. use the `A3` USB port, and also the `A2` port if you need to connect two devices.
- You can also use a secondary device alongside an Xbox® Series X|S controller such as a mouse for enhanced aiming, or a keypad with dozens of assigned MACROs.
- **Crossover Note:**
- An Xbox® Series X|S controller must be connected to `A1` while using any crossover device on an Xbox® Series X|S console.
- **Bluetooth Pairing:**
- Tap Zen's Bluetooth pairing button (P2) for pairing mode, then...
- **DualSense****®** **Controllers:** There is currently no Bluetooth support. Use USB.
- **Xbox**®** Controllers:** There is currently no Bluetooth support. Requires [adapter](https://cronus.shop/products/xbox-one-wireless-adapter).
- **Nintendo**® **Switch**** Controllers:** Hold down Sync buttons for pairing mode.
- **DualShock®**** Controllers:** Hold down `SHARE + PS` for pairing mode.
- **Wireless Adapters:**
- To achieve wireless support for Xbox® controllers, the [Xbox Wireless Adapter is required](https://cronus.shop/products/xbox-one-wireless-adapter). Plug it into `A3`, connect the Xbox® controller to `A2` for a few seconds, then unplug. Soon, the LED on the Adapter and controller will turn solid white, indicating successful pairing.
- The Astro® C40 adapter can also be connected to `A3`.
:::hint{type="success"}
# 🔋 IMPORTANT
Your controller might not charge when connected via Zen. Ensure its fully charged or equipped with fresh batteries to prevent disconnections.
:::
:::hint{type="info"}
# 🎧 WIRED HEADSETS
Considering the wide variety of headsets, controllers, and consoles, we can't promise full audio functionality for every combo, especially third-party controllers. However, many official controller USB setups are compatible.
Give yours a try and find out! 🎮
:::
[title] MOD's vs Hacks
[path] WELCOME TO CRONUS/
A **MOD** (or **Macro on Demand**) refers to a programmable sequence of game controller inputs that are automated through scripts or other software such as **Microsoft's Xbox Accessories App**, **Corsair's iCUE**, **Razer's Synapse**, or **Logitech G-Hub**. This kind of input automation is used by **many popular gaming products** across the industry, not just Cronus.
## 🔍 What Cronus Does (and Doesn't Do)
***
Calling a macro a "hack" is not just wrong - it's outdated.
This confusion has been floating around for **way too long**, and it’s time to clear it up.
✅ Cronus automates button presses using scripts
✅ Cronus supports customizable macros
❌ Cronus does **not** hack game files
❌ Cronus does **not** modify game files
❌ Cronus does **not** inject code into game files
❌ Cronus does **not** trigger aimbot or god mode mechanics
❌ Cronus does **not** access hidden developer features
❌ Cronus does **not** allow you to walk through walls or become invisible
❌ Cronus does **not** alter your health, hitbox, or damage
:::hint{type="danger"}
To be clear: **a MACRO is not a HACK**. It replicates button presses exactly as a human would. A **HACK**, on the other hand, involves manipulation of a games actual code, usually performed on a PC, which Cronus does **not** do.
:::
## ✅ Examples of Products That Use Macros
***
To help illustrate how common and accepted Macros are, here are some well-known devices and brands that use similar macro technology:
- **Microsoft Xbox Elite Series 2 Controller**
Offers macro-like functionality using paddles and "shift" commands through the Xbox Accessories app.
- **Corsair Gaming Keyboards (e.g., K55 RGB Pro) **
Features six dedicated macro keys programmable via Corsair's iCUE software.
- **Razer Gaming Keyboards (e.g., BlackWidow V4)**
Includes six fully programmable macro keys, configured via Razer Synapse.
- **Logitech G-Series Gaming Keyboards (e.g., G613)**
Equipped with G-keys for macros, set up via Logitech G Hub software.
- **Redragon Gaming Keyboards (e.g., K585 DITI One-Handed)**
Includes seven macro keys for MMO gaming, highly customizable via onboard settings.
These devices highlight how **input-based automation** is both industry-standard and legally accepted across casual, competitive, and accessibility-driven gaming.
## 🎮 Cronus is Game-Agnostic
***
A common misconception is that Cronus macros are made for specific games. They're not.
**Cronus works through your controller**, not the game itself. That means if your controller works with the game, then Cronus works with the game, because it doesn't "know" what game you're playing. It simply performs automated controller inputs.
:::hint{type="success"}
For example, if you use a **Rapid Fire Macro**, the script simply tells the controller to **press the fire button a set number of times per second** - nothing more. Whether the game actually fires that quickly depends entirely on the game's design.
:::
## 🔒 Macros Respect Game Limits
***
Another common misunderstanding is that macros can somehow override game mechanics. In reality, **they can't**.
If developers have placed restrictions on how certain actions work, like limiting how fast a semi-automatic weapon can fire, then **no macro will bypass that**. The game simply won’t register the inputs beyond what it already allows.
So even if a Rapid Fire macro is telling the controller to press the trigger repeatedly, it's still up to the game to respond. **If the game blocks rapid inputs, the macro won't make a difference**.
:::hint{type="info"}
A macro doesn't change the game, it just changes how your inputs are delivered. The game still receives normal button presses and stick movements, nothing more. It can't access game code, bypass mechanics, or create actions the game wasn't built to accept.
All it does is automate what you could already do yourself. It repeats inputs with perfect timing and consistency instead of relying on manual effort. If you can perform the action by hand, a Cronus GPC script with macros can replicate it. It's not adding new abilities, its just removing the need to do them manually.
**No hacks. No cheats. Just macros.**
:::
:::hint{type="danger"}
Cronus Zen is intended for personal enjoyment and hobbyist use only. It is not intended for, nor do we encourage, any use that may be designed to circumvent or otherwise violate the End User License Agreements (EULA) of software publishers.
:::
[title] Nintendo® Switch
[path] SUPPORTED DEVICES/
Cronus Zen supports the Nintendo® Switch console, and all official Nintendo controllers.
:::hint{type="success"}
Remember, when using Cronus Zen, any supported device *(controllers, mice, keyboards)* will work with your Nintendo® Switch console! 🎮🚀
:::
# Nintendo® Switch Consoles
***

| **Console Version** | **Supported** |
| ------------------------ | -------------------------------- |
| Nintendo® Switch | YES |
| Nintendo® Switch OLED | YES |
| Nintendo® Switch Lite | YES |
| Nintendo® Switch TV Dock | YES |
# Nintendo® Switch Controllers
***
Cronus Zen supports all features of the official Nintendo® Switch controllers *(Bluetooth)*.

| **Controller Model** | **USB** | **Bluetooth** |
| ------------------------------- | ------------------------------- | -------------------------------- |
| Nintendo® Switch Joy-Cons (L+R) | NO | YES |
| Nintendo® Switch Wireless Pro | NO | YES |
# Licensed Controllers
***
The following are third-party licensed Nintendo Switch controllers that have been verified to work with Cronus Zen. If you're using a controller that works but not listed here, we'd love to know! Reach out to us at [cronus.support](https://cronus.support). 🥰
| **Controller Model** | **USB** | **Bluetooth** |
| --------------------------- | -------------------------------- | -------------------------------- |
| Hori D-Pad Controller (L+R) | NO | YES |
| Hori Switch Horipad | YES | NO |
| Gulikit ZEN Pro | YES | YES |
:::hint{type="danger"}
These controllers are ***NOT*** currently compatible with Cronus Zen:
- All unlicensed Nintendo® Switch controllers
- All Flight Sticks
- All H.O.T.A.S.
:::
# Enable Wired Comms
***
You must enable Pro Controller Wired Communication for Cronus Zen to correctly pair with the Nintendo Switch.
- System Settings > Controllers and Sensors > Pro Controller Wired Communication: **On **

# Controller Setup
***
This guide will show you how to connect any controller to a Nintendo® Switch console.

First make sure your Zen is updated to . If it isn't, you'll need to visit [STEP 1: Update Firmware](docId:9U47MtFRK1z6gjIle0uv5).
OK, Let's get after it.
1. Connect the Cronus Zen to your PC using the `PROG` USB port.
2. Open Zen Studio .
3. Select the **Device** panel.
4. Set the **Emulator Output Protocol** to **NINTENDO SWITCH**.

:::hint{type="info"}
**Nintendo® Switch TV Dock**
When using a Switch TV Dock, make sure the 15v power supply is connected or the Zen will not power on.
If you are using the Switch in Handheld mode, you'll also need an [OTG USB-C Adapter](https://cronus.shop/collections/cronus-zen/products/usb-c-otg-adapter) for the Cronus Zen to connect successfully.
:::
- **Nintendo® Switch Wireless Pro (Bluetooth):**
- Tap Zen's Bluetooth pairing button (P2) for pairing mode.
- Hold down the sync button and after a few seconds it will pair with the Zen. That's it. 😁
- **Nintendo® Switch Joy-Cons (Bluetooth):**
- The Nintendo Switch Left & Right Joy-Con Controllers have to be paired separately to the Cronus Zen.
- Tap Zen's Bluetooth pairing button (P2) for pairing mode, then hold down the **Joy-Con (Left) sync button** and after a few seconds it will vibrate.
- Tap Zen's Bluetooth pairing button again, then hold down the **Joy-Con (Right) sync button** and it will also vibrate. That's it. 😁
::::VerticalSplit{layout="middle"}
:::VerticalSplitItem

:::
:::VerticalSplitItem

:::
::::
- **Crossover Gameplay:**
- Non-Nintendo® Switch USB controllers connect to Zen's `A3` USB port.
- **Note:** An AUTH controller connected to `A1` is not required.
- **Bluetooth Pairing:**
- Tap Zen's Bluetooth pairing button (P2) for pairing mode, then...
- **DualSense****®** **Controllers:** There is currently no Bluetooth support. Use USB.
- **Xbox**®** Controllers:** There is currently no Bluetooth support. Requires [adapter](https://cronus.shop/products/xbox-one-wireless-adapter).
- **Nintendo**® **Switch**** Controllers:** Hold down Sync buttons for pairing mode.
- **DualShock®**** Controllers:** Hold down `SHARE + PS` for pairing mode.
- **Wireless Adapters:**
- To achieve wireless support for Xbox® controllers, the [Xbox Wireless Adapter is required](https://cronus.shop/products/xbox-one-wireless-adapter). Plug it into `A3`, connect the Xbox® controller to `A2` for a few seconds, then unplug. Soon, the LED on the Adapter and controller will turn solid white, indicating successful pairing.
- The Astro® C40 adapter can also be connected to `A3`.
:::hint{type="success"}
**🔋 IMPORTANT**
Your controller might not charge when connected via Zen. Ensure its fully charged or equipped with fresh batteries to prevent disconnections.
:::
# Switch Headset Support
***
While the Switch itself doesn’t offer a direct wired headset connection via the Joy-Con or Wireless Pro controllers, we've engineered a sweet workaround for when it's docked.
When your Switch is nestled into a **Nintendo Switch TV Dock**, our added technical wizardry allows you to game using a DualSense, DualShock4, or Xbox Series X|S controller, all while enjoying full wired headset support.
Here’s your guide to popular controllers that enable headset support while gaming on the docked Nintendo Switch. Just ensure all controllers are connected to `A3`.
| Controller | USB | BLUETOOTH |
| ----------------------------- | -------------------------------- | -------------------------------- |
| PS4 DualShock4 v1 (CUH-ZCT1X) | NO | NO |
| PS4 DualShock4 v2 (CUH-ZCT2X) | YES | YES |
| PS5 DualSense | YES | NO |
| Xbox Series X\|S | YES | NO |
| Xbox One | YES | NO |

# Check Zen Connection
***
Navigate to 'Controllers' from the Switch menu and observe the icon:
- If it displays 'USB', the Switch is correctly synced to the Zen.
- If the 'USB' is not displayed, tap Zen's reset button to resynchronize.
::::VerticalSplit{layout="middle"}
:::VerticalSplitItem

:::
:::VerticalSplitItem

:::
::::
[title] Wireless (Non-PS5®)
[path] SETUP GUIDES/STEP 4: Controller Setup/
In this guide, we will provide you with step-by-step instructions on how to setup your console and controller using Bluetooth or Wireless Adapter.
:::hint{type="danger"}
It's important to note that you will lose controller audio features when using your controller wirelessly. For example, a DualSense® controller connected to the Zen by USB fully supports a wired headset, including the controller speaker and mic *(requires the new ** with ****Native PS5®**** mode enabled) - but these features will not work when the controller is paired to the Cronus Zen by Bluetooth.*
:::
# Wireless Support
***
The chart highlights which controllers do/do not support Bluetooth or Wireless Adapter.
| | **USB** | **BT** | [ADAPTER](https://cronus.shop/products/xbox-one-wireless-adapter) |
| ----------------------------- | --------------------------------- | --------------------------------- | ----------------------------------------------------------------- |
| DualSense® | YES* | YES* | See Notes* |
| DualSense® Edge | YES* | YES* | See Notes* |
| DualShock® 4 | YES | YES | N/A |
| Xbox® (All models) | YES | NO | YES* |
| Nintendo® Switch (All models) | NO | YES | N/A |
| Astro® C40 | YES | NO | YES |
*PS5® console support with a USB DualSense® controller requires the* *.*
**Using Xbox® Series X|S & Xbox® One controllers wirelessly requires the* *.*

# XBOX® (Wireless Adapter)
***
Any supported **Xbox®** Controller can be used wirelessly with an **Xbox® Series X|S** or **Xbox® One** console **(DEFAULT)**, or any other supported console such as a **PlayStation®** or **Nintendo® Switch** **(CROSSOVER)**. This requires the [Xbox Wireless adapter ](https://cronus.shop/products/xbox-one-wireless-adapter)*(using the sync button will not work)*.
**DEFAULT:** Connect the [Xbox® Wireless Adapter](https://cronus.shop/products/xbox-one-wireless-adapter) to `A3`. Then, connect your **Xbox®** Controller to `A2`. After waiting a few seconds, remove the USB cable from `A2`. You'll notice the wireless adapter's LED will begin to flash. Once it stops flashing, your **Xbox® **controller is successfully paired to Zen.
**CROSSOVER:** Same as above, but make sure a controller that matches the console is connected to `A1` for correct authentication.
For example, if you are gaming on a **PS4®** with the **Xbox® Elite S2** controller, a **PS4® DualShock®4** controller must be connected to `A1`, and the **Xbox®** controller would be paired to the **Xbox® Wireless Adapter** connected to `A3`.
# PLAYSTATION® (Bluetooth)
***
Any **DualSense®** or **DualShock®4** controller can be used wirelessly with a **PS5®** or **PS4®** console **(DEFAULT)**, or any other supported console such as the **Xbox® Series X|S** or **Nintendo® Switch** **(CROSSOVER)**. *Note: Full PS5® console support with a DualSense® controller requires the* [ZenLINK Wi-Fi expansion module.](docId\:GfEYdRLIZsJZUO-c7qGf4)*.*
**DEFAULT:** Press the Bluetooth pairing button `P2` on your Zen. The RGB LEDs will flash blue when in pairing mode. On your **DualSense®** or **DualShock®4** controller, hold down `SHARE + PS` and wait for the lightbar to start flashing. Once the controller and Zen are paired, both lightbar and RGB LEDs will stop flashing.
**CROSSOVER:** Same as above, but make sure the PlayStation® controller is connected to `A1` for correct authentication.
For example, if you are gaming on an Xbox® with the DualSense® controller, an Xbox® controller should be connected to `A1`, and a DualSense® controller would be paired to the Cronus Zen by Bluetooth.
# SWITCH WIRELESS PRO (Bluetooth)
***
Any Switch Wireless Pro Controller can be used wirelessly with a Nintendo Switch console (MATCHED), or any other supported console such as a PS5 (CROSSOVER).
Press the Bluetooth pairing button `P2` on your Zen. The RGB LEDs will flash blue – that's your sign it's in pairing mode. On your Switch Wireless Pro, hold down the sync button and the player LEDs will start to blink green. Once the controller and Zen are paired, both Player and RGB LEDs will stop flashing, indicating you're ready to go!
# SWITCH JOY-CONS (Bluetooth)
***
Any Switch Joy-Con can be used wirelessly with a Nintendo Switch console (MATCHED), or any other supported console such as a PS5 (CROSSOVER).

::::WorkflowBlock
:::WorkflowBlockItem
Plug your Cronus Zen into a computer using the `PROG` USB port.
:::
:::WorkflowBlockItem
Open **ZEN STUDIO** > Device Panel > Emulator Output Protocol set to **NINTENDO SWITCH**.
:::
::::
The Nintendo Switch Left & Right Joy-Con Controllers now have to be paired separately.
::::WorkflowBlock
:::WorkflowBlockItem
Connect **CRONUS ZEN** to the **SWITCH TV DOCK** from the `CONSOLE/PC` USB port.**
***NOTE:** Handheld (No TV Dock) requires an OTG USB-C adapter*
:::
:::WorkflowBlockItem
Press Zen's Bluetooth pairing button `P2` until the RGBs flash **BLUE**
:::
:::WorkflowBlockItem
Press the LEFT JOY-CON sync button until the player LEDs start to flash. After a few seconds, the Zen RGBs will change to **RED**, and the Joy-Con will vibrate.
:::
:::WorkflowBlockItem
Now press the RIGHT JOY-CON sync button and again after a few seconds, the JOY-CON will vibrate.
:::
::::
::::VerticalSplit{layout="middle"}
:::VerticalSplitItem

:::
:::VerticalSplitItem

:::
::::
:::hint{type="info"}
We recommend using a powered USB hub with a 5v AUX port. This connects to your PC/Mac and the Zen connects to the hub. In almost every case, this will solve most, if not all issues with PS5 disconnecting, not pairing the controller, laggy response, no rumbles and no adaptive triggers.
The Cronus MK Switch + Powered Hub/5v Aux is now available from [cronus.shop](https://cronus.shop/collections/cronus-zen/products/cronus-mk-switch)
:::
[title] File Management
[path] ZEN STUDIO/
Standard options for handling GPC and GPJ files.
::Image[]{src="https://archbee-image-uploads.s3.amazonaws.com/IwUlH55FdaPsVELSqm1Fc/H2sYQs0kRfLVudcpwp5BW_image.png" size="76" width="618" height="542" position="center" darkWidth="618" darkHeight="542" showCaption="false"}
:::hint{type="info"}
**File Types:**
**.GPC** is the scripting language for all Cronus devices.
**.GPJ** is a project file that includes a collection of GPC scripts.
:::
# New
To create a new file, select **File 👉 New** and a sub-menu will open offering a number of options including templates of sample scripts to illustrate some basic structures of the GPC programming language.
## Empty File
As the name implies, this option creates a blank file that opens as a new TAB in the Compiler window.

## GPC Script
Create a blank GPC Script by generating the main function which opens as a new TAB in the Compiler window.

## Remap Sample
Create a sample Remap GPC Script which opens as a new TAB in the Compiler window.

## Combo Rapid Fire
Create a sample Combo Rapid Fire GPC Script which opens as a new TAB in the Compiler window.

# Open...
To open a GPC Script or GPJ Project file, select **File 👉 Open** (CTRL + O). An 'Open Script or Project' dialog will appear and you can select one or multiple files to open. Each file will be opened in an individual compiler tab, if a file was already opened, its corresponding compiler tab will auto select.

## Add File To Project
All opened GPC scripts can be saved into a single project file (GPJ). A project file is an easy way to recall the currently opened GPC files.
To add a gpc file to a project, an existing project must first be open in the compiler (see image below).
::Image[]{src="https://archbee-image-uploads.s3.amazonaws.com/IwUlH55FdaPsVELSqm1Fc/F6EH_PBkjTfIZ-zAbb4Xf_image.png" size="74" width="533" height="40" position="flex-start" darkWidth="533" darkHeight="40" showCaption="false"}
Select **File 👉 Add File To Project** and a 'Add a File To The Current Project' dialog will appear asking you to select a .gpc script file. You can also click on the 'Add File' button.
# Save
To save a GPC Script file, select **File 👉 Save** (CTRL + S). If the script has not been previously saved, a 'Save Script As' dialog will appear asking you to choose a destination and filename. If the file exists, it will be overwritten.
:::hint{type="danger"}
**Important: **Make sure you select the TAB or click inside the compiler window to focus on the script you wish to save. If the script is not selected, the Save & Compile options will not be available.
:::

:::hint{type="info"}
**Info:** To indicate that a GPC file was changed and has not yet been saved, **an asterisk(\*)** will be displayed in its tab, after the filename.
:::
::Image[]{src="https://archbee-image-uploads.s3.amazonaws.com/IwUlH55FdaPsVELSqm1Fc/Lgbdfk8re33-VHxVjAu0__image.png" size="88" width="591" height="151" position="flex-start" darkWidth="591" darkHeight="151" showCaption="false"}
## Save As...
To save an existing GPC Script or GPJ Project file to a different file or location, select **File 👉 Save As...** A 'Save Script As' dialog will appear asking you to choose a destination and filename.
## Save All
To save all open GPC Scripts, select **File 👉 Save All**. A 'Save Script As' dialog will appear asking you to choose a destination and filename for each of the scripts that are open in **Compiler**.
# Save Project
All opened GPC scripts can be saved into a single project file (GPJ). A project file is an easy way to recall the currently opened GPC files.
To save a GPJ Project file, first, make sure all the scripts you wish to include in the project are saved, then select **File 👉 Save Project**. If the project has not been previously saved, a 'Save Project As' dialog will appear asking you to choose a destination and filename. If the file exists, it will be overwritten.

## Save Project As...
To save an existing GPJ Project file to a different file or location, select **File 👉 Save Project As...** A 'Save Project As' dialog will appear asking you to choose a destination and filename.
# Close
To close a GPC Script, highlight the TAB in the Compiler that you wish to close and select **File 👉 CLOSE**. You can also click on the X in the right corner of the TAB.
If you have any unsaved data in a GPC file, Zen Studio will always ask if you'd like to save those changes before closing any file.
::Image[]{src="https://archbee-image-uploads.s3.amazonaws.com/IwUlH55FdaPsVELSqm1Fc/AJZat5RloyS62hq3UIuR6_image.png" size="54" width="358" height="128" position="flex-start" darkWidth="358" darkHeight="128" showCaption="false"}
## Close All
To close all files in the Compiler, select **File 👉 Close All.**
## Close Project
To close the open project file in the Compiler, select **File 👉 Close Project.**
# Recent Files
Zen Studio keeps a list of the 10 most recently opened files in the **File 👉 Recent Files** menu, so you can reopen them quickly by simply clicking on the file name.
# Relaunch as Admin
Zen Studio requires full Windows Administrator permissions. If a Windows install has a restricted or corrupt profile, it can prevent the software from functioning correctly. A solution to this is to open Zen Studio in Admin Mode, this is easily done by selecting **File 👉 Relaunch as Admin**
If you have any open TABS in the Compiler, you will get a warning message to close those TABS.
::Image[]{src="https://archbee-image-uploads.s3.amazonaws.com/IwUlH55FdaPsVELSqm1Fc/lYUdJ7pbxK8ZSTCnIZW2Z_image.png" size="60" width="407" height="147" position="flex-start" darkWidth="407" darkHeight="147" showCaption="false"}
If Zen Studio has started in Admin Mode successfully, you will see **\[ADMIN]** displayed in the Title Bar.

# Exit
Close the Zen Studio Software. 😜
[title] Programmer
[path] ZEN STUDIO/Working Panels/
The **Programmer** panel provides access to:
- GPC Scripts
- Remapper Profiles
- Local GPC files
Cronus Zen™ includes **8 memory slots (32KB each)**. Any combination of scripts, or profiles can be assigned to these slots.
# Panel Sections
***
## File Directory
Browse local folders and GPC files.
Features:
- Set a favorite folder
- Reset favorite to default (Desktop)
- Refresh local directory
Right-click the Favorites bar to reset it.
## GamePacks
Drag-and-drop pre-built packs for your favorite games.
Drag and drop to a memory slot to assign.
## GPC Scripts
Any script currently open in the Compiler appears here.
Drag and drop to a memory slot to assign.
## Remapper Profiles
Displays profiles created using the **MAX Mapper** plugin.
Drag and drop to assign to a memory slot.
# Memory Slot Management
***
## Program Device
Click **Program Device** to write all configured memory slots to the Cronus Zen.
## Reload Memory Slots
If changes are made via the GamePack Configuration Interface (GCI), use **Reload Memory Slots** to sync Zen Studio with the device.
## Delete Memory Slot
Drag a slot to the **trash icon** to clear it.
Click **Program Device** to confirm deletion.
[title] Cronus Zen User Guide
[path] /
Welcome to the ! 👋
Since 2013, Cronus has pioneered cross-platform console gaming with cutting-edge scripting and technology. is the next-generation successor, adding powerful mods, mouse and keyboard support, and universal controller compatibility.
You're not just buying a piece of tech; you're joining a massive global community of passionate gamers, all united by the freedom to game on your own terms.

Here you’ll find everything you need, from setup instructions to advanced M.O.D info.
::::LinkArray{contentSource="DOCS" sourceParentDocId="FPA2VmeNs-_Xrkfd_oflP" childrenDocs="[object Object],[object Object],[object Object],[object Object],[object Object]" itemsPerRow="3" displayMode="CARD"}
:::LinkArrayItem{headerImage="https://archbee-image-uploads.s3.amazonaws.com/IwUlH55FdaPsVELSqm1Fc/E4T-CSq59N9MRDmtrfhgC_welcometocronus.png" headerType="IMAGE" docId="NEaKDhSqHdaIRI0o74MTF" displayMode="CARD" docSeoDescription="Welcome to the new Cronus Zen User Guide (now available in over 100 languages). Discover detailed, step-by-step instructions for every console, every controller, every GamePack, and every script."}
[Introduction](docId\:NEaKDhSqHdaIRI0o74MTF)
:::
:::LinkArrayItem{headerType="IMAGE" docId="h7fYlITqjVYBAeUW4jolF" displayMode="CARD" docSeoDescription="These are the minimum requirements for using Cronus Zen."}
[Requirements](docId\:h7fYlITqjVYBAeUW4jolF)
:::
:::LinkArrayItem{headerType="IMAGE" docId="S2SCGm94h_N5t741PV_oe" displayMode="CARD" docSeoDescription="Download Zen Studio, tools, and updates, everything in one place"}
[Downloads](docId\:S2SCGm94h_N5t741PV_oe)
:::
:::LinkArrayItem{headerImage="https://archbee-image-uploads.s3.amazonaws.com/IwUlH55FdaPsVELSqm1Fc/kmqPqakq-l0h-Na3FCWeP_mods-vs-hacks.png" headerType="IMAGE" docId="Y8sozpgAdLePx5lAQIXi8" displayMode="CARD" docSeoDescription="A MOD (Macro On Demand) is not a hack - it simply replicates button inputs like a human. A hack alters a game's code, typically on PC. Cronus does not modify game code or perform hacking."}
[MOD's vs Hacks](docId\:Y8sozpgAdLePx5lAQIXi8)
:::
:::LinkArrayItem{headerType="IMAGE" docId="k5Js-aPBM-ACq682_QAup" displayMode="CARD" docSeoDescription="All content is provided for personal, educational, and lawful use only. We do not endorse or permit any use intended to bypass or violate End User License Agreements (EULA), terms of service, or intellectual property rights."}
[LEGAL DISCLAIMER](docId\:k5Js-aPBM-ACq682_QAup)
:::
::::
::::LinkArray{contentSource="DOCS" sourceParentDocId="FPA2VmeNs-_Xrkfd_oflP" childrenDocs="[object Object],[object Object],[object Object],[object Object],[object Object]" displayMode="CARD"}
:::LinkArrayItem{headerImage="https://archbee-image-uploads.s3.amazonaws.com/IwUlH55FdaPsVELSqm1Fc/E4T-CSq59N9MRDmtrfhgC_welcometocronus.png" headerType="IMAGE" docId="NEaKDhSqHdaIRI0o74MTF" displayMode="CARD" docSeoDescription="Welcome to the new Cronus Zen User Guide (now available in over 100 languages). Discover detailed, step-by-step instructions for every console, every controller, every GamePack, and every script."}
[Introduction](docId\:NEaKDhSqHdaIRI0o74MTF)
:::
:::LinkArrayItem{headerType="IMAGE" docId="h7fYlITqjVYBAeUW4jolF" displayMode="CARD" docSeoDescription="These are the minimum requirements for using Cronus Zen."}
[Requirements](docId\:h7fYlITqjVYBAeUW4jolF)
:::
:::LinkArrayItem{headerType="IMAGE" docId="S2SCGm94h_N5t741PV_oe" displayMode="CARD" docSeoDescription="Download Zen Studio, tools, and updates, everything in one place"}
[Downloads](docId\:S2SCGm94h_N5t741PV_oe)
:::
:::LinkArrayItem{headerImage="https://archbee-image-uploads.s3.amazonaws.com/IwUlH55FdaPsVELSqm1Fc/kmqPqakq-l0h-Na3FCWeP_mods-vs-hacks.png" headerType="IMAGE" docId="Y8sozpgAdLePx5lAQIXi8" displayMode="CARD" docSeoDescription="A MOD (Macro On Demand) is not a hack - it simply replicates button inputs like a human. A hack alters a game's code, typically on PC. Cronus does not modify game code or perform hacking."}
[MOD's vs Hacks](docId\:Y8sozpgAdLePx5lAQIXi8)
:::
:::LinkArrayItem{headerType="IMAGE" docId="k5Js-aPBM-ACq682_QAup" displayMode="CARD" docSeoDescription="All content is provided for personal, educational, and lawful use only. We do not endorse or permit any use intended to bypass or violate End User License Agreements (EULA), terms of service, or intellectual property rights."}
[LEGAL DISCLAIMER](docId\:k5Js-aPBM-ACq682_QAup)
:::
::::
:::LinkArray{contentSource="DOCS" sourceParentDocId="Wo_iBSx_UzZTeIJ8HS2Ou" childrenDocs}
:::
Click any one to get started.
- Main hub of the Cronus Zen Guide
- [Introduction](docId\:NEaKDhSqHdaIRI0o74MTF)
- [💡What does Cronus Zen Do](docId\:uHvyWMopcfS_wEnvTzVT4)
- [📋Requirements](docId\:h7fYlITqjVYBAeUW4jolF)
- [📘Cronus Zen Quick Start Guides (Multilingual)](docId\:DL3_kFzzNulROHoDzk0fO)
- [📥Downloads](docId\:S2SCGm94h_N5t741PV_oe)
- [📝Changelog](docId\:Sx_tJ04Z-gvmQxKccnych)
- 📙Setup Guides
- 🎮Supported Devices
- 🖥️Zen Studio
- [🖱️Mouse & Keyboard](docId\:ZN7sVue09YgGvH-PGwb4Q)
- 🏁Wheel Mode
- 🚨Troubleshooting
[title] Register with Linux & Chromebook
[path] TROUBLESHOOTING/
This guide explains step-by-step how to register your Cronus Zen on Linux or using a Chromebook without the need for a Virtual Machine (VM).
:::hint{type="warning"}
The Marketplace feature is currently not functional with this method
:::
# ✅ Google Chrome & Access the Firmware Tool
1. **Install Google Chrome** if it’s not already installed
2. Visit: [https://firmware.modcentral.ca](https://firmware.modcentral.ca)
3. Connect your **Cronus Zen in** [bootloader mode](docId:7cpnL5ScNTyU9B2dWqIyb) using the **top port**
4. Receive an **Access Denied** error? follow the steps below!
:::hint{type="danger"}
# Received Access Denied Error
1. Open a **Terminal window**
2. Reconnect the Zen in **bootloader mode**
3. Run the command: **lsusb**
- Too many devices? Try: **lsusb | grep ZEN**
4. Create a new udev rule file: **sudo nano /etc/udev/rules.d/50-zen.rules**
5. Paste the following line into the file:
- **SUBSYSTEM=="usb", ATTR\{idVendor}=="1209", ATTR\{idProduct}=="2ffb", MODE="0666"**
6. Press **Ctrl + X, **then **Y, **then **Enter **to save and exit
7. **Reboot your system**
:::
# 🗝️ Register Your Zen
1. Open Chrome and revisit **firmware.modcentral.ca**
2. Connect your Cronus Zen in bootloader mode and click **Connect**
3. You should now see your **serial number** and update** firmware **if needed
4. **Copy your serial number**
# 🏁 Final Registration on the Zen Dashboard
1. Go to the new dashboard: [https://gpclib.cmindapi.com/login](https://gpclib.cmindapi.com/login)
2. Log in using your **Discord account**
3. In the browser's address bar type:
- **https\://gpclib.cmindapi.com/devices/register?serial=****YOUR_SERIAL_HERE**
4. Replace "YOUR_SERIAL_HERE" with your actual serial number
5. You should see a **Device Registered** message and your Cronus ZEN will appear in your dashboard
6. Follow the [final](docId\:IfSSF19ZgIoRxZdwlGVrF)** linking step in Discord** to complete setup
***
:::hint{type="success"}
# Chromebook user
If you're using a Chromebook, you can skip the udev rules setup and follow these simplified steps:
:::
# 💻Chromebook Users
1. Open **Google Chrome** and visit: [https://firmware.modcentral.ca/](https://firmware.modcentral.ca/)
2. Connect your **Cronus Zen in bootloader mode** (top port)
3. Click **Connect** to view your **serial number**
4. Copy the **serial number**
5. In new tab go to :
- https\://gpclib.cmindapi.com/devices/register?serial=YOUR_SERIAL_HERE
6. Replace "YOUR_SERIAL_HERE" with your actual serial number.
7. You'll see a **Device Registered **message
8. Follow the [final](docId\:IfSSF19ZgIoRxZdwlGVrF)** linking step in Discord** to complete setup
9.
🫰Special thanks to *Gatsugatsusama (Cronus Zen Discord Moderator)* for the methods
[title] Hardware Errors
[path] TROUBLESHOOTING/
It's important to know there are three types of error categories, each with their own page in this guide:
- **Hardware Errors (This page)**
This is when there is an issue with the actual Cronus Zen itself, such as error codes and a blank OLED screen.
- [Firmware Errors](docId\:ly6Zi3tqakUyk8HhzB3kI)
This is when there is an issue when using the Firmware Update Tool, such as Device Not Found, 0.0.0 error, and network errors.
- [Zen Studio Errors](docId\:xrFAY4U9Buyb9SO7ONL07)
This is when there is an issue when using Zen Studio , such as Device Disconnected, registration issues, and unable to download GamePacks.
Before doing anything else, watch this video first, it will clarify pretty much everything.
# Check First
***
Before you start, it's crucial to be aware of the following when recovering from an error:
- **USB Cables:** Check that they work and firmly connected. The best way to test is to connect your controller directly to your PC or console and see if it detects correctly.
- **No Scripts or GamePacks:** Ensure no Scripts or GamePacks are loaded. Why? Because sometimes, these can be the cause behind the fault you’re wrestling with. If you find a script or GamePack causing havoc, give a shout out to its creator to get any bugs squashed.
- **Protect Your MK Profiles:** Ensure that all MK profiles are securely backed up, to avoid losing any of your tailored settings.
- **Script Safeguarding**: Unfortunately, scripts cannot be backed up directly. Ensure that you retain a separate copy of any script you've been utilizing to avoid any potential gaming disruptions.
OK, let's get after it....
# E3 Error Code
***
E3 Error code **E3001** indicates that the Zen’s firmware is missing or corrupted. To resolve this, connect the device to your PC using** the top USB port**, open **Zen Studio,** launch the **Firmware Tool**, and install the latest firmware version—no bootloader mode is necessary.
E3 error code **E3002**, signal a system crash caused by specific events. Fortunately, they can usually can be easily recovered by simply unplugging all USB cables from the Zen for at least 10 seconds, then reconnect - or if that fails you can perform a [Hard Reset](docId\:YYPr5YvpVLS896Z4hspfd).
The most common triggers behind these errors are:
- **USB Cable Check:** Always double-check that all USB cables and connections to the Zen and the controller are confirmed working and secure.
- ******Faulty Scripts:** The primary offender. For issues here, you'll need to reach out to the script's creator. Remember, we provide GamePacks, not scripts.
- **Unsupported Device:** Ensure your controller/mouse/keyboard is compatible with Zen.
- **Misconnected Hardware:** Even supported controllers can cause errors if plugged into the wrong USB port.
If one of these consistently triggers an error, congrats! you've nailed down the issue. Simply do not use the unsupported hardware or scripts and everything should work as expected.
# Stack/Bytecode Errors
***
Stack & Bytecode underflow, overflow errors are commonly associated with using a GamePack or Script designed for a different firmware.
1. Perform a [Hard Reset](docId\:YYPr5YvpVLS896Z4hspfd)
2. Program Firmware using Zen Studio
3. Program any GamePack to memory slot 1.
4. Test In-Game
Tested working? Great! You have solved the problem, and you can continue gaming. 🚀
# USB Device Not Recognized
***

- This usually means the PC USB port isn't getting enough power. Try another USB port, or a powered USB hub like the [Cronus MK Switch](https://cronus.shop/collections/cronus-zen/products/cronus-mk-switch).
- It can also mean you have Windows USB driver issues. Here's a screenshot of the built-in Windows drivers used by Cronus Zen for your reference.

# Blank OLED Screen
***
If the OLED screen is blank when you connect Zen to a PC or CONSOLE from the `CONSOLE/PC` or `PROG` USB port, unfortunately your Cronus Zen is defective and needs to be replaced.
:::hint{type="danger"}
# Still Not Working? 😲
If your Zen's pulling a vanishing act with a blank OLED, skipping the RGB LED party, or flat out refusing to reset, that’s a huge bummer because it sounds like it’s developed a fault. **DON'T PANIC!**
**Here's Your Game Plan:**
1. **Warranty Wonders:** Bought directly from [cronus.shop](https://cronus.shop)? The warranty is between 90 days and 1 year depending on the package you purchased. But if you snagged yours from another store like GameStop, you might have a 30-day warranty. Sweet deal if you've just unboxed. Within 30 days? You're set for a new replacement or a refund, whichever you prefer.
2. **Passed the Warranty Deadline? We've Got a Plan B: **This [Extended Warranty Service](https://cronus.shop/collections/cronus-zen/products/cronus-zen-mail-in-out-of-warranty-service) is here to the rescue. Doesn't matter when or where you got it - GameStop, Amazon....anywhere! we’ve got you covered. 🚑
**Let's get you back in the game!**
:::
[title] STEP 1: Update Firmware
[path] SETUP GUIDES/
It's important to have the latest firmware installed before using the Zen Studio software. It's packed with new features and bug fixes, including game-changing support for the powerful Wi-Fi Expansion Module *(*[buy here](https://cronus.shop/collections/cronus-zen/products/cronus-zenlink)*)*.
# Step-by-Step Guide
***
Setting up Cronus Zen™ requires that you are using a Windows® 10/11 PC with a good internet connection.
::::WorkflowBlock
:::WorkflowBlockItem
While pressing the small blue reset button, connect **Cronus Zen™** to a **Windows® PC**: **CONSOLE/PC USB**
Let go of the button once the OLED screens displays **Zen Bootloader** with the RGB LEDs glowing Purple/Blue.
![]()
:::
:::WorkflowBlockItem
Open the **Collective Minds Web Update Tool** at [cronus.support/fw](https://cronus.support/fw) using any Chromium based web browser such as **Google**®** Chrome** or **Microsoft**®** Edge** and click the **Connect** button. ***Note:** Firefox & Safari browsers will likely not work.*
***Note:** If you need to update the firmware again in future, you don't need to use a PC. You can use this online tool on most compatible devices, including your cellphone.*
::Image[]{src="https://archbee-image-uploads.s3.amazonaws.com/IwUlH55FdaPsVELSqm1Fc/lTEh11T_aQtciuxn2Mp5O_de94475c-ed67-44b7-848f-d19c7b360168.png" size="74" width="724" height="571" position="flex-start" darkWidth="724" darkHeight="571" showCaption="false"}
:::
:::WorkflowBlockItem
A window will popup saying **firmware.modcentral.ca wants to connect**. Select **Cronus ZEN** and click **Connect**.
If you do not see **Cronus ZEN** listed, make sure a working USB cable is connected firmly to the correct **CONSOLE/PC** USB Port at the back of the Zen, and that the OLED screen displays **Zen Bootloader**.
::Image[]{src="https://archbee-image-uploads.s3.amazonaws.com/IwUlH55FdaPsVELSqm1Fc/DyE7zrgRjYUX4VALTed0v_image.png" size="60" width="448" height="254" position="flex-start" darkWidth="448" darkHeight="254" showCaption="false"}
:::
:::WorkflowBlockItem
Click the button labelled **Latest 2.2.XX** and the update tool will display **Programming Device, please wait**. In less than 20 seconds, your **Cronus Zen™** will be upgraded and ready to use with the **Zen Studio** software.
::Image[]{src="https://archbee-image-uploads.s3.amazonaws.com/IwUlH55FdaPsVELSqm1Fc/IwH0rcA_LGKWjwfy2Sd9Z_1e9bb5e2-c100-4cda-a04f-169892d4d7b1.png" size="74" width="711" height="837" position="flex-start" darkWidth="711" darkHeight="837" showCaption="false"}
:::
:::WorkflowBlockItem
Once the firmware update has completed, the **Cronus Zen™** RGB LED's will flash Red, Green, Blue and the OLED screen will display the **Collective Minds Gear Head** logo.

You can now proceed to [STEP 2: Install Zen Studio](docId\:uvMc-vW2cI8sD09IzJ4EP)
:::
::::
[title] Untitled
[path] /
[title] Zen LINK™
[path] SUPPORTED DEVICES/PlayStation® 5/
::Image[]{src="https://archbee-image-uploads.s3.amazonaws.com/IwUlH55FdaPsVELSqm1Fc/MbPytObH4ZM_YrTworPXf-20260311-034613.png" darkSrc="https://archbee-image-uploads.s3.amazonaws.com/IwUlH55FdaPsVELSqm1Fc/MbPytObH4ZM_YrTworPXf-20260311-034613.png" size="70" width="800" height="800" darkWidth="800" darkHeight="800" position="center" showCaption="false"}
The Cronus is a powerful Wi-Fi Expansion Module for the ([purchase separately](https://cronus.shop/collections/cronus-zen/products/cronus-zenlink)). It adds powerful new capabilities, including **full native PlayStation®5 support** with no PS Remote Play® or Windows® PC tether required!
Another amazing feature is that you can wirelessly program and configure Cronus GamePacks and scripts through a compatible Chromium based browser like Google® Chrome & Microsoft® Edge on a wide variety of devices and platforms, including Windows®, macOS®, Chromebook™, Android™, and iOS™. All you need is a Windows® 10/11 computer for the initial setup and a compatible Wi-Fi connection and you'll be up and running in just a few minutes.
| **DualSense**®** Functions**
**Requires Cronus ** | **Supported** |
| ---------------------------------------------------------------- | ---------------------------------- |
| Rumbles & Haptic Feedback | YES |
| Adaptive Triggers | YES |
| Two Finger/Swipe Touchpad | YES |
| Gyroscope | YES |
| Wired Headset (USB) | YES** |
| DualSense® Speaker (USB) | YES** |
| DualSense® Mic (USB) | YES** |
# Requirements
***
Here are the requirements for using &
- Cronus Zen 👉 [purchase here](https://cronus.shop/products/cronus-zen) & Cronus Zen LINK 👉 [purchase here](https://cronus.shop/collections/cronus-zen/products/cronus-zenlink)
- Windows 10/11 Computer *(for initial setup - not required while gaming)*
- Zen Studio 👉 [Downloads](docId\:S2SCGm94h_N5t741PV_oe)
- Zen Firmware 👉 [Online Update App](docId\:S2SCGm94h_N5t741PV_oe)
- A compatible Wi-Fi connection
# PS5® Console Settings
***
The following settings must be applied on your PlayStation®5 before using a with the . It's important to note that **Bluetooth will be disabled on the console** so it won't be possible to power on the PS5 with your controller.
:::::WorkflowBlock
:::WorkflowBlockItem
## Users and Accounts
Users and Accounts > Other > Console Sharing and Offline Play > **Enable******
:::
::::WorkflowBlockItem
## System
⚙️ System > Remote Play > **Enable Remote Play**
⚙️ System > System Software > Console Information > **Name** *(make sure there is a name here)*
:::hint{type="info"}
It's recommended these two other system settings are disabled as a precautionary measure to protect against future system updates that may affect compatibility or functionality with the Cronus Zen or Zen LINK.
System > System Software > System Software Update and Settings >
Disable: **Download Update Files Automatically**
Disable: **Install Update Files Automatically**
:::
::::
:::WorkflowBlockItem
## Power Saving
⚙️ System > Power Saving > Set Time Until PS5 Enters Rest Mode > Set **While Playing Games **to **Don't Put in Rest Mode**
⚙️ System > Power Saving > Features Available in Rest Mode > **Supply Power to USB ports** > **Always**
⚙️ System > Power Saving > Features Available in Rest Mode > **Enable** **Stay Connected to the Internet**
⚙️ System > Power Saving > Features Available in Rest Mode > **Enable Turning on PS5 from Network**
⚙️ System > Power Saving > Set Time Until Controllers Turn Off > **Don't Turn Off**
:::
:::WorkflowBlockItem
## Controller (General)
⚙️ Accessories > Controller (General) > Vibration Intensity > **Strong (Standard)**
⚙️ Accessories > Controller (General) > Trigger Effect Intensity > **Strong (Standard)**
⚙️ Accessories > Controller (General) > Communication Method > **Use USB Cable**
⚙️ Accessories > Controller (General) > Advanced Settings > **Turn Off Bluetooth**
***Note: **DualSense Edge Controller settings can be found in ****Profile 1*******
:::
:::::
# Native PS5® Mode
***
Make sure you are using the latest version of Cronus Zen firmware & Zen Studio then follow the video below to get started.
For the initial setup you will need a Windows® 11/10 PC and Wi-Fi that supports . Your PS5® must also be connected to this same Wi-FI network.
Navigate to [https://zenlink.local](https://zenlink.local) in a compatible browser such as Chrome or Edge *(Firefox, Safari, Opera do not work)*.
Our video will guide you through the Zen Link™ setup process for use on a PS5® console in just a few minutes.
::embed[]{url="https://www.youtube.com/embed/i6EvQWueUWM"}
# Controller Setup
***
All DualSense® features are supported *(audio features USB only)*, however you can use any supported Xbox or Switch controller too.
::::WorkflowBlock{src="https://api.archbee.com/api/optimize/IwUlH55FdaPsVELSqm1Fc/EPNyhjN3UNb5irSiP8h7R_xboxxstoxboxx.png" size="100" width="841" height="300" darkWidth="841" darkHeight="300" position="center"}
:::WorkflowBlockItem
Connect **Cronus Zen™** to **Game System**:** CONSOLE/PC USB** *(Short USB cable)*
Connect **Zen LINK™** to **Cronus Zen™**:** A1 USB****
The Zen LINK LED will change to **ORANGE** when it successfully connects to your 2.4GHz Wi-Fi.
:::
:::WorkflowBlockItem
Connect **Controller** to **Cronus Zen™**:** A3 USB**
The Zen LINK LED will change to **GREEN** when it successfully pairs to the controller.
**Wireless Support:** You can also pair your controller to the **Cronus Zen™** using Bluetooth, but you will lose audio features.
Press the left Bluetooth pairing button **P2** on your Zen. The RGB LEDs will flash blue – that's your sign it's in pairing mode. PlayStation controller: hold down **SHARE + PS** and wait for the lightbar to start flashing.
When the controller and Zen are paired, both lightbar and RGB LEDs will stop flashing.
:::
:::WorkflowBlockItem
Once your Cronus Zen™ successfully syncs with your PS5®, the ZenLINK™ LEDs will change to **BLUE** as soon as you start playing a PS5® game, signaling you're connected and ready to enjoy full Cronus Zen™ functionality on your PS5®. 🙂
:::
::::
# ZenLINK™ Device Buttons
***
## Config Mode
**HOLD **the **BLUE CONFIG BUTTON for at least 5 seconds **while plugging into PC until the LEDs turn **PURPLE**. They will then either turn **ORANGE** (Wi-Fi connected) or **BLINK RED** (no Wi-Fi set).
If the LEDs flash **PURPLE** and **GREEN** it means there is no update available.
## Factory Reset
To perform a Factory Reset, **HOLD** the **FACTORY RESET BUTTON** *(paperclip hole underneath)* while plugging into the PC until the LEDs turn **PURPLE** then **BLINK RED**.
# Troubleshooting
***
## ZenLINK™ LEDs
Please refer to the various ZenLINK™ LED indicators and their meanings below to assist with troubleshooting.
**Device LED (Config Mode):**
- **PURPLE LED** means config mode.
- **ORANGE LED** means successfully connected to Wi-Fi.
- Blinking **RED LED** means no Wi-Fi settings are setup.
- Blinking **BLUE LED** in config mode means firmware is updating **(DO NOT UNPLUG!)**
- **CYAN LED** means Zen Console Mode ready.
***Note:** This is briefly shown when the *ZenLINK™* is unplugged/plugged back in.*
**Device LED (Console Mode):**
- **CYAN LED** means Console Mode ready.
- **ORANGE LED** means successfully connected to Wi-Fi.
- Blinking **RED LED** means no Wi-Fi found.
- Blinking **PURPLE LED** means failure to connect to console
- Single **LIGHT GREEN** flash then LED off means retrying connection.
- **RED/BLUE **flashing means Remote Play disconnected.
- **STEADY GREEN** means successfully connected.
## Red LED (no Wi-Fi)
Make sure your Windows® PC is connected to the **same Wi-Fi network** as your PS5® *(and of course make sure the PS5® is turned on and connected)*. If your computer is currently using a **wired LAN (Ethernet) connection**, **temporarily disconnect the cable** and switch to Wi-Fi.
Your Wi-Fi router must support the 2.4GHz band. Most modern Wi-Fi routers combine their and networks under the same Wi-Fi name , so you typically won't need to worry about this step. However, if your router has separate SSID connections for each band, be sure to connect your PC to the 2.4GHz network specifically.
**Tip:** Remove special characters from your password if you're having trouble connecting *(example: ! @ # $ % ^ & \* ( ) - \_ = + ?)*.
## Random Disconnections
UPNP must be enable in the internet routers settings. Another solution is to put ZenLINK™ and the PS5® on a static IP address with port forwarding enabled *(see the instructions for your router)*.
TCP port 9295 → 9295
TCP port 9304 → 9304
TCP port 8572 → 8572
UDP ports 9000-65535 → 9000-65535
## No Wired Headset Audio
If your wired headset isn't working and your DualSense® is connected by USB cable to your Cronus Zen™, you will need to manually change the **Remote Play Input Device** to **USB Headset **on your PS5®.
⚙️ Settings > Sound > Microphone > Input Device > Select **USB Headset**
:::hint{type="danger"}
Wired headsets and the DualSense® controller speaker/mic is not supported when paired to the Cronus Zen™ using Bluetooth.
:::
## Console Name Not Set
Ensure your PS5® console has a name in its **Console Information** section prior to setup. It is given a name by default, but there is a chance you may have removed it at some point.
# DualSense® Edge Curve
If you are using a DualSense® Edge controller, you must change the built-in Right Stick Sensitivity/Deadzone settings to default or it will break the functionality of many scripts.
- Go to Settings > **Accessories**.
- Select DualSense® Edge Wireless Controller > **Custom Profiles**.
- Select **Create Custom Profile**, call it **CRONUS**, then select **OK**.
- Select the profile you created and...
- Right Stick Sensitivity Curve: **Default**
- Curve Adjustment: **0**
- Deadzone Adjustment: **0%**
# Important Notes
***
- ZenLINK™ MUST be within reasonable range of your wireless router/modem to ensure smooth operation; otherwise lag and disconnecting could occur. You should have a good idea from your other devices as to whether you are within a decent Wi-Fi signal range.
- ZenLINK™ uses similar technology to PlayStation® Portal and as such, it is subject to the same restrictions. For the best possible experience, minimize the amount of high bandwidth devices and apps like Netflix® running on your network while you are playing. If your internet is unstable or your network is prone to dropping out, it will affect the performance of ZenLINK™ .
- Connect your PS5® console via wired ethernet if possible. The PS5® puts out plenty of hot air near the ethernet connection, so if you see instances of your ethernet connection dropping out on your console, you may need a higher quality cable.
- Be aware that PS Remote Play® will disconnect from ZenLINK™ after an idle period.
***
:::hint{type="danger"}
# Disclaimer
Zen LINK™ is a trademark of Collective Minds Gaming Co. Ltd. . All product names, logos, brands, and other trademarks, images, or videos mentioned in this manual or on the website are used solely for identification purposes and remain the property of their respective trademark holders. These trademark holders are NOT affiliated with Collective Minds Gaming Co. Ltd., and they DO NOT sponsor or endorse its products, services, or websites.
The trademarks "Sony®", "PlayStation®", PlayStation®5", "PS5®", "PSN®", "DUALSENSE®", "DUALSHOCK®", and "PS REMOTE PLAY®" are owned by Sony Interactive Entertainment.
Copyright or trademark concerns should be directed to the owner or their legally authorized representative in accordance with the U.S. Copyright Act. We reserve the right to disclose infringement notices to involved parties, including the alleged infringer. For inquiries or to report concerns, please contact dmca (at) cronusmax.com
:::
[title] Zen Operational Mode
[path] ZEN STUDIO/
Easily switch between Normal Mode, Tournament Mode & Wheel Mode.
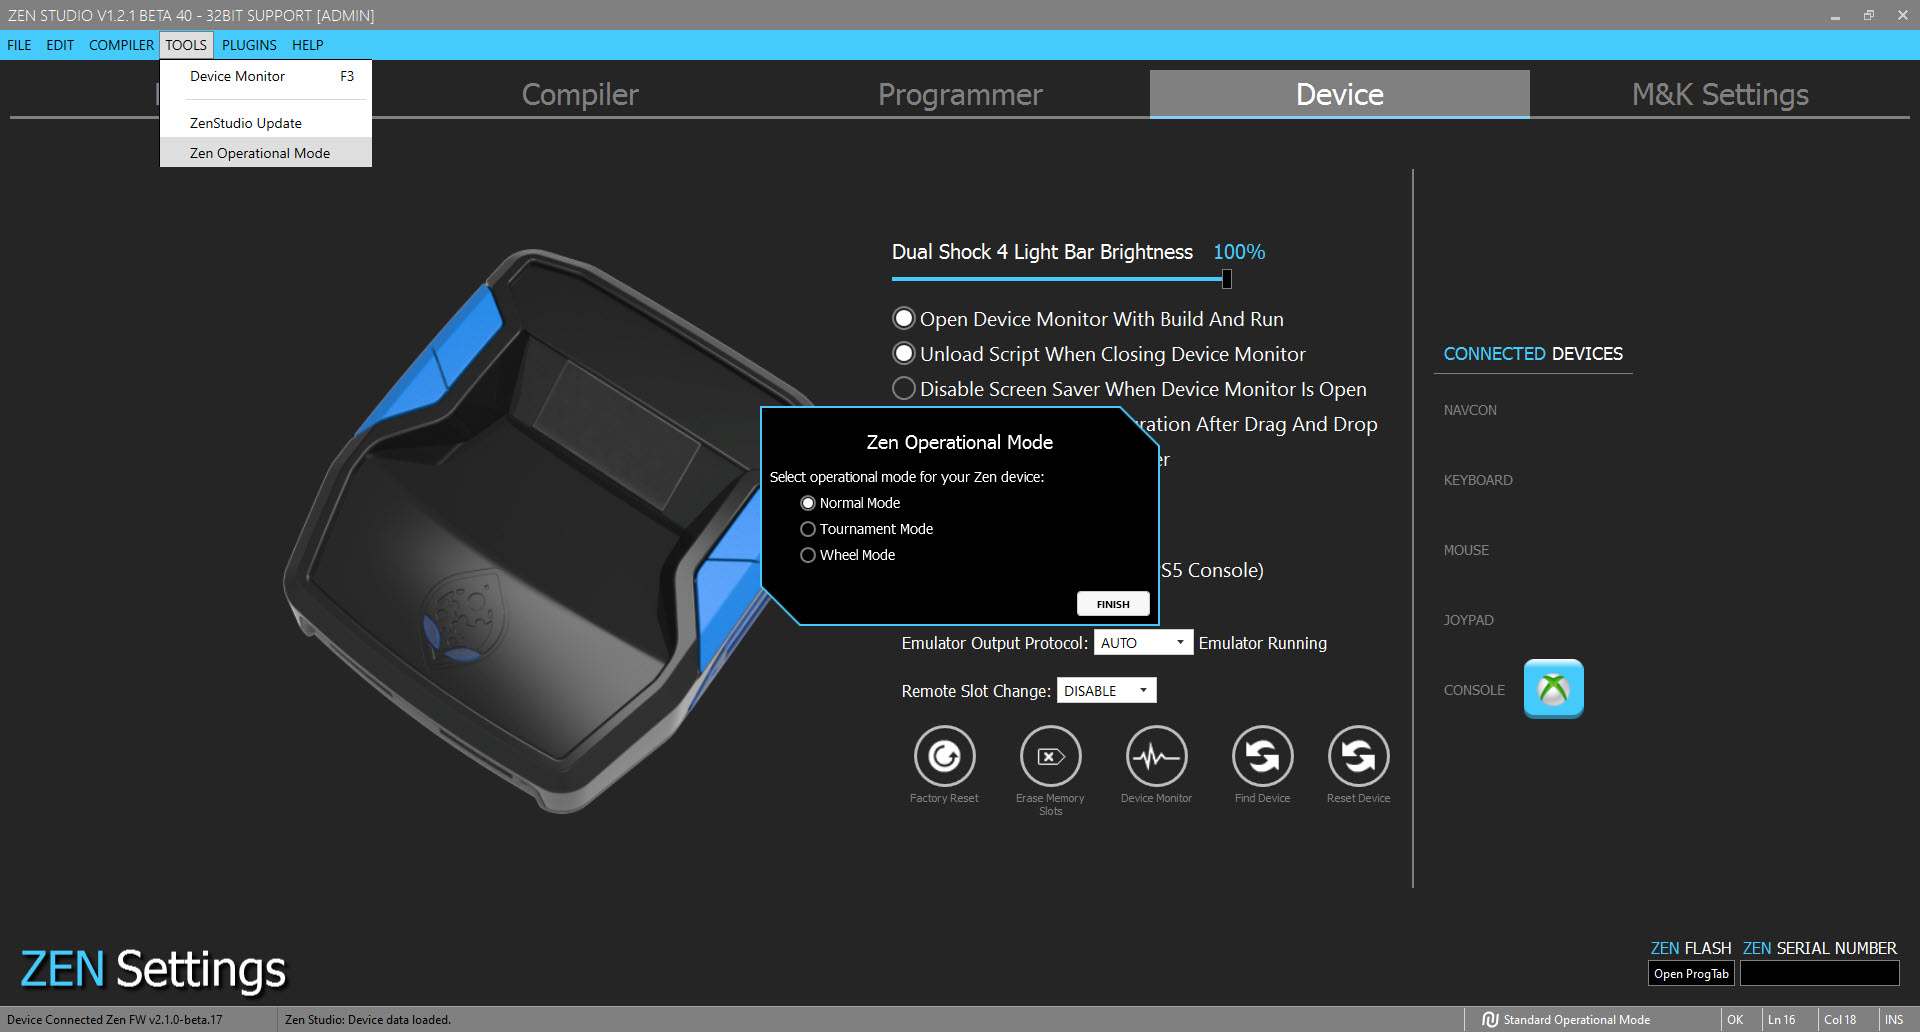
Zen Operational Mode allows you to easily switch between **Normal Mode** (Default functionality), **Tournament Mode** (compiler is disabled, blocking access to scripts and GamePacks while optimizing data throughput), and **Wheel Mode** where you can connect any Logitech DFGT/G25/G27 or compatible PS3 Fanatec Wheel directly to a PS4 with full Force Feedback Support by emulating a Logitech G29 (which is also compatible with Cronus Zen). Support includes all pedals, brakes, and gear shifters that also connect to these wheels.
**🔎Find more detailed information for the three available Modes 👉 here: **
::::LinkArray
:::LinkArrayItem{headerType="COLOR" headerColor="#2166ae"}
[Normal Mode](docId:88NF5B2kCvmOdAHnTOVnm)
:::
:::LinkArrayItem{headerType="COLOR" headerColor="#2166ae"}
[Tournament Mode](docId\:qgXQ00c1P2g-N1y4N3MH1)
:::
:::LinkArrayItem{headerType="COLOR" headerColor="#2166ae"}
[Wheel Mode](docId\:P7aeu4c7aG1ZaY-dteT9y)
:::
::::
[title] STEP 3: Controller Setup
[path] SETUP GUIDES/
Cronus Zen supports USB, Bluetooth, and a number of wireless adapters for almost all licensed controllers and most third-party controllers.
# Step-by-Setup Guides
***
- [PS5® USB & Wireless Controller Setup](docId\:GfEYdRLIZsJZUO-c7qGf4)
- [Non-PS5® USB Controller Setup](docId\:zkurj3Jh7jIj_U8Fjs5Ox)
- [Non-PS5® Wireless Controller Setup](docId:3a-IiCb4E8li6oxmYqRQj)
# Supported Devices
***
Cronus Zen supports all major consoles, all official controllers, and most licensed third-party controllers.
::::VerticalSplit{layout="middle"}
:::VerticalSplitItem
[PlayStation® 5](docId\:S6Hzm5x9wBZscQOIYLdtW)
[PlayStation® 4](docId\:DvBZqf3zPY3dofyUNQXhH)
[PlayStation® 3](docId\:A28lmydBu3Y-rzVAbG78c)
[Nintendo® Switch](docId\:Z6K65ua4BrNymolyFjo6w)
[Nintendo® Wii](docId\:HMYt-9uwihnGcW6sB66wB)
:::
:::VerticalSplitItem
[Xbox® Series X|S](docId\:JiAGY0GuHGnL3D5zadSOX)
[Xbox® One](docId\:IWbxmvMynyfauNi92evwZ)
[Xbox® 360](docId:8LFT2W7C8gkDo5_wJFGlb)
[Racing Wheels](docId:_ZDkExeYSAOYxUF8Bc_AN)
[Mouse & Keyboard](docId\:ofbsQBeL2sxI1kfnp8_rr)
:::
::::
:::hint{type="info"}
## AUDIO HEADSET (USB ONLY)
Considering the wide variety of headsets, controllers, and consoles, we can't promise full audio functionality for every combination, however if you do wish to use a wired headset, the controller must be connected to the Cronus Zen by USB as there is no audio support available over bluetooth.
***Pro Tip: If you are having issues getting your headset working, first connect your headset to the controller, then connect the controller to your Zen, then connect the Zen to your console.***
:::
:::hint{type="success"}
**NINTENDO**®** SWITCH: **If using a Switch TV Dock, make sure the 15v power supply is connected or the Zen will not power on. If you are using the Switch in Handheld mode, you'll also need an [OTG USB-C adapter](https://cronus.shop/products/usb-c-otg-adapter).
**Make sure this option is enabled:** System Settings > Controllers and Sensors > Pro Controller Wired Communication: **On**
:::
[title] PlayStation® 4
[path] SUPPORTED DEVICES/
Cronus Zen supports all versions of the PlayStation® 4 console, including all variations of DualShock4® controllers *(USB & Bluetooth)*.
:::hint{type="success"}
Remember, when using Cronus Zen, any supported device *(controllers, mice, keyboards)* will work with your PlayStation® 4 console! 🎮🚀
:::
# PlayStation® 4 Consoles
***

| **Console Version** | **Supported** |
| ------------------- | --------------------------------- |
| PlayStation® 4 | YES |
| PlayStation® 4 Slim | YES |
| PlayStation® 4 Pro | YES* |
**The Cronus Zen* `CONSOLE/PC` *USB cable* *must* *be connected to the* ***REAR USB PORT*** *of the PlayStation 4 Pro. The front USB ports do not have enough power for the Cronus Zen.*
# DualShock4® Controllers
***
All special editions and variations of the official Sony DualShock4® are compatible with Cronus Zen *(both USB & Bluetooth supported)*.

| **Controller Model** | **USB** | **Bluetooth** | **Audio (USB)** | **Auth** |
| ------------------------------------------------------- | -------------------------------- | -------------------------------- | -------------------------------- | -------------------------------- |
| DualShock4® v1 (CUH-ZCT1X) | YES | YES | NO | NO |
| DualShock4® v2 (CUH-ZCT2X) | YES | YES | YES | YES |
*X: U=USA, E=Europe, J=Japan*
:::hint{type="success"}
**DUALSHOCK4® V2 SUPPORT**
There are two DualShock4® models DS4v1 and DS4v2. While v1 does great for basic gaming, it does not support audio *(no headsets and no DS4 speaker) *and will not work as an AUTH controller for PS4 crossover setups.
Meanwhile, the DS4v2 has your back, fully supporting all gaming, audio, and crossover setup needs. Spot a blue lightbar on the touchpad? That's a DS4v2!

:::
# PlayStation® Move Controllers
***
The original, and most third-party versions of PlayStation® Move (L + R) controllers can easily pair to the Zen by Bluetooth - Left Bluetooth channel, & Right Bluetooth channel👍

# Licensed Controllers
***
The following are third-party licensed PS4 controllers that have been verified to work with Cronus Zen. If you're using a controller that works but not listed here, we'd love to know! Reach out to us at [cronus.support](https://cronus.support). 🥰
:::hint{type="info"}
For Bluetooth support on a PlayStation® 4 console, some third-party licensed controllers require a DualShock4® v2 AUTH controller connected to `A1`.
:::
| **PS4 Controller Model** | **USB** | **Wireless** |
| ----------------------------------------- | ---------------------------------- | -------------------------------------------- |
| Astro C40 TR | YES | YES *(Adapter)* |
| Hori PS4 Mini-Pad | YES | NO |
| Horipad 4 FPS | YES | NO |
| Horipad FPS Plus | YES | NO |
| Mad Catz Street Fighter V FightStick TE2+ | YES | NO |
| Nacon Compact Wired Controller | YES | NO |
| Nacon Revolution Pro v1 | YES | NO |
| Nacon Revolution Pro v2 | YES | NO |
| Nacon Revolution Pro v3 | YES | NO |
| Nacon Revolution Unlimited Pro | YES | YES *(Adapter)* |
| PowerA Fusion Pro | YES* | NO |
| Razer Raiju Tournament Edition | YES** | NO |
| Razer Raiju Ultimate | YES | NO |
| Scuf Infinity4PS Pro (DS4 v1 Model) | YES | YES *(BT)* |
| Scuf Infinity4PS Pro (DS4 v2 Model) | YES | YES *(BT)* |
| Scuf Impact | YES | YES *(BT)* |
| Scuf Vantage | YES | NO |
| Scuf Vantage 2 | YES | NO |
**Requires PC mode which will output as an Xbox controller.*
:::hint{type="danger"}
These controllers are ***NOT*** currently compatible with Cronus Zen:
- Thrustmaster eSwap Pro
- All Unlicensed PS4 Controllers
- All Flight Sticks
- All H.O.T.A.S.
**Note:** Connecting an unsupported controller might trigger an [E3 Error Code](docId:-MNg8vXAlWo3m3CIRbyN5). Simply unplug/replug the USB cable to reset.
:::
# Controller Setup
***
This guide will show you how to connect any controller to a PlayStation**®** 4 console.

First make sure your Zen is updated to . If it isn't, you'll need to visit [STEP 1: Update Firmware](docId:9U47MtFRK1z6gjIle0uv5).
***Note: **If you have a PS4 Pro, the Cronus Zen must be connected to a rear USB port, not the front.*
OK, Let's get after it.
1. Connect the Cronus Zen to your PC using the `PROG` USB cable.
2. Open Zen Studio .
3. Select the **Device** panel.
4. Set the **Emulator Output Protocol** to **PLAYSTATION 4**.

- **DualShock4® Controller (USB Only):**
- Connect to the `A1` USB port. That's it. 😁
- **Crossover Gameplay:**
- Other devices such as non-PS4 controllers, mice, keyboards etc. use the `A3` USB port, and also the `A2` port if you need to connect two devices.
- You can also use a secondary device alongside a DualShock4® controller such as a mouse for enhanced aiming, or a keypad with dozens of assigned MACROs.
- **Crossover Note:**
- A DualShock4® v2 controller must be connected to `A1` while using any crossover device on a PlayStation® 4. The DS4v1 *will not work* as AUTH.
- **Bluetooth Pairing:**
- Tap Zen's Bluetooth pairing button (P2) for pairing mode, then...
- **DualSense****®** **Controllers:** There is currently no Bluetooth support. Use USB.
- **Xbox**®** Controllers:** There is currently no Bluetooth support. Requires [adapter](https://cronus.shop/products/xbox-one-wireless-adapter).
- **Nintendo**® **Switch**** Controllers:** Hold down sync button for pairing mode.
- **DualShock®**** Controllers:** Hold down `SHARE + PS` for pairing mode.
- **PlayStation Move® (L+R) (Bluetooth):**
- The PlayStation Move® Left & Right Controllers have to be paired separately to the Cronus Zen.
- **Move (Blue) :** Tap Zen's Bluetooth pairing button (P2) for pairing mode, then hold down the Move sync button and after a few seconds it will pair.
- **Move (Pink) :** Tap Zen's Bluetooth pairing button again, then hold down the Move sync button and it will also pair. That's it. 😁
- **Wireless Adapters:**
- To achieve wireless support for Xbox controllers, the [Xbox Wireless Adapter is required](https://cronus.shop/products/xbox-one-wireless-adapter). Plug it into `A3`, connect the Xbox® controller to `A2` for a few seconds, then unplug. Soon, the LED on the Adapter and controller will turn solid white, indicating successful pairing.
- The Astro C40 adapter can also be connected to `A3`.
:::hint{type="success"}
**🔋 IMPORTANT**
Your controller might not charge when connected via Zen. Ensure its fully charged or equipped with fresh batteries to prevent disconnections.
:::
:::hint{type="info"}
🎧 **WIRED HEADSETS**
Considering the wide variety of headsets, controllers, and consoles, we can't promise full audio functionality for every combo, especially third-party controllers. However, many official controller USB setups are compatible.
Give yours a try and find out! 🎮
:::
::Image[]{src="https://archbee-image-uploads.s3.amazonaws.com/IwUlH55FdaPsVELSqm1Fc/vclTrqX2XOm9qAMh3uLRc_zenstudiov7d6kbpgbp.png" size="70" width="516" height="116" position="flex-start" darkWidth="516" darkHeight="116" showCaption="false"}
[title] M&K Settings
[path] ZEN STUDIO/Working Panels/
The M\&K Settings plugin allows configuration of mouse translation and keyboard mapping for console gameplay.
It provides detailed control over:
- Mouse sensitivity
- Boost
- Inverted Y-axi
- Ballistic curves
- Deadzone compensation
- Deadzone shape
- Analog Stickize
- Button and key mapping
The goal is to optimize mouse-to-reticle translation within console limitations.
# Layout System
***
M\&K Settings includes **six independent layouts**.
Each layout contains:
- Dedicated Aim Settings
- Independent Button Mappings
Layouts allow different configurations for various gameplay styles or scenarios.
# Aim Settings
***
Aim Settings provide advanced mouse tuning options, including:
- Sensitivity adjustments
- Boost control
- Six selectable ballistic curves
- Deadzone configuration
Ballistic curves modify input response behavior to fine-tune acceleration and precision.
# Button Mapping
***
Button mapping is divided into:
- Primary mappings
- Secondary mappings
- Movement mappings
Mappings are not restricted to a single input device.
Controller inputs can be combined with mouse and/or keyboard input.
Copy and Paste tools allow entire sections of Aim Settings or Mappings to be duplicated without affecting other sections.
[title] Compiler
[path] ZEN STUDIO/Working Panels/
The Compiler is an integrated development environment (IDE) for creating, editing, and compiling GPC scripts.
Features include:
- Syntax highlighting
- Find / Replace
- Real-time error reporting
- Bytecode size and memory usage analysi
- Debug output window
# 16-Bit vs 32-Bit Scripts
***
Legacy 16-bit scripts must be compiled using the **Legacy 16-Bit Compiler**.
Enable this option in:
**Device Panel > Use Legacy 16-Bit Compiler**
Use this only for older scripts that require compatibility.
# Compiler Interface
***
## Tab Bar
Displays all open GPC scripts.
- Drag and drop to reorder tabs
- An asterisk (\*) indicates unsaved changes
## Editor Window
Used to edit GPC source code.
Includes:
- Real-time syntax highlighting
- Text formatting
- Search functionality
Syntax highlighting improves readability and reduces coding errors.
## Compiler Output
Displays compilation results for the active script.
Output includes:
- Errors
- Warnings
- Bytecode size
- Stack memory usage
- Percentage of memory used
Cronus Zen provides **8 × 32KB memory slots**.
:::hint{type="danger"}
**IMPORTANT:** Warnings should be treated as errors. Even if compilation succeeds, warnings may indicate:
- Deprecated functions
- Out-of-range values
- Potential instability
Unresolved warnings can cause runtime issues or device error codes.
:::
# Compiler Menu
***
## Font Size
Adjust editor font size via:
**Compiler > Font Size**
Default: 10
## Compile (F7)
Compiles the active script without running it.
Used to verify:
- Errors
- Warnings
- Memory usage
## Build and Run (F5)
Compiles the active script and loads it directly into device RAM.
The script runs immediately without programming a memory slot.
Commonly used for live testing with the **Device Monitor**.
## Publish Script
Allows submission of a GPC script to the public GPC Library.
Requirements:
- Registered device
- Internet connection
Access via:
**Compiler > Publish Script**
This opens the publishing portal in your default web browser.
[title] Main Interface
[path] ZEN STUDIO/
This page covers Zen Studio's main interface and basic functionality.
# Menu Bar
***
The menu bar has a set of drop-down menus for easy access to all Zen Studio functions, such as opening and saving script files, editing & navigating code in the compiler, access to tools like **Device Monitor**, **Zen Studio Update**, and **Zen Operational Mode**, a list of pre-loaded Plugins for added functionality and links to useful support resources.

## File, Edit & Compiler
***
These menu options allow you to work with GPC script files and GPJ project files.
## Tools
Available tools for monitoring**, **and operating your Cronus Zen, to check online updates for Zen Studio, and to change Operational Mode.
- **Device Monitor:** This opens the Device Monitor window. To have access to this menu item the Cronus Zen device needs to be connected to your computer via the PC PROG USB Port.
- **Zen Studio Update:** Zen Studio has a built-in update wizard that checks online for the latest version of the Zen Studio software. This check is performed manually and requires an internet connection.
- **Zen Operational Mode:** Select which mode you wish the Cronus Zen to run in:
- **Normal Mode:** This is the default setting for Cronus Zen. Full access to all scripts and GamePacks with no restrictions.
- **Tournament Mode:** The Compiler is disabled which removes access to Scripts and GamePacks. This tech is also used in another product we developed for the Call of Duty World League™ called the "Tournament Stick", which is the only controller adapter approved by Activision.
- **Wheel Mode:** This allows you to connect any compatible racing wheel, shifter, clutch, and pedals to a PlayStation 4, and have it detected by the game as a fully functional Logitech G29 with complete wheel features, including FORCE FEEDBACK SUPPORT!
## Plugins
Functionality can be extended with the addition of **Plugins**. A plugin can access and modify the data exchanged between the game controller, mouse, or keyboard and the console, allowing a wide range of applications. All Plugins can also be accessed using keyboard shortcuts.
- **MAX Combo (Alt+F1):** Record any sequence of buttons/sticks which then gets converted to gpc script. Especially useful for fighting game combos, or any game that uses a long or repetitive sequence of buttons.
- **MAX Mapper (Alt + F2):** Easily remap controls using a visual interface then save and export the changes to a GPC script without any coding knowledge.
- **MAX Rec (Alt + F3):** This is for recording a macro that can be saved, loaded, and shared. Need to go AFK? Record simple movements, save, run and loop. Stop when you're ready to get back to playing.
## Help
The help menu contains links to our website and to our online community. You also have access to the User Manual, and other helpful links and documentation. About Zen Studio (F1) Studio gives detailed information regarding Zen Studio software and firmware build versions.
# Working Panels

Switching between working panels is easily done by using the navigation tabs, as shown in the picture below. The Zen Studio software has five working panels:
- **Library:** Interface for viewing and downloading GPC scripts from our online database. It is a quick start for those who don't have any familiarity with programming and want to make use of the available GPC scripts shared by the Cronus Community, or for those who are interested in learning more about the GPC script language through examples.
- **Compiler: **Features an integrated development environment (IDE) that provides comprehensive facilities to programmers for GPC scripting development. It consists of a source code editor, syntax highlighting, integrated GPC compiler, and testing tools.
- **Programmer:** Gives easy access to all GamePacks, GPC Scripts, Remapping Profiles, and GPC Files, so you can program any combination of those to one of eight Cronus Zen 32k memory slots. You must be connected to the internet to view our GPC Script Library and the huge collection of GamePacks.
- **Device:** Various options including DualShock 4 Light Bar Brightness, Open Device Monitor With Build And Run, Unload Script When Closing Device Monitor, Disable Screen Saver When Device Monitor Is Open, Open GamePack Configuration After Drag And Drop, Enable Autosave In Compiler, Use Legacy 16Bit Compiler, Enable PS4 Speciality (For PS5 Console), Enable PS Remote Play, a graphical display of Connected Devices, set the Emulator Output Protocol to Auto or manually select a preferred gaming platform, select a controller shortcut for Remote Slot Change (change memory slots from your controller without having to press the P1 button), Erase Memory Slots or perform a full Factory Reset.
- **M\&K Settings:** Get the best possible lag-free mouse translation for console games with the Mouse & Keyboard Settings Plugin. Load a premade Game Profile directly from the M\&K Settings interface, or import one of the many shared Game Profiles in the Cronus Zen Community. You can also manually adjust all existing mouse parameters to achieve a PC 1:1 like movement
**🔎Find more detailed information on each of the Working Panels 👉 here: **
# Community Panel
The Community Panel displays all of your Community and GPC Library stats once you register your Cronus Zen. Once registered you get access to the Zen Community and Zen Scripts in the GPC library.
You will also notice your Zen serial number which is linked to your community account. Having this will validate your status as an owner of the Cronus Zen, and it is also used to store all saves and settings to that particular Zen device (useful if you have more than one device on the same computer).
# Status Bar

The Status Bar is an information area for Zen Studio and can be found at the bottom of the main interface. The status bar is divided into three sections, each of which shows different information.

The very first section to the left displays information directly from the Zen device, if it is connected or not, and the firmware version.

The next section to the right displays which **Zen Operational Mode** is active. This area is also clickable.

Finally, the section to the far right is for the **Compiler Editor**. This displays if the active script is OK or BAD, what Line/Column is selected in the editor, and if INSERT is enabled on your keyboard or not.
[title] Device Monitor
[path] ZEN STUDIO/
Get real-time information directly from the Cronus Zen. I/O data, CPU Load, VM Speed, Battery Info, USB & Bluetooth VID/PID.
The Device Monitor shows all real-time information about your Cronus Zen: I/O data, CPU Load, VM Speed, Battery Info, 3 x USB & 2 x Bluetooth Input display, and VID/PID info, Memory Slot control, Controller Power access, Rumble data, LED data and more!
This is an essential tool for testing controllers and debugging GPC scripts

:::hint{type="info"}
**Info:** The Device Monitor is only accessible when the Cronus Zen is connected to your computer via the **PROG USB** port and **mini-USB cable**.
:::

# Input Area
::Image[]{src="https://archbee-image-uploads.s3.amazonaws.com/IwUlH55FdaPsVELSqm1Fc/Pl03Ia_h5CP2TVFhRzOaS_image.png" size="64" width="275" height="495" position="flex-start" showCaption="false"}
The Full status of the controller inputs, buttons, and sensors are reported within the Input Area. Any Interaction on the controller will be reported in these data fields and in real-time. If there is no controller connected, a message prompting to connect one will be shown,
Any input field can have its real-time value plotted within the plot area. Simply click on a field to select it and any changes will be shown in the plot area. You can have four fields selected at the same time.
# Output Area
::Image[]{src="https://archbee-image-uploads.s3.amazonaws.com/IwUlH55FdaPsVELSqm1Fc/8R1JWnFkkrZCzQk5eWV7L_image.png" size="62" width="275" height="499" position="flex-start" showCaption="false"}
The Cronus Zen reads the input data from the controller, processes this data according to the loaded code (Script or GamePack), and then sends the processed data to the console. The results of processed data are displayed by the fields in the Output Area. If the Zen is not connected to a console then the user can choose the **Emulator Output Protocol (Playstation 4\5, Xbox One X|S, SWITCH, PS3, XB360, PC/MOBILE)** in the respective dropdown box.
The six TRACE debug fields can be used by a GPC script for feedback information, flow control checking, and variables monitoring.
Any output or debug field can have its real-time value plotted in the plot area. Click on a field to select it for plotting, you can have up to four fields selected at the same time.
# Status & Controls
## CPU Load

Shows the amount of computational work that Cronus Zen device is performing. Any value below 80% is acceptable and means the processor is able to perform all its tasks on time, without delays or lag.
## VM Speed
::Image[]{src="https://archbee-image-uploads.s3.amazonaws.com/IwUlH55FdaPsVELSqm1Fc/FyKYMIIb8ZcMG3QYiJj96_image.png" size="54" width="220" height="36" position="flex-start" showCaption="false"}
Adjust the speed of the Virtual Machine in real-time. A really great feature for experienced scripters. Speed ranges from 1ms to 40ms. The default speed of the Cronus VM is 10ms.
## Active Slot
Displays the number and GamePack or Script name of the active memory slot, or 0 in case no slot is loaded. Running a GPC script by the "Build and Run" command will change this parameter to 10.
Click **+** to cycle through the memory slots, **Unload** to deactivate all memory slots (revert to Slot 0), and **CFG** to load the GamePack Configuration Interface if available. The Build and Run (F5) command will change this parameter to 10.
::Image[]{src="https://archbee-image-uploads.s3.amazonaws.com/IwUlH55FdaPsVELSqm1Fc/_xzZxuwc0gETccgvdifKP_image.png" size="34" width="240" height="45" position="flex-start" showCaption="false"}
## USB/BlueTooth Inputs
::Image[]{src="https://archbee-image-uploads.s3.amazonaws.com/IwUlH55FdaPsVELSqm1Fc/3j8OsZNG3_zN6cfQs2KcU_image.png" size="54" width="242" height="88" position="flex-start" showCaption="false"}
Detect up to 3 x USB and 2 x Bluetooth Inputs. Click on the Information icon to view extended information about the connected devices, in particular VID\:PID data which is useful for developers. The icon below that is to refresh any connected devices that you may have connected and are not displaying.
::Image[]{src="https://archbee-image-uploads.s3.amazonaws.com/IwUlH55FdaPsVELSqm1Fc/PCwqa9_N_MxK0OaizrGmx_image.png" size="32" width="236" height="237" position="flex-start" showCaption="false"}
## Controller Battery

Shows the battery level of a wireless controller. The battery status parameter is not applicable to wired controllers.
## Input Labels

Displays the type of input connected to the Zen. When selected the Output Area will change to reflect the device, displaying all of the inputs, buttons, and sensors.
## LED Status

Displays the current state of each Player LED: ON, OFF, FAST BLINKING, SLOW BLINKING. On PS3 fast blinking means, the controller battery is almost without charge, and the slow blinking means the battery is charging. A GPC script can overwrite the LED state, as an example: GamePacks, which widely uses this functionality to display real-time Mod status.
## Rumble Status

Displays the current speed of each rumble engine. 0% means the rumble engine is not spinning, 100% means it is spinning at full speed. Rumble A refers to the strong engine, Rumble B to the weak engine, and the Rumble RT/LT to the Xbox One triggers engine. The rumble strength and frequency can also be overwritten by a GPC script.
## Pause Plot

It is possible to pause the plot graph so you can closely examine a particular sequence of data (see below).
## Highlight Accel/Gyros
Highlight accelerometer and gyroscope output data.

::Image[]{src="https://archbee-image-uploads.s3.amazonaws.com/IwUlH55FdaPsVELSqm1Fc/cpT2xEEcNNitf1Onr6uWW_accel.gif" size="40" width="136" height="258" position="flex-start" showCaption="false"}
# Plot Area

The Plot Area plays an important role in data analysis and script debugging. Any data field can have its real-time value plotted by clicking on it; click a second time to stop plotting. You can have up to 4 fields selected at the same time.
## Deselect All
Deselect all input fields.
## Capture
This option will capture a screenshot of the plot area and display the labels of the inputs that were highlighted. Useful for debugging scripts and diagnosing controller output.

[title] GameSir® Fix
[path] TROUBLESHOOTING/
# Fix issues with GameSir® G7 HE/SE
***
After the latest firmware update, **GameSir® G7 HE/SE controllers** no longer work when directly connected to the **Cronus Zen**.
This guide shows you exactly how to fix the issue with **two simple methods**:
- ***Method 1:***** Downgrade the controller firmware** to a compatible version.
- ***Method 2*****: Switch the input mode** to restore ZEN compatibility. (No Downgrade)
# Method 1: Downgrading
***
### ⚙️The older Firmware to downgrade
::File{src="https://archbee-doc-uploads.s3.amazonaws.com/7VAtgLO6AGDNOQhiZv_mF-HbCgtvL-L0hnlQHnnmMRw-20250622-172942.exe" label="G7 6.4.0.exe"}
# Method 2: Changing input mode
***
🫰Special thanks to *Ari ♡ "kiwiko"* for the methods
# GAMESIR G7 SE
***
Immerse yourself in a pinnacle gaming experience with the Xbox Series X|S **Gamesir G7 SE Controller**, showcasing the innovative **Hall Effect Stick** sensors in both left and right analog sticks for almost zero stick drift and enhanced in-game precision.
For Cronus Zen compatibility, you must do the following:
1. Download the [Gamesir Nexus app](https://www.gamesir.hk/pages/gamesir-nexus)
2. Select the **Update** button and program to the latest version.
3. Once completed, select the **Profiles** button.
4. Profile 1 should be highlighted, select the **Configure** button.
5. Select the Sticks button at the top of the screen.
6. Set the Left Stick Range '**Initial**' value to 0. Enable **RAW**.
7. Set the Right Stick Range '**Initial**' value to 0. Enable **RAW**.
8. Move the sticks around until both X\&Y reads 0.00%
9. Press **A** to confirm.
10. Connect Zen to your console from the `CONSOLE/PC` USB port.
11. **Wait 5 seconds** then connect the Gamesir controller to `A1`.**
**Note:** If you don't wait the controller will not power on *(look for the White LED)*.
12. Tap Zen's reset button and after a few seconds the RGBs will change to **GREEN**.
13. You're now ready to play with peak precision!

[title] Requirements
[path] WELCOME TO CRONUS/
Here are the requirements for setting up and using the latest version of .
- Cronus Zen™ 👉 [available at cronus.shop](https://cronus.shop/products/cronus-zen)
- Cronus Wi-Fi Expansion Module 👉 [available at cronus.shop](https://cronus.shop/collections/cronus-zen/products/cronus-zenlink) *(add-on for PS5® support, wireless programming and more!)*
- Windows® 10/11 PC for
***Note:** There are unofficial workarounds available where you can use a Mac or Chromebook to run Zen Studio. *
- A good quality internet connection is essential, or you won't be able to access many features, including the Library, , firmware updates, and much more.
- A compatible Wi-Fi is required when using the .
[title] MOUSE & KEYBOARD
[path] /
This guide will help you **setup, fine-tune** and **understand** Mouse and Keyboard with the Cronus Zen.
# 📚 Guide Sections
***
This guide is split into clear sections. Click any one to get started.
- [🎛️ Native vs Emulation difference](docId\:ONB0FZA2AQ0EL71iH2Q3_)
- [🖥️ Supported Platforms and Devices](docId\:ExoW1az8iklSEmlo1Fe84)
- [🔌 Connect & Configure Mouse & Keyboard](docId\:U-qV6VmiWcuBkhgoyQ_xz)
- [📁 How to Import Game Specific Profiles](docId\:TagqBB8udTVzliH8Gp7bD)
- [🎯 Advanced Aim & Movement Tuning](docId\:WIwgP46nm8AItIwgZDbiJ)
- [🔀 Zen MK Switch Explained & Setup](docId\:bYeCSv1n_YVmuKQblWweF)****
[title] ZEN STUDIO (LEGACY)
[path] /
Zen Studio is the software that gives full control over your Zen hardware with multiple levels of configuration, as well as easy access to advanced scripts, and macros by way of a powerful and fully upgraded GPC script compiler, along with a huge range of pre-configured GamePacks with the latest mods for the latest games.
Zen Studio also has a comprehensive Mouse & Keyboard settings interface as well as various plugins for capturing inputs from your controller, and re-mapping buttons, analog sticks, and sensors without any scripting knowledge. This page will show you how to easily install Zen Studio, and guide you through the different [Working Panels](docId\:eYewJikHXfmcCFt6e30th).

# Library Panel
***
If successful, you will see your Community Account information display on the right side of the **Library Panel **��
The *Cronus GPC Library* includes thousands of free scripts exclusive only to registered Cronus Community Members, with special private access for Cronus Zen owners. Detailed instructions can be found here👉 [Library](docId\:h6XfQJjuNqEhQ0J6F4iSd)
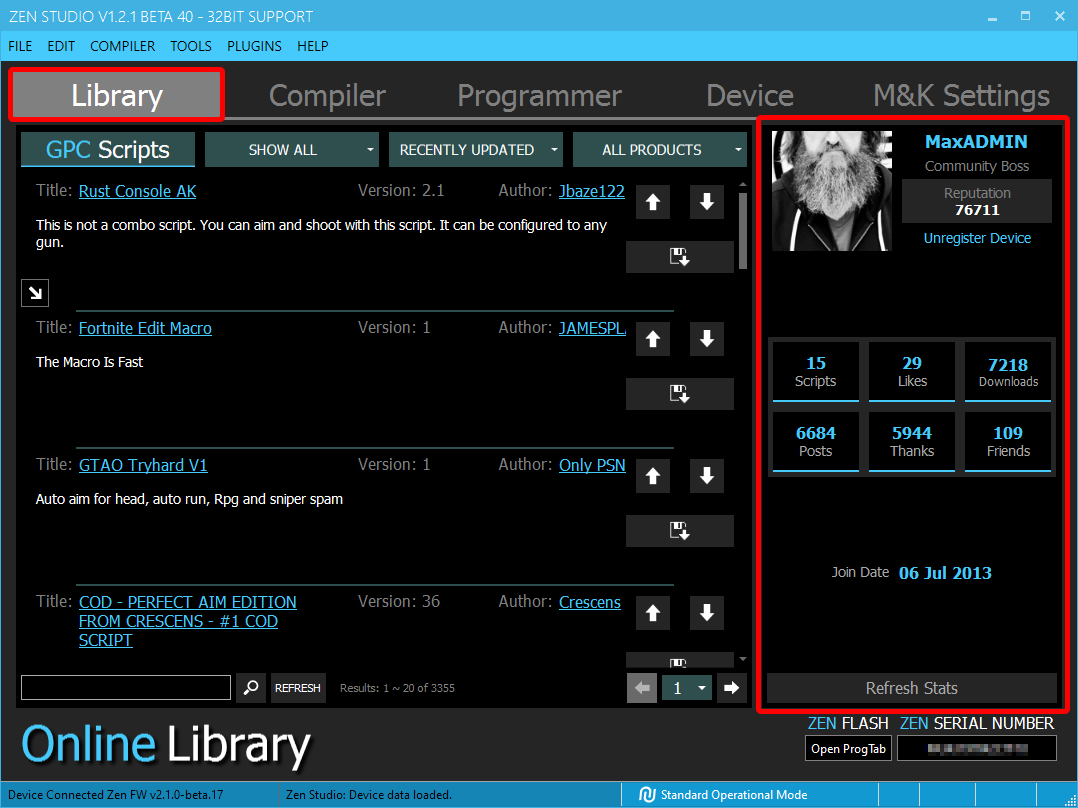
# Compiler Panel
***
The Compiler is a fully loaded IDE, designed to edit & compile GPC source code files with full-text formatting, find/replace, and real-time syntax highlighting. Includes a full debugging output window. Detailed instructions can be found here👉 [Compiler](docId:31OujVTlPaGXTfZHHCEzC)

# Programmer Panel
***
Get easy access to all GamePacks, Library Scripts, Re-mapper Profiles, and GPC Files.
Detailed instructions can be found here👉 [Programmer](docId\:z3dyj9L9ZGrsCfOxbhHc0)
:::hint{type="info"}
If you see an error saying, "*Unable to Download GamePacks*", it means your ISP is blocking the Cloudflare DNS so you will need to use a VPN service. There are many free ones, we recommend [ProtonVPN](https://protonvpn.com/free-vpn/).
:::

To access the instructions for each GamePack, highlight the pack you are interested in then click on the **i** icon next to the GamePack name *(see image below)*.

# Device Panel
***
View connected devices, enable PS Remote Play or PS4 Speciality, a 16bit compiler for older scripts, change multiple device options, and access to various maintenance tools including Reset Device, Factory Reset, Erase Memory Slots, and Device Monitor. Detailed instructions can be found here 👉 [Device](docId\:FOoeKrBsIq7RI6drRlRBF)

# M\&K Settings Panel
***
Take your gaming with Cronus to the next level with our brand-new Mouse & Keyboard Translator Engine.
We found that many Zen users would often use a third-party MK device to get better mouse & keyboard performance, while still using Zen for MODS and scripts. As you can imagine, this didn't jive with our dev team, so they went back to the drawing board, redesigning the Cronus Zen Mouse and Keyboard engine from the ground up.
Over a year in development, and after hundreds and hundreds of Mouse & Keyboard support tickets and months of community feedback during the open beta, we're excited to reveal what we now believe is the world's most powerful Mouse/Keyboard/Controller/Script all-in-one translator device. Detailed instructions can be found here👉 [M\&K Settings](docId\:JVQ15_Lcj3XvqXOP-NNka)

The rest of the Zen Studio guide is split into sections that explain every panel, button and feature in extra detail.
- [Main Interface](docId:0qUnXoMIqCK3TdVBy5cI6)
- [File Management](docId\:wsR2RdsAs_x-6sxH7pbOW)
- [Edit, Search, Replace](docId\:B0S3hVLm3nB4Zujq9cUV8)
- [Working Panels](docId\:eYewJikHXfmcCFt6e30th)
- [Zen Studio Update](docId\:wtYDSYdFa2jB_x8Yx517x)
- [Zen Operational Mode](docId\:Q0B3zItIKCjnFpbm3nuTV)
- [Device Monitor](docId\:bzqwLvypc8_k6_FFb4yHH)
- [Plugins](docId\:TqB0IjQl25RTwIcFrmeHO)
[title] Supported Platforms and Devices
[path] MOUSE & KEYBOARD/
**F**ollowing platforms are supported:
- 🎮 **PlayStation 5**® (requires [Cronus Zen LINK™ Wi-Fi Expansion Module](https://cronus.shop/products/cronus-zenlink))
- 🎮 **Xbox Series X|S**®
- 🎮 **Xbox One**®
- 🎮 **PlayStation 4**®
- 🎮 **Nintendo Switch**®
# 🖱️ Supported Keyboards & Mice
***
You can find the list of **officially supported keyboards and mice** here:
👉 [View Supported Devices](docId\:ofbsQBeL2sxI1kfnp8_rr)
:::hint{type="success"}
If your mouse or keyboard isn’t listed, don’t worry.Most standard USB devices are still supported.
:::
# Disclaimers
***
Any use of this product means being aware of and agreeing to the following:
:::BlockQuote
**⚠️ Trademark Notice**The trademarks "PlayStation®", PlayStation®5", PS5®, PSN®, DualSense® are owned by Sony Interactive Entertainment.
The trademarks **"Nintendo**®** Switch"**, **"Joy-Con**®**"**, and **"Nintendo**®** eShop"** are owned by **Nintendo Co., Ltd.**
****
The trademarks **"Xbox**®**"**, **"Xbox**®** Series X"**, **"Xbox**®** Series S"**, **"Xbox**®** One"**, **"Xbox**®** Live"**, and **"Xbox**®** Game Pass"** are owned by **Microsoft Corporation**.
:::
[title] LEGAL DISCLAIMER
[path] WELCOME TO CRONUS/
The content provided on this website is intended solely for personal, educational, and lawful use. It is not intended for, nor do we encourage any use that may be designed to circumvent or otherwise violate the **End User License Agreements (EULA)**, **terms of service**, or **intellectual property rights** of any third party.
By purchasing, accessing, or using any Cronus Device, you acknowledge and agree to the following:
1. **Permitted Use** - The Cronus Device must be used only in compliance with all applicable laws, regulations, and third party agreements, including but not limited to software licenses and platform terms of service.
2. **Prohibited Use** - You may not use the Cronus Device in any manner that violates or is inconsistent with any applicable End User License Agreement (EULA), terms of service, license terms, or any applicable laws, regulations, or contractual obligations.
3. **User Responsibility** - You are solely responsible for how you use the Cronus Device. It is your obligation to ensure that your use complies with all applicable legal and contractual requirements.
4. **No Affiliation or Endorsement** - The Cronus Device is not affiliated with, endorsed by, or authorized by any game developer, publisher, or platform provider.
5. **No Warranty for Third Party Compliance** - We make no representations or warranties that use of the Cronus Device will comply with any specific third party agreement. Compliance is determined solely by the applicable publisher or platform provider.
6. **Limitation of Liability** - To the maximum extent permitted by law, Collective Minds Gaming Co. Ltd., as manufacturer, and its affiliates shall not be liable for any claims, damages, losses, or penalties arising from use of the Cronus Device, including but not limited to account suspension, bans, or violations of third party agreements. Blue Ridge Electronics LLC shall not be liable for any claims, damages, losses, or penalties arising from content provided on this website or from use of the Cronus Device.
7. **Indemnification** - You agree to indemnify, defend, and hold harmless Blue Ridge Electronics LLC, and their respective affiliates from any claims, damages, liabilities, costs, or expenses arising out of or related to your use or misuse of the Cronus Device or your use of this website.
# TRADEMARK NOTICE
***
CronusMAX™, Cronus Zen™, and Zen LINK™ are trademarks of Collective Minds Gaming Co. Ltd. . All rights reserved.
"Sony", "PlayStation", "PS5", "PS4", "PS3", "DualSense", "DualShock", and "PS Remote Play" are trademarks or registered trademarks of Sony Interactive Entertainment Inc.
"Xbox", "Xbox Series X|S", "Xbox One", "Xbox 360", and "Xbox Wireless" are trademarks or registered trademarks of Microsoft Corporation.
"Nintendo", "Nintendo Switch", "Wii", and "Wii U" are trademarks or registered trademarks of Nintendo Co., Ltd.
All other trademarks, product names, logos, images, and brands referenced are the property of their respective owners and are used solely for identification purposes. No affiliation, sponsorship, or endorsement is claimed or implied.
# DMCA NOTICE AND TAKEDOWN POLICY
***
This website, including but not limited to **cronusmax.com** and **cronus.support**, is owned and operated by **Blue Ridge Electronics LLC **("we", "us", or "our"). These websites provide community resources, support content, and related services for users of **CronusMAX™**, **Cronus Zen™**, **Zen LINK™ **and related products (the "**Cronus Device**").
We respect the intellectual property rights of others and expect users of our websites and services to do the same.
If you believe that any content available on this website infringes your copyright or trademark rights, you may submit a notification pursuant to the **Digital Millennium Copyright Act (17 U.S.C. § 512)**.
To be effective, your notice must include:
- Identification of the copyrighted or trademarked work claimed to have been infringed
- Identification of the allegedly infringing material, with sufficient detail to locate it
- Your name, mailing address, telephone number, and email address
- A statement of good faith belief that the use is not authorized by the rights owner, its agent, or the law
- A statement, under penalty of perjury, that the information is accurate and that you are authorized to act on behalf of the rights holder
- Your physical or electronic signature
DMCA notices should be sent to: dmca\@cronusmax.com
Designated DMCA Agent registered with the **U.S. Copyright Office Registration Number: DMCA-1043082**
Upon receipt of a notice that substantially complies with applicable law, we may remove or disable access to the allegedly infringing material at our sole discretion and without prior notice.
We are not obligated to acknowledge receipt of any notice, provide confirmation of action taken, or respond to any submission. The absence of a response does not indicate that no action has been taken.
We reserve the right to remove or disable content, terminate repeat infringers, and provide notice information to affected parties as required by law.
[title] Nintendo® Wii
[path] SUPPORTED DEVICES/
Cronus Zen supports original Nintendo Wii, and most licensed third-party Wii controllers. They can all be connected to Xbox, PlayStation, and Nintendo Switch consoles, including support for PC and Android gaming, all with full MOD & GPC scripting capabilities!
- [Official Nintendo Wii Controllers](docId\:HMYt-9uwihnGcW6sB66wB)
- [Third-Party Nintendo Wii Controllers](docId\:HMYt-9uwihnGcW6sB66wB)
- [Wiimote USB Sensor Bar](docId\:HMYt-9uwihnGcW6sB66wB)
::Image[]{src="https://archbee-image-uploads.s3.amazonaws.com/IwUlH55FdaPsVELSqm1Fc/fuJDVhXNWRNKZUpuIapVZ_wiicontrollers.png" size="98" width="1840" height="1010" position="center" showCaption="false"}
# OFFICIAL NINTENDO WII CONTROLLERS
***
All special editions and variations of the official Nintendo Wii U Pro and Wii Remote *(aka Wiimote)* Controllers are compatible with Zen. Wii controllers are Bluetooth only *(the Wii U Pro USB cable is for charging only)*.
**Note:** Connecting an unsupported controller can cause an [E3 Error Code](docId:-MNg8vXAlWo3m3CIRbyN5).
| **Controller Model** | **USB** | **Bluetooth** |
| --------------------- | ------------------------------- | ---------------------------------- |
| Nintendo Wii U Pro | NO | YES |
| Nintendo Wiimote | NO | YES* |
| Nintendo Wiimote Plus | NO | YES** |
**Does not support Gyroscope (requires the Nintendo MotionPlus adapter or use a Nintendo Wiimote Plus).*
***Expansion port supports Nintendo Wii Nunchucks*
# THIRD-PARTY LICENSED NINTENDO WII CONTROLLERS
***
There are many "knock off" Wii controllers on the market. Some work with Zen, and some don't. As there are so many different serial numbers and brand names, it's definitely a potluck if it will work or not. Let us know if you have a third-party Wii controller that works, and we'll add it to this page 👍
# WIIMOTE USB SENSOR BAR
***

Yes, you can use a Wii USB Sensor bar with a Wiimote Plus and Cronus Zen! Simply connect it to any USB power source and place it in optimal sight of your gaming area.
It works as a reference point for the Wiimote Plus, which has a camera on the front that is looking for the Infra-Red lights on the Sensor Bar, that is how it determines the Wiimote's location.
If you need one, [we do sell them](https://shop.cronusmax.com/wiimote-usb-sensor-bar-for-cronusmax.html) 🛒 in the Cronus store
***
[title] MAX Combo
[path] ZEN STUDIO/Plugins/
Automate the creation of combo sequences by reading controller inputs and converting the data into GPC code.
The MAX Combo plugin **automates the creation of combo sequences by reading the controller inputs and converting this data into GPC code**. The code optimization is focused on minimizing the code size, but ensuring that all events are reproduced faithfully. The algorithm automatically identifies the beginning and end of the sequence of commands executed in the controller. You can include (or exclude) the data from accelerometers and/or DS4 Touchpad. **You are able to record in 300 second intervals.**
Now think of the potential here – let's say you have a modded controller from a company that says their Anti-Recoil is one of a kind and impossible to copy and no one else has it. With MAX Combo you can record it and convert it to an editable GPC script in seconds!

# Plugin Operations
***

# Capture Options
***

Input field to enter the name of the combo to be generated and checkboxes to include the accelerometers and/or the DS4 touchpad data during the capture. You can also set the stick deadzone if needed or preferred.
# Start Capture

Clicking on this button will begin a count down of 3 seconds to start the commands capture. The capture buffer has 30 seconds in length, the action you want to perform needs to be done within this time. You can press the stop button to interrupt the capture, or just wait for the memory buffer to completely fill out. The GPC code generation algorithm automatically identifies the beginning and end of the sequence of commands executed in the controller.
# GPC Code

The results of the GPC code generation algorithm is shown in this area. The code optimization is focused to minimize the code size but ensuring that all events are reproduced faithfully. If the result displayed is satisfactory, select all the code to copy and paste into your GPC script.
# Status Bar

The Status Bar shows information about the buffer usage during the capture operation and about the GPC code generated such as how many transitions were detected and commands generated.
# Device Monitor

Opens the device monitor to show the inputs and the outputs live.
[title] Device
[path] ZEN STUDIO/Working Panels/
View connected devices, change multiple device options, and run maintenance tools including Erase Memory Slots and Factory Reset.

# Device Options
***
## DualShock 4 Light Bar brightness

Adjust the brightness of the DS4 Lightbar in real-time.
## Open Device Monitor With Build And Run
***
**Device Monitor** will automatically open when you select **Build and Run (F5)** from the **Compiler.**
## Unload Script When Closing Device Monitor
***
Compiled scripts running using **Build and Run (F5)** will automatically unload when **Device Monitor** is closed.
## Disable Screen Saver When Device Monitor Is Open
***
To prevent any interruptions while monitoring I/O while gaming, the Windows screensaver is disabled while Device Monitor is open.
## Open GamePack Configuration After Drag And Drop
***
Automatically open the GamePack Configuration Interface when you drag and drop a pack into a memory slot.
## Enable Autosave in Compiler
***
Auto saves your open files when in the compiler. Protect your work in case of a crash or you just simply forgot to save.
## Use Legacy 16Bit Compiler
***
Zen will continue to support 16bit scripts, so be sure to select the 16bit compiler instead of the 32bit compiler for those scripts.
# PS4 Speciality
***
PS5 support requires a specific third-party licensed PS4 controller to act as a 'donor' which we call the PS4 Speciality Controller *(third-party means **NOT** an original Sony controller)*.
This controller can be used as a license donor, so you are able to play PS5/PS4 games using the new DualSense Controller, the Sony DualShock 4 Controller (DS4) and most licensed Xbox Controllers 👉 click here for the current list of known 'Speciality Controllers.
:::hint{type="success"}
**Tip: **This will allow you to use all Cronus Zen functionality, including your favorite PS5/Xbox Series X|S/PS4/Xbox One controllers, GamePacks, and Scripts with PS5/PS4 games without any timeouts or disconnections! (**Note**: Some PS5 Games do not support rumble at this time.)
:::
## Enable PS4 Speciality (For PS5 Console)
***
Select "Enable PS4 Speciality (For PS5 Console)". You will be prompted to "Please Wait. Resetting Device, If the device does not come back up please click FIND DEVICE".
## Enable PS Remote Play
***
Select "Enable PS Remote Play". You will be prompted to "Please Wait. Resetting Device, If the device does not detect, click the **FIND DEVICE** button.
# Emulator Output Protocol
***
Cronus Zen supports all six major output protocols: PLAYSTATION 4/5, XBOX ONE X|S, NINTENDO SWITCH, PS3, XBOX 360, and PC/MOBILE. Use the drop-down menu to select the corresponding protocol to the console system you are using.

:::hint{type="info"}
**Info**: The 'Mirror' reflects the source controller connected to Zen's A1 USB Port. Any controller that is then connected to A2, A3, or Bluetooth will appear on the console whatever the mirror is reporting. This is how we're able to connect a PS4 controller to an Xbox One. An Xbox One controller is connected to A1, so the Mirror always reflects the Xbox One controller, even though you are gaming with a PS4 controller. Magic sauce!
***Note:** Not applicable to the PS5.*
:::
# Remote Slot Change
***
Change Cronus Zen memory slots remotely using your controller. The available buttons change depending on what controller you have connected.

| Controller | Toggle #1 | Toggle #2 |
| --------------- | ------------ | --------- |
| Xbox One X\|S | XBOX + VIEW | XBOX + LS |
| Xbox 360 | XBOX + BACK | XBOX + LS |
| PlayStation 4/5 | PS + SHARE | PS + L3 |
| PlayStation 3 | PS + SELECT | PS + L3 |
| Nintendo Switch | HOME + MINUS | HOME + L3 |
# Factory Reset
***
Resets all options to factory default settings and erases memory slots.
::Image[]{src="https://archbee-image-uploads.s3.amazonaws.com/IwUlH55FdaPsVELSqm1Fc/jet0yDcbvGFmB8CPuYR4o_2022-03-2911-44-41.jpg" size="90" width="522" height="107" position="flex-start" darkWidth="522" darkHeight="107" showCaption="false"}
# Erase Memory Slots
***
Erases all memory slots without affecting any other options.
# Device Monitor
***
The Device Monitor shows all real-time information about your Cronus Zen: I/O data, CPU Load, VM Speed, Battery Info, 3 x USB & 2 x Bluetooth Input display, and VID/PID info, Memory Slot control, Controller Power access, Rumble data, LED data and more!
*This is an essential tool for testing controllers and debugging GPC scripts.*

🔎**Find more detailed information about the Device Monitor 👉 here: **
# Find Device
***
If the Zen does not detect in Zen Studio and the USB cables are good, this will help re-sync the discovery of the device.
# Reset Device
***
Reset the Zen without manually power cycling.
# Clear BT Devices
***
Bluetooth pairings can become corrupt causing controller disconnections. Especially if you have ever paired more than one device which can sometimes result in cross contamination. We have included a function to erase all BT pairing history from the Zen, however it requires a couple of steps:
1. The device you wish to unpair? Turn it's power off *(if it's a controller, hold down the XBOX/PS button for 5-15 seconds until the LED turns off)*.
2. Open Zen Studio, click the Device Tab and press the **Clear BT Devices** button.
3. You'll get a popup asking if you wish to clear Bluetooth Device. Click yes until the taskbar says "All registered Bluetooth devices have been cleared" *(see image below)*.
4. Now disconnect all USB cables from the Cronus Zen.
5. It's now important to pair the device to something else other than the Zen, or it will continually try to pair to the Zen causing controller disconnections.
6. Once that is done you can start using your Zen again 🙂
# Connected Devices
***
Displays the manufacturer's logo of any Console, Joypad, Mouse, Keyboard, or Navcon that is correctly registered with the Cronus Zen.

# Zen Flash
***
Displays the amount of flash memory used by the scripts or gamepacks loaded to the memory slots.
# Zen Serial Number
***
Displays the unique serial number attached to your Zen. Once you have registered your Zen, the serial number is used to give you exclusive access to private areas of the Cronus Community.
[title] Reduce Display Lag
[path] TROUBLESHOOTING/
Follow these tips to make sure your display is performing at the most optimized quality and speed for video gaming.
# What is Game Mode?
***
What many overlooks is that if a TV has a Game Mode, you will have input lag if it's not being used. This is because generally newer TVs do their own processing of the image/sound before displaying it to the TV, resulting in a delay between the source output and displayed results.
Setting your TV/Monitor in Game Mode will eliminate this processing and give you a 1:1 source to display throughput. (This helps for any gaming system). If you don't believe us, Google it, there are thousands of blogs and articles that talk about this. We have compiled the most comprehensive and detailed guide that you'll find anywhere to aid you in getting the perfect lag-free gaming setup.
Follow these steps and it may just blow your mind with how much improvement it makes - without or without using a Cronus. Here's one response from a customer....
:::BlockQuote
*"Wow!!!! I was blown away that this actually worked, who would have thought the cause of all this enraging input delay was a result of game mode on my TV. It was a bit difficult to find, but it was indeed there. And WOW, did it make a difference. I cannot tell you how amazing it is to play now. The input lag is completely gone, I'm insanely particular about latency and input lag, and when I got my Cronus yesterday and tried it, I was disappointed, but this changes everything and now my setup is better than ever before. THANK YOU, THANK YOU!"*
:::
Check out this video which shows how the [Leo Bodnar Input Lag Tester](https://www.leobodnar.com/shop/?main_page=product_info\&products_id=212) optimizes settings for your TV or Monitor.
::embed[]{url="https://youtu.be/zVw6T9rw0xU"}
## Ways to Reduce Display Lag
***
## ▶️ Switch Input Mode
***
Switch input mode from "AV" to "PC/HDMI". For monitors/TVs that have the "HDMI" label instead of "PC" (such as with the majority of Samsung & LG panels), you must rename the input mode to "PC" manually. I know it seems silly that changing the name of the input would actually make a difference - but just try it and see what happens. You'll cry. If your TV or monitor is NOT a Samsung, AND you cannot find out how to rename HDMI mode to PC, then chances are your HDMI mode will work just as well. With any monitor though, switching to "PC" (or HDMI mode if you can't rename it) input mode instead of "Auto", "AV" or "HDMI" will instantly shut off all of the useless post-processing protocols that are specific to the AV mode.
What's amazing is that for every product we've ever tried this on, the screen looks infinitely smoother and actually has an anti-aliasing (AA) effect despite shutting off post-processing effects. This is because AV mode almost always uses some weird "artificial digital sharpness" that makes jagged edges from games appear worse.
:::BlockQuote
*Most importantly you have just shaved about another 10-15 ms from this change alone - and for experienced gamers, this could be the difference between coming first or last.*
:::
I'm sure this feature can make movies look great, BUT it's not meant for games. Even more surprising is often you'll gain another inch of the screen! AV mode (or AV/HDMI mode on Samsung) is often zoomed and stretched. TONS of people go years without even realizing they are missing a portion of their screen. Flip back and forth if you think you notice a difference. That said, many monitors already use the unzoomed format (also called the "Just Scan" protocol), and in that case, you won't notice any difference. Either way, your picture should look better, but most importantly you have just shaved about another 10-15ms from this change alone - and for experienced gamers, this could be the difference between coming first or last. We have a Samsung in the office and the difference is huge, however, the manual says to specifically use HDMI Port 2 - remember to READ THE TV MANUAL! Labeling the HDMI input to "PC" is preferred over Game Mode because on these models:
-
-
-
-
-
## ▶️ Enable Game Mode
***
Enable Game Mode, if available. If you are a fanatic about TV picture calibration and are frustrated by the lack of fine-tuning white balance, check to see if there is a factory menu you can access for more granular adjustments. The Game mode is the single most important thing you can do as far as reducing input lag and is found on most modern sets, where the settings of the TV, including colors, motion blur, and other variables, are set specifically to accommodate video games and will help reduce video game lag. Whereas certain settings can help with motion graphics, such as sports on live TV, these same settings can make your video game lag or feel delayed. Most of the time this option will have disappeared after selecting PC mode. PC mode usually stops ALL post-processing (which is what causes input lag), while game mode usually only stops some for HDMI mode. If you do still see a Game Mode, turn it on. Check to see if doing so resets your monitor back to "HDMI" mode. If so, go with PC mode over Game mode. If you can have both modes at the same time (it's possible) then go with that.
## ▶️ Change Response Time
***
Look for a setting called "Response Time" or "Pixel overdrive", "overdrive", etc. Usually, the options are something like "Normal", "Faster", or "Fastest". The "1-2ms" advertised response time of your monitor is usually only achieved by using this overdrive setting. Before you automatically choose the "fastest" (or equivalent setting), you should do a quick google check to see if your monitor's overdrive method is worth it. In theory, the overdrive/response time setting should improve your response time (pixel switch speed) which will give you a smoother moving screen. However, many times (especially with Benq), the overdrive does nothing to improve your response time and often can introduce input lag (as it is an intense/complicated form of post-processing). do your research to determine if the benefits will outweigh the costs. Remember that faster response time gives you smoothness while lower input lag will make your aiming "feel" better. If you discover there is a compromise, it's really up to you as far as which to choose. If you don't notice any motion blurring effect (outside the game's graphical engine), then I'd personally just stick with better input lag if I was forced to choose between the two. If you find your monitor's overdrive method is efficient then obviously crank it to get the best of both worlds.
## ▶️ Disable 'Magic' Processing
***
Turn off any remaining "magic" or "auto-color" or anything else that sounds like a patented, gimmicky name. Generally, any color or picture settings that imply an "auto" mode are just processes. Settings that say "custom" or "manual" are the ones you want to gravitate towards. If your picture/color looks worse on these manual/custom modes, then feel free to move the manual sliders around (Sharpness, RGB color balance, contrast sliders, etc. are all fine to customize and won't affect lag). My Samsung has a common "Magic Color" setting that is supposed to auto-balance colors dynamically. This option is not turned off by PC mode, so turning things like this off is necessary to "purify" your signal and eliminate the remaining lag. I also have a "Magic Bright" picture mode that adjusts other picture aspects on the fly. Turn anything like that off as well. Make sure you go through each subsection of your settings (eg. Picture, Color, Input, General, etc.), and when in doubt, just google something if you don't know what it is. If you turn something off and it makes everything look like garbage, then obviously you can keep those vital processes. Once again remember that if you do mess with anything, you can just reset and try again.
## ▶️ Disable Motion Smoothing
***
Turn Off Motion Smoothing Modes. One of the most controversial topics in TV-land right now is motion smoothing, which uses interpolation and frame-skipping to lend a more life-like look to video content. In other words, it makes everything look like a soap opera. The words hertz and refresh rate get thrown around a lot. Generally speaking, higher refresh rates (measured in hertz) add to the soap-opera effect. LG, Sony, Toshiba, Samsung, Vizio, and even Philips all have different names and brand titles for their motion smoothing settings: "TruMotion," "CineMotion," "Smooth Motion Effect," and "Smooth Motion Plus" among others. But they all basically do the same thing, with varying degrees of intensity. For single-player games, motion smoothing can actually make games look better. Sports games in particular can look as fluid as real life. But if you're playing a game online (especially a competitive multiplayer game) turn any and all motion assistance off. Along with an iffy internet connection, it's a major cause of input lag—don't put yourself at a disadvantage. Game Mode (see above) will often automatically disable motion assistance, but it's smart to double-check.
## ▶️ Disable HDMI-CEC
***
Disable HDMI-CEC. In my tests, this added \~10ms of lag on my set. I disabled it on my TV and on my PS4. Though disabling it on my PS4 didn't change lag, it did change the audio cut out.
## ▶️ Disable Power Saving
***
Disable any power-saving settings or ambient screen dimming. Both of these add additional lag (\~10ms each).
## ▶️ Test HDMI Inputs
***
If possible, test each HDMI input. I have 4 HDMI inputs and two of them consistently have less input lag (6ms less) than the other two.
## ▶️ No TV Speakers
***
Using TV speakers adds input lag. If possible, use a separate audio system such as a soundbar. Using TV speakers added \~8ms of lag on my set.
## ▶️ Refresh Rate
***
Looking for the ultimate gaming experience? Simply put, purchasing a 120hz+ Refresh Rate TV will get rid of any input lag you may have experienced with a 60hz Refresh Rate TV. Even with smaller TVs, a 60hz refresh rate can make it feel like your tv, internet, or controller is lagging or not responding to your inputs. With larger TVs, it’s even more noticeable. A 120hz+ refresh rate will help minimize and reduce lag when playing video games. Below is a simple guide that explains what the refresh rate should be for the size of your TV to help get rid of your video game lag:

All that being said, I was personally able to shave off \~20ms of lag.
I tested using the average of top, middle, and bottom readings which is the current meta. I also let the TV warm up for a few minutes before measuring each change as I observed this was the best way to observe the lowest measurements and most accurately resembled real-world use. Obviously, not all of these will translate from one TV set to another, but if anything else, it suggests that seemingly benign settings can introduce additional lag. If you want to check out the Lag rating for your TV/Monitor/Projector, or any other model - we highly recommend [displaylag.com](#) - they currently have well over 500 models in their database!

*As you guessed, DisplayLag features a database with multitudes of HDTVs and monitors, along with news, reviews, and information about the latest displays and video games. I wanted to create a centralized database, a place where anyone can come and look up a display. Before this website, measurements were scattered all over the internet, using a variety of testing methods (most commonly involving a computer, clone mode displays, and a program such as SMTT), and it was difficult to create a standard in which we could accurately compare displays due to a large amount of factors. Not anymore.*
[title] Connect & Configure
[path] MOUSE & KEYBOARD/
Here's how to get your mouse and keyboard working smoothly with Cronus Zen.
# Setup Overview
***
Follow these four simple steps to get your mouse and keyboard working with Cronus Zen:
- **Step 1:** Turn OFF GamePacks or Scripts
- **Step 2:** Connect the Devices *(MK Switch recommended)*
- **Step 3:** Open Zen Studio & Check Device Detection
- **Step 4:** Test Input Detection
# Step 1
***
Before connecting anything, turn OFF GamePacks or Scripts.
Here’s how:
- Press the right blue **Memory Slot button** on the Cronus Zen
- Cycle through until the **Collective Minds Alien logo** appears on the OLED screen
- This means **no GamePacks or Scripts **are active
# Step 2
***
Connect the Devices (MK Switch Recommended) to your Cronus Zen.
🔗 Connection Order
- Plug your **controller** into **Zen USB Port A1**
- Connect your **keyboard** to **Zen USB Port A2**
- Connect your **mouse** to **Zen USB Port A3**
- Connect the **PROG USB cable** from Cronus ZEN to your **PC**
:::hint{type="danger"}
⚠️ Once your main mouse and keyboard are connected to the **Cronus Zen**, they’ll function as a **controller**. You won’t be able to control your PC with them anymore, unless you **switch them back manually**.
That’s why you’ll need either a **second set** of mouse and keyboard, or a **MK Switch** to toggle between PC and Zen.
If you don’t have a second keyboard/mouse for your PC, a **USB powered MK Switch** is a huge help.
:::
# Step 3
***
Now that everything is connected, it’s time to check if Cronus Zen detects your mouse and keyboard correctly.
**Launch Zen Studio**
- Open **Zen Studio** on your PC
- Click on the **“Device” **tab
**Check Detected Devices**
- Look under the **Connected Devices** section
- Your mouse and keyboard should appear
:::hint{type="success"}
💡If your device shows up with a question mark, don’t worry, it still works.
That just means Zen Studio doesn’t have an icon for it.
:::
# Step 4
***
Time to test if the Cronus Zen is picking up the inputs from the Mouse and Keyboard.
**Open the Device Monitor **
- In **Zen Studio**, press **TOOLS **--> **Device Monitor**
**Test Your Mouse**
- Move your mouse, you should see **RX/RY values changing** in real time
- This confirms your mouse input is being read as right stick movement
**Test Your Keyboard**
- Press **W, A, S, D**, you should see **LX/LY values changing** in real time
- This confirms your keyboard input is being read as left stick movement
- Try other keys like **spacebar** to test additional mappings
[title] MAX Rec
[path] ZEN STUDIO/Plugins/
Record any sequence of commands from the controller and then playback this sequence 1:1.
MAX Rec is incredibly useful, in particular Racing Games, and Fighting Games. For example, you may wish to help a friend finish a Game on an extremely difficult level. With MAX Rec You can record the sequence of commands while playing the game and then send the file to your friend, he can then use the MAX Rec plugin to load the file and reproduce the sequence that you created.

# Plugin Operations
***

First, make sure that your Cronus Zen is connected to both your console and Windows PC (via the PC PROG USB Port).
# Information Area

Information about the commands sequence such as: if the sequence was loaded from a file, or it just lies in the memory buffer. Its length in seconds. The progress bar represents all the sequences of commands and how much it was reproduced.
# Load File

Open a dialog box to load a sequence of commands of a file into the memory buffer.
# Play/Pause

Play and pause the commands sequence loaded on the memory buffer.
# Loop

Automatically repeats the playback when it reaches the end of the buffer.
# Record/Stop
::Image[]{src="https://archbee-image-uploads.s3.amazonaws.com/IwUlH55FdaPsVELSqm1Fc/I7mx1DgaN1MlIcs8qB1zW_image.png" size="84" width="40" height="35" position="flex-start" showCaption="false"}
Start recording the sequence of commands in the memory buffer. This button can also stop the recording or stop the playing, depending on the action is being conducted.
# Save File
::Image[]{src="https://archbee-image-uploads.s3.amazonaws.com/IwUlH55FdaPsVELSqm1Fc/5xxDsKHe0ztHCcvWobmIg_image.png" size="20" width="56" height="35" position="flex-start" showCaption="false"}
Open a dialog box to save into a file the sequence of commands in the memory buffer.
# Device Monitor

Opens the device monitor to show the inputs and the outputs live.
[title] Mouse & Keyboard
[path] SUPPORTED DEVICES/
While it is our goal to add support for as many of the most popular gaming mice as possible, there will always be models that do not function correctly, or at all. This is a list of mice & keyboards that are confirmed as working.
# Supported Mice
***
Cronus Zen is designed to detect almost any mouse or keyboard that conforms to the standard USB interface. So, if your mouse is not listed here, it does not mean it's not supported, only that it hasn't been tested yet. If your device isn't listed here and it works, let us know and we'll update🙂
**Note:** Connecting an unsupported mouse can cause an [E3 Error Code](docId:-MNg8vXAlWo3m3CIRbyN5).
| Model | Connect | Sensor | Max Poll | Max DPI | Key |
| -------------------------- | -------- | --------- | -------- | ------- | ----- |
| Cooler Master MM710 | USB | PMW3389 | 1000Hz | 16,000 | |
| Cooler Master MM711 | USB | PMW3389 | 1000Hz | 16,000 | |
| Corsair Harpoon RGB Pro | USB | PMW3327 | 1000Hz | 12,000 | |
| Corsair IRONCLAW RGB | Wireless | PMW3391 | 1000Hz | 18,000 | |
| Corsair M65 Pro | USB | PMW3360 | 1000Hz | 12,000 | 🍟🖱️ |
| Corsair M65 RGB Elite | USB | PMW3391 | 1000Hz | 18,000 | |
| Glorious Race Model O | USB | PMW3360 | 1000Hz | 12,000 | |
| Logitech G Pro | USB | HERO 25K | 1000Hz | 25,600 | |
| Logitech G Pro Ultralight | USB | HERO 25K | 1000Hz | 25,600 | |
| Logitech G403 | Wireless | HERO 25K | 1000Hz | 25,600 | 🍟🍏 |
| Logitech G502 Proteus | USB | PMW3366 | 1000Hz | 12,000 | 🍏 |
| Logitech G502 Lightspeed | USB | HERO 16K | 1000Hz | 16,000 | 🍏 |
| Logitech G502 Hero | USB | HERO 16K | 1000Hz | 16,000 | 🍏 |
| Logitech G703 Lightspeed | USB | HERO 25K | 1000Hz | 25,600 | 🍟 |
| Razer Deathadder Chroma | USB | ADNS-3988 | 1000Hz | 10,000 | |
| Razer Deathadder Elite | USB | PMW3390 | 1000Hz | 16,000 | 🍋 |
| Razer Deathadder Essential | USB | PMW3327 | 1000Hz | 6,400 | 🍿 |
| Razer Mamba | USB | PMW3389 | 1000Hz | 5,600 | |
| Razer Naga Pro | USB | Focus+ | 1000Hz | 20,000 | 🍺 |
| Razer Naga Pro | Wireless | Focus+ | 1000Hz | 20,000 | 🍺 |
| Razer Naga Trinity | USB | PMW3389 | 1000Hz | 16,000 | 🍉 |
| Razer Viper Ultimate | USB | Focus+ | 8000Hz | 20,000 | |
| Redragon M612 | USB | PAW 3104 | 1000Hz | 8,000 | |
| SteelSeries Rival 500 | USB | PMW3360 | 1000Hz | 16,000 | 🖱️ |
| SteelSeries Rival 600 | USB | TruMove 3 | 1000Hz | 12,000 | |
| UTechSmart Venus Pro RGB | USB | PWM3335 | 1000Hz | 16,000 | |
🍟 Requires the USB wireless dongle supplied with the mouse. Bluetooth not supported.
🍏 All extra buttons must be mapped to keyboard keys using [Logitech G-Hub Software](https://www.logitechg.com/en-us/innovation/g-hub.html).
🍺 All extra buttons must be mapped to keyboard keys using [Razer Mouse Utility](https://mysupport.razer.com/app/answers/detail/a_id/3260/~/razer-naga-pro-%7C-rz01-03420-support-%26-faqs).
🍋 No onboard memory profile. DPI up/down: 450, 900, 1800 *(default)* and 3500dpi.
🍿 No onboard memory profile. DPI up/down: 400, 800, 1600 *(default)*, 3200 & 6400dpi.
🍉 Supports the 2-button config. The 7 and 12-button configs require key binding with [Synapse 3
](https://www.razer.com/synapse-3)🖱️Mice with the PMW3360 Sensor are reported to have smoothing over 2000dpi. Experiment with lower values if you have any issues.
# Supported Keyboards
***
This is a list of keyboards that users have reported to be working. Cronus Zen is designed to detect almost any device that conforms to a standard USB interface, so if your keyboard is not listed here, it doesn't mean it does not work, only that it hasn't been tested and reported back to us yet. If you have a keyboard that is not listed here and it works with your Zen, let us know so we can update the list 👍
:::hint{type="info"}
While it is our goal to add support for as many of the most popular gaming Keyboards as possible, there will always be models that do not function correctly, or at all. These usually require custom drivers and will be updated in a future firmware release if support is possible. *If you have an unsupported keyboard, let us know.*
:::
**Note:** Connecting an unsupported keyboard may cause an [E3 Error Code](docId:-MNg8vXAlWo3m3CIRbyN5).
| Model | Key |
| --------------------- | --- |
| Corsair K30 | 🍊 |
| Corsair K40 | 🍊 |
| Corsair K50 | 🍊 |
| Corsair K55 | 🍊 |
| Corsair K60 | 🍊 |
| Corsair Hyper X | 🍊 |
| Corsair K65 | 🍊⛔ |
| Corsair K68 | 🍊⛔ |
| Corsair K70 | 🍊⛔ |
| Corsair K90 | 🍊⛔ |
| Corsair K95 | 🍊⛔ |
| Corsair K100 | 🍊⛔ |
| Corsair Strafe | 🍎 |
| FNATIC STREAK65 RGB | 🍊 |
| HyperX Alloy Core RGB | |
| Logitech G213 | |
| Logitech G413 | |
| Logitech G512 | 🍉 |
| Logitech G713 | |
| Logitech G815 | 🍉 |
| Logitech G915 | ⛔ |
| Logitech G Pro | ⛔ |
| Razer Orbweaver | |
| Razer Ornata Chroma | |
| Razer Tartarus V2 | |
| Redragon K5 Range | 🍒 |
| Redragon K6 Range | 🍒 |
| Steelseries Apex Pro | |
**Key**
⛔ Some firmware versions do not detect correctly. Let us know if yours works.
🍊 Keyboard must be in BIOS mode or it will not detect (Move Switch to 'BIOS')
🍎 Keyboard must be in BIOS mode on every startup (Hold F1 + Windows Lock Key for 5 secs)
🍉 This keyboard has two USB cables. If not using the MK Switch, connect the cable with the Keyboard logo.
🍒 Keyboard also outputs as a Mouse. It must be added to the ignore list.
# Corsair BIOS Mode
***
Most Corsair keyboards have a BIOS mode which needs to be enabled for it to be detected by Cronus Zen.
If your CORSAIR keyboard has a Windows lock key, it will be located at the upper part of your keyboard and can be identified by its lock symbol. See the image of the K70 RGB keyboard below for an example of where to find the Windows lock key.

:::hint{type="danger"}
**Enter BIOS mode**
For most Corsair keyboards, you can follow the steps below to enter BIOS mode. First, make sure they are all updated to the latest firmware *(if applicable)*.
If your keyboard has a Windows lock key:
1. Hold down the Windows lock key and the F1 key at the same time.
2. Wait 5 seconds.
3. Release the Windows lock key and the F1 key.
If your keyboard does not have a Windows lock key:
1. Unplug your keyboard.
2. Hold down the S key and the B key at the same time.
3. Plug in your keyboard while still holding the S and B keys.
4. Release the S and B keys.
If you have a K100 or a K95 that has been updated to the latest firmware:
1. Make sure your keyboard is currently unplugged.
2. Hold down the B and S keys on your keyboard.
3. Plug in the keyboard while holding down the B and S keys.
If you have a K70:
1. Make sure your keyboard is currently unplugged.
2. Hold down the ESC key on your keyboard.
3. Plug in the keyboard while holding down the ESC key.
Some Corsair keyboards have a switch located on the rear left or rear right of the keyboard that can be used to place a keyboard into BIOS mode.
:::
[title] Racing Wheels
[path] SUPPORTED DEVICES/
Breathe new life into your old racing wheel with Cronus Zen. Now supporting a range of awesome, but forgotten wheels from Logitech® and Fanatec®, fully functional on a PlayStation® 4 with full Force Feedback, Pedals, Brakes, Clutch, and Shifter support for the latest SIM Racers!
:::hint{type="success"}
**LOGITECH**®**...**
*"Unfortunately, our existing Logitech G wheels don’t work with next-generation systems. This is often a side effect of a new platform launch."*
**CRONUS...**
*"Nope."*
:::

This is the complete list of Logitech® and Fanatec® Wheels that are supported by Cronus Zen's Wheel Mode, including full Force Feedback support.
- Fanatec® ClubSport Wheel Base v1
- Fanatec® ClubSport Wheel Base v1.5
- Fanatec® ClubSport Wheel Base v2
- Fanatec® CSR
- Fanatec® CSR Elite
- Fanatec® Porsche 911 GT2
- Fanatec® Porsche 911 GT3
- Fanatec® Porsche 911 GT3 R
- Fanatec® Porsche 911 GT3 RS v2
- Fanatec® Porsche 911 Turbo
- Fanatec® Porsche 911 Turbo S
- Logitech® Driving Force GT
- Logitech® G25
- Logitech® G27
# How To Setup
***
Zen's Wheel Mode has been tested working with the vast majority of SIM Racers that support racing wheels on the PlayStation®, such as Gran Turismo, Assetto Corsa, F1, GRID Legends, and WRC.
::::WorkflowBlock
:::WorkflowBlockItem
Connect Zen to your PC using the PROG USB cable and open Zen Studio

:::
:::WorkflowBlockItem
Select **Tools > Zen Operational Mode** and select **Wheel Mode**. You can disconnect Zen from your PC, but don't connect it to your PlayStation® yet.

:::
:::WorkflowBlockItem
Depending which PlayStation® you are using, connect the '**AUTH**' controller *(DualSense*®* or DualShock4*®*)* to Zen's `A1` USB port. This must always be connected to Cronus Zen while the **RACING WHEEL** is in use.
:::
:::WorkflowBlockItem
Connect the **RACING WHEEL** to Zen's `A3` USB port. If the wheel has it's own power supply like the Logitech G27, that must also be connected to the wheel along with any accessories it came with, such as brakes, clutch, shifter etc.
:::
:::WorkflowBlockItem
Plug your Cronus Zen into a PS5/PS4 console using the `CONSOLE/PC` USB port.
**Danger:**** Always keep your distance from the wheel while it is calibrating as it may cause damage to the wheel and/or serious injury to yourself.**
:::
:::WorkflowBlockItem
Make sure both the AUTH controller and Racing Wheel are powered on, then tap Zen's blue reset button.
Having trouble syncing? Don't fret. Simply unplug the **AUTH** controller from the `A1` port and plug it back in. That usually does the trick.
:::
:::WorkflowBlockItem
You are now free to play most SIM racing games on your PlayStation®. 👌🏁
:::
::::
# IMPORTANT NOTES
***
**Fanatec**®** Notes:** Must be switched to PS3 mode with DC power supply connected. See the [Fanatec PS3 Mode](docId\:i74HMDnFmBeSDeUxZC41m) page for detailed instructions.
**Logitech**®** G25 Notes:** The wheel must be switched to PS3 mode with the DC power supply connected. To change between six-speed and sequential mode, push straight down on shift knob and turn Mode Selection Dial so the red arrow points to the desired symbol. In sequential mode, the Sequential Mode Status Light will be on. In six-speed mode, the light will be off - [Instructions PDF
](https://www.logitech.com/assets/47297/g25-racing-wheel-qsg.pdf)**Logitech**®** G27 Notes:** The wheel must be switched to PS3 mode with the DC power supply connected - [Instructions PDF](https://www.logitech.com/assets/47059/g27-racing-wheel-quickstart-guide.pdf)
**Logitech**®** G29 Notes:** Works on a PS5 without using Zen *(PS4 version of GT7 works 100%)* The wheel must be switched to PS4 mode with the DC power supply connected - [Instructions PDF](https://www.logitech.com/assets/53755/3/g29-driving-force-racing-wheel.pdf)
**Logitech Gaming Software:** [Download](https://support.logi.com/hc/en-us/articles/360024699674--Downloads-G27-Racing-Wheel)****
::::hint{type="info"}
# DRIVE HUB
Please note there will be no further updates to Zen's Wheel mode *(final update was Jan 2020)* as there simply isn't enough space to handle the huge list of different brands of wheels, brakes, shifters and clutches, with support for both PlayStation® and Xbox® and dozens of games across multiple platforms.
If you require more advanced support for newer games, and a much larger range of wheels, clutches, brakes, and shifters, as well as support for both the **PlayStation**®** 5** and **XBOX**®** Series X/S** - we invite you to check out our dedicated Racing Wheel product, the [Drive Hub](https://cronus.shop/collections/drive-hub/products/drive-hub)** 🛒 **which has been [GTPlanet's favorite wheel adapter since 2017](https://www.gtplanet.net/drivehub-allows-use-almost-driving-wheel-console/)!
:::BlockQuote
Use coupon code **GIVEME10** for a 10% discount!
:::
::::
[title] Apple®
[path] SUPPORTED DEVICES/
Cronus Zen allows you to enjoy your favorite games across multiple Apple platforms using any controller, with any M.O.D. Whether it's on an iPad, iPhone, or a MacBook, Cronus Zen ensures you can dive into your preferred gaming worlds without being tethered to a single device type.
# Controller Setup
***
:::::WorkflowBlock
:::WorkflowBlockItem
Connect your Cronus Zen to a Windows® computer `PROG USB`.
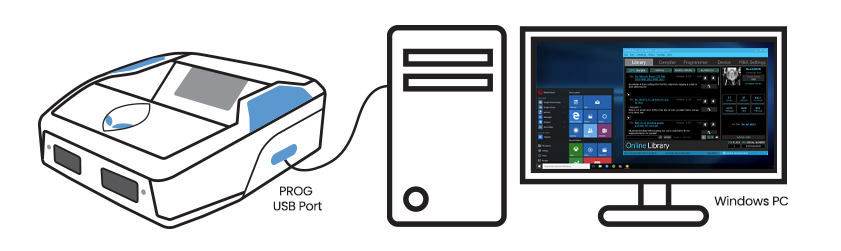
:::
::::WorkflowBlockItem
Open Zen Studio , select the Device panel and enable PS Remote Play. You can now disconnect the `PROG USB`.
:::hint{type="info"}
You're not actually using PS Remote Play. It has another function that ensures any controller you connect to your Apple device will detect as an original DUALSHOCK4®
:::
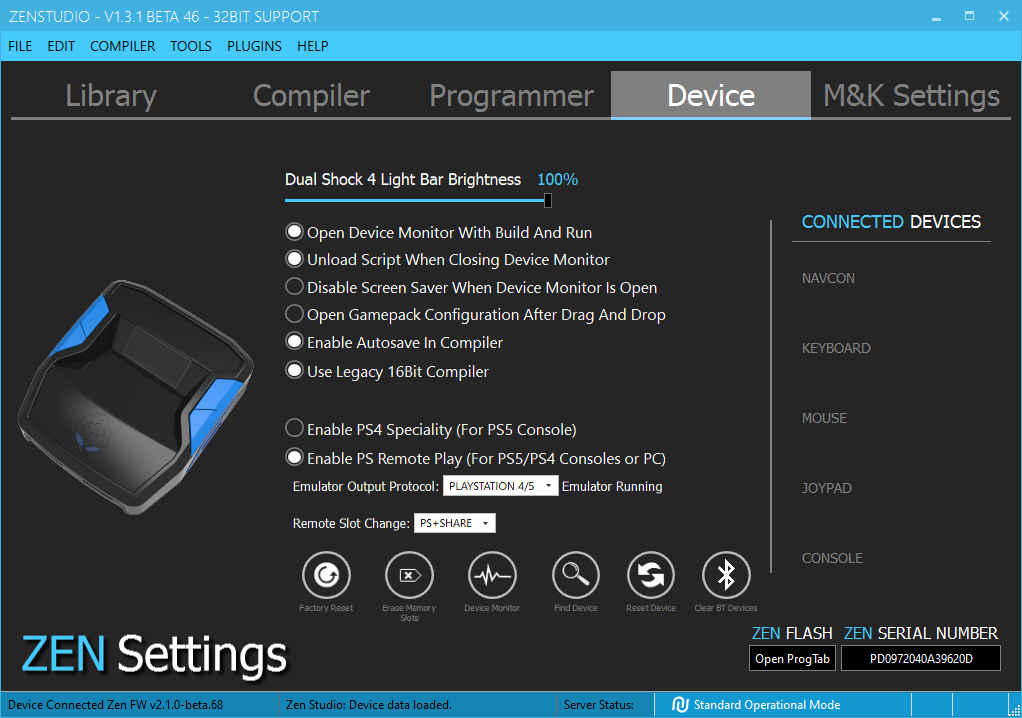
::::
:::WorkflowBlockItem
Connect your Cronus Zen to any supported Apple device `CONSOLE/PC USB`. You will need a special [Lightning Adapter](https://cronus.shop).
:::
:::WorkflowBlockItem
🚫 **IMPORTANT:** Make sure the Zen is powered on then **wait 10 seconds** 🕑 before connecting a controller.
:::
:::WorkflowBlockItem
After 10 seconds, connect any supported controller to the Zen `A3 USB`.
**Note:** If you're using a wireless controller, make sure it is fully charged as it will not charge from the Apple device.

:::
:::::
# Running Zen Studio on a Mac
***
Zen Studio is built exclusively for Windows operating systems, so we can't offer "official" support for Mac users. Yet, we value the Mac community and, based on customer insights, have crafted this unofficial guide to show you how to dual boot both MacOS and Windows on your Mac device.
:::hint{type="success"}
If your Mac is using an earlier version of any Mac operating system, you should [install the latest Apple software updates](https://support.apple.com/en-us/HT201260), which can include important [security updates](https://support.apple.com/en-us/HT201222), as well as updates for Boot Camp.
To download macOS software updates, select the **Apple menu** 🍏 in the upper-left corner of your screen > **System Preferences** > **Software Update...**

:::
# Mac's That Support Zen Studio
***
If your Mac was released before 2020 and has the Intel processor, then you should use the built-in [Boot Camp](https://support.apple.com/guide/bootcamp-assistant/welcome/mac) method.
If it was released after 2020 and has Apple Silicon (the [Apple M1](https://en.wikipedia.org/wiki/Apple_M1) & [Apple M2](https://en.wikipedia.org/wiki/Apple_M2) family of processors), use Parallels VMWare Fusion 2023 (👉 [Free Trial](https://customerconnect.vmware.com/downloads/get-download?downloadGroup=FUS-TP2023)).
:::hint{type="success"}
During testing, we discovered that Macs built after 2017 don't supply sufficient USB power to the Zen, or to any of its connected controllers.
The solution? Use a **powered USB hub**. We recommend the [Cronus MK Switch](https://cronus.shop/collections/cronus-zen/products/cronus-mk-switch), which conveniently features a 5v AUX power port.
:::
Your Mac provides several tools to help you identify it. The simplest is **About This Mac**, available by choosing **About This Mac** from the Apple menu 🍏 in the upper-left corner of your screen. The other is the [System Information](https://support.apple.com/en-us/HT201581) app.
We've put together this handy list to make it easier to detect which version you have.
## Boot Camp Supported (Intel)
- **iMac** (20", Early 2009) to iMac (Retina 5K, 27", 2020)
Official Link: [Identify your iMac model](https://support.apple.com/en-us/HT201634)
- **MacBook Air** (Mid 2009) to MacBook Air (Retina, 13", 2020)
Official Link: [Identify your MacBook Air model](https://support.apple.com/en-us/HT201862)
- **MacBook Pro** (15", Early 2008) to MacBook Pro (13", 2020, Two Thunderbolt 3 ports)
Official Link: [Identify your MacBook Pro model](https://support.apple.com/en-us/HT201300)
- **Mac mini **(Early 2009) to Mac mini (2018)
Official Link: [Identify your Mac mini model](https://support.apple.com/en-us/HT201894)
- **Mac Pro **(Early 2009) to Mac Pro (2019)
Official Link: [Identify your Mac Pro model](https://support.apple.com/en-us/HT202888)
## Parallels Supported (M1/M2)
- **iMac** (24", M1, 2021) to iMac (24", M1, 2021)
Official Link: [Identify your iMac model](https://support.apple.com/en-us/HT201634)
- **MacBook Air** (M1, 2020) to MacBook Air (15", M2, 2023)
Official Link: [Identify your MacBook Air model](https://support.apple.com/en-us/HT201862)
- **MacBook Pro** (13", M1, 2020) to MacBook Pro (14", 2023)
Official Link: [Identify your MacBook Pro model](https://support.apple.com/en-us/HT201300)
- **Mac mini **(Early 2020) to Mac mini (2023)
Official Link: [Identify your Mac mini model](https://support.apple.com/en-us/HT201894)
- **Mac Pro **(Rack, 2023) to Mac Pro (2023)
Official Link: [Identify your Mac Pro model](https://support.apple.com/en-us/HT202888)
## Supported macOS Version
| **macOS Codename** | **Version** |
| ------------------ | ----------- |
| macOS Sonoma | 14.0 |
| macOS Ventura | 13.0 |
| macOS Monterey | 12.6 |
| macOS Big Sur | 11.7 |
| macOS Catalina | 10.15.7 |
| macOS Mojave | 10.14.6 |
| macOS High Sierra | 10.13.6 |
| macOS Sierra | 10.12.6 |
| OS X El Capitan | 10.11.6 |
# Download Windows
***
Here are the various links you can use to grab a free trial copy of Windows 11 or 10.
Official Microsoft Windows 11: [Free Trial](https://www.microsoft.com/en-us/software-download/windows11)
Official Microsoft Windows 10: [Free Trial](https://www.microsoft.com/en-us/software-download/windows10)
Non-Official Windows 11 Insider Preview: [Free Trial](https://quickfever.com/windows-11-insider-preview-download/)
# Boot Camp
***
How to install Windows 11 or 10 on your Intel Mac with Boot Camp.
Official Apple Guide: [Click here
](https://support.apple.com/en-us/HT201468)Windows 11 on Mac (Boot Camp): [Click here](https://iboysoft.com/howto/install-windows-11-on-mac.html)[
](https://support.apple.com/en-us/HT201468)Windows 10 on Mac (Boot Camp): [Click here
](https://iboysoft.com/howto/install-windows-on-mac.html)Windows 10 on Mac (Boot Camp): [Click here](https://www.howtogeek.com/186907/how-to-install-windows-on-a-mac-with-boot-camp/)
::embed[]{url="https://www.youtube.com/watch?v=Lj0iwLyVpzI"}
::embed[]{url="https://www.youtube.com/watch?v=_z_vpjIg_yg"}
::embed[]{url="https://youtu.be/Hmm9Q-T0oTo"}
# Parallels
***
How to install Windows 11 on your Apple Silicon Mac (M1/M2) with Parallels...
::embed[]{url="https://www.youtube.com/watch?v=cygsGM5sNJo"}
::embed[]{url="https://www.youtube.com/watch?v=za2CyrxKYFs"}
1. Download the [free trial](https://customerconnect.vmware.com/downloads/get-download?downloadGroup=FUS-TP2023) from the official Parallels website.
2. Grant the necessary permissions and wait for the installation to complete.
3. Click on Install Windows when it asks to begin downloading.
4. When the Windows 11 ISO download completes, follow the on-screen instructions to complete the installation within a few minutes.
:::hint{type="info"}
If you are using VMWARE Parallels and get the Unknown Device error, click the Parallels icon (top right of the screen) then go to Devices > USB & Bluetooth > Cronus Bridge. That will disconnect the `PROG` port from Parallels.
Go back to **Devices** > **USB & Bluetooth** > **Cronus Bridge**. You will see a checkmark next to "Cronus Bridge" and the Zen should now detect correctly.
This has been tested with both Sonoma and Ventura *(Last tested October 13 2023).*
Windows 11 on Mac (Parallels): [Click here](https://9to5mac.com/2023/04/14/how-to-install-windows-11-apple-silicon-mac-free-vmware-fusion-player-13-video/)
Windows 10 on Mac (Parallels): [Click here](https://www.howtogeek.com/869687/how-to-run-windows-on-a-mac/)

:::
# UTM
***
Another alternative is UTM, a QEMU-based emulator and virtualizer is a free app that simplifies running Windows 11 on Apple Silicon-based Macs (M1/M2) absolutely free, offering near-native speeds due to the shared processor architecture.
This works on any Mac that uses a processor with an M in the model name, like M1, M1 Max, M2, and so on. You can find out which kind of Mac you have using Apple > About This Mac.
This method is untested with Zen Studio - let us know if it works.
[https://www.howtogeek.com/how-to-run-windows-on-your-mac-for-free](https://www.howtogeek.com/how-to-run-windows-on-your-mac-for-free)
[title] Fanatec PS3 Mode
[path] WHEEL MODE/
How to activate PS3 Mode on all supported Fanatec Wheels.
:::hint{type="danger"}
The Fanatec wheels listed on this page have to be in **PS3 Mode** before it can work with Zen's Wheel Mode with full force feedback support.
:::
## How to get CSR / CSR Elite Wheels into PS3 Mode
***
1. Connect Cronus Zen to PS4/PS5
2. Connect a USB cable to the Cronus Zen and to the connector on the left side of the wheel.
3. After the self-calibration enter the PC mode by pressing Back Button for one second. "- - -" will disappear on the display
4. Press Connect Button and Back Button simultaneously. A dot in the display indicates the PS3 mode.
5. The Wheel is now in PS3 Mode. Unplug it from the Cronus Zen - make sure the wheel remains powered.
## How to get 911 Turbo S Wheels into PS3 Mode
***
(No RF Dongle - Latest Fanatec Firmware)
1. Connect Cronus Zen to PS4/PS5
2. Connect a USB cable to the Cronus Zen and to the connector on the left side of the wheel.
3. After the self-calibration enter the PC mode by pressing Back Button for one second. There will be no wheel button illumination.
4. Press Connect Button, and Back Button simultaneously. Wheel button illumination shows the PlayStation symbol.
5. The Wheel is now in PS3 Mode. Unplug it from the Cronus Zen - make sure the wheel remains powered.
## How to get 911 GT2 Wheels into PS3 Mode
1. Connect Cronus Zen to PS4/PS5
2.
3.
4. Press Connect Button and Back Button simultaneously. Wheel button illumination shows PlayStation symbols
5. The Wheel is now in PS3 Mode. Unplug it from the Cronus Zen - make sure the wheel remains powered.
## How to get 911 GT3 RS/RS V2 Wheels into PS3 Mode
***
1. Connect Cronus Zen to PS4/PS5
2. Connect the wheels USB cable to the Cronus Zen.
3. After the self-calibration press the Base Button and Select Button simultaneously.
4. The Wheel is now in PS3 Mode. Unplug it from the Cronus Zen - make sure the wheel remains powered.
## How to get a ClubSport Wheel Base into PS3 Mode
***
1. Connect Everything as per the instructions while the PS4/PS5 is powered off.
2. Power on the CSW.
3. Power on the PS4/PS5. Wait until you're at the PS4/PS5 Main Menu and the wheel is calibrated.
4.
Universal Hub: Press the Select Button and Circle Button simultaneously right after auto calibration of the ClubSport Wheel Base is completed. The tuning display of your Universal Hub shows a red dot when PS3 mode is active.

:::hint{type="success"}
With the Cronus Zen you will be able to navigate game menus using your Fanatec Wheel (which you could not do with some games before). The PS4 Home Button is L3 + R3. The PS4 Share Button is the bottom left Black Button on your Rim.
:::
:::hint{type="info"}
If you use a regular Fanatec Steering Wheel like the BMW M3 GT2, the Formula Black or Formula Carbon, or the Porsche 918 RSR you must press the buttons **Select (9) + Horn (22)** or **Select (9) + Circle (3)** simultaneously right after auto calibration of the ClubSport Wheel Base is completed.
:::
:::hint{type="danger"}
# ⛔ HAZARD
When FFB initialization and auto calibration is in progress, never touch the wheel in order to avoid injuries or incorrect calibration.
:::
For different methods and solutions for Fanatec PS3 Mode see 👉 [this topic in the Cronus forums](https://www.cronusmax.com/forums/showthread.php/159019-Getting-your-Fanatec-Wheel-into-PS3-Mode)
[title] Edit, Search, Replace
[path] ZEN STUDIO/
The Zen Studio Compiler supports all standard editor operations such as Undo, Redo, Cut, Copy, Paste, Find/Replace, Delete, and more.

# Indentation
Indenting text is fully supported by the GPC Editor. Indentation is the addition of extra white space at the start of a line to separate blocks of text, adding a hierarchy. When editing, pressing the Tab key will insert a white space starting from the cursor's location on a single line, or select multiple lines, and pressing the Tab key will add additional white space at the beginning of each line within the selection, allowing you to indent entire blocks of text at once. Pressing Shift-TAB will remove the indentation.
# Overtype

You can enable and disable overtyping (that is, instead of inserting characters at the cursor, you replace them) by pressing the Insert key of your keyboard. The rightmost section of the statusbar will indicate the current mode: INS for inserting characters, OVR for overwriting them (overtype). The displayed cursor will also change shape accordingly.
# Selecting Text
Selected text can be moved to another part of the same document, copied elsewhere in the same or another document, searched for text, deleted, and more. When using the mouse, the most basic way is to drag the mouse from a start point to an end point. You can also double click a word to select it, or triple-click on a line to select it, or simply click on the line number margin.
You can extend a selection by Shift-clicking its new insertion point while using navigation keys in conjunction with the SHIFT key to either expand or reduce the selection by a single space or by entire lines.
To select a rectangle, use the above methods while also holding the ALT key down. For example, use a mouse to Alt-click the start point and Alt-move the mouse to the end point while holding down the left button.

# Edit Menu
Easily perform the various editor operations by selecting the corresponding menu item from the Edit Menu, or by using the keyboard shortcuts associated with each option. Additionally, these operations and more are also available in the context menu by clicking the right mouse button inside the editor window.
## Undo
Each time undo is used the last input in a script will be undone. This can be a single letter, number, or if the text was pasted. Undo can be repeatedly done until the script is at the original script from when it was loaded. To Undo simply select **Edit 👉 Undo** (CTRL + Z).
## Redo
This command is used to reverse an Undo action. To Redo simply select **Edit 👉 Redo** (CTRL + Y).
## Cut
Cut will remove highlighted text which can be pasted later into a script. To Cut simply select **Edit 👉 Cut** (CTRL + X).
## Copy
Copy will take highlighted the text and allow it to be pasted later. The difference is when using copy the text will not be removed and may be repeatedly pasted. To Copy simply select **Edit 👉 Copy** (CTRL + C).
## Paste
Text that was copied or cut will be inserted when the paste command is used. To Paste simply select **Edit 👉 Paste** (CTRL + V).
## Select All
All text in the current window will be highlighted which can then be cut, copied, or deleted. To Select All simply select **Edit 👉Select All** (CTRL + A).
## Find/Replace...
::Image[]{src="https://archbee-image-uploads.s3.amazonaws.com/IwUlH55FdaPsVELSqm1Fc/_Jbu7hg_uu3KnaUWEfsJd_image.png" size="44" width="350" height="180" position="flex-start" showCaption="false"}
A very useful command for locating or replacing text. To Find or Replace text simply select **Edit 👉 Find/Replace** (CTRL + F).
## Go to Line/Column...
::Image[]{src="https://archbee-image-uploads.s3.amazonaws.com/IwUlH55FdaPsVELSqm1Fc/rk16ALSmEK53Y_yZTuqGZ_image.png" size="84" width="350" height="130" position="flex-start" showCaption="false"}
Zen Scripts can become 4000+ lines long. Go directly to any line within a script. Jump to any line or column by simply selecting **Edit 👉 Go to Line/Column...** (CTRL + G).
[title] Hard Reset
[path] TROUBLESHOOTING/
A hard reset will sweep your device clean, reverting all settings back to their original, out-of-the-box state. So, before you start, it's crucial to be mindful of the following when recovering from an error:
- **Protect Your MK Profiles:** Ensure that all MK profiles are securely backed up, to avoid losing any of your tailored settings.
- **Script Safeguarding**: Unfortunately, scripts cannot be backed up directly. Ensure that you retain a separate copy of any script you've been utilizing to avoid any potential gaming disruptions.
# Hard Reset
***
This only takes a few seconds, and you only need to do it once. As long as you see those **RED**, **GREEN**, and **BLUE** light up, you're golden. 🚀
::::WorkflowBlock
:::WorkflowBlockItem
Start with nothing connected to the Zen. Press and hold down both `P1` and `P2` buttons together *(the two large blue buttons either side of the OLED screen)* - don't let go!
:::
:::WorkflowBlockItem
While holding down both the buttons, plug your Cronus Zen into a console or pc using the `CONSOLE/PC` USB port.

:::
:::WorkflowBlockItem
Keep pressing the `P1` and `P2` buttons for a minimum of 4 seconds. Wait for the Zen RGB LEDs to flash in a sequence: **RED**, **GREEN**, and **BLUE**.
If successful, the Collective Minds gear head logo will display on the Zen OLED Message Screen.
:::
::::

:::hint{type="danger"}
# Still Not Working? 😲
If your Zen's is still showing a blank or corrupt OLED, the RGB's are not working, or it's flat out refusing to reset, that’s a huge bummer because it sounds like it’s developed a fault. **DON'T PANIC!**
**Warranty Wonders:** Bought directly from [cronus.shop](https://cronus.shop)? The warranty is between 90 days and 1 year depending on the package you purchased. But if you snagged yours from another store like GameStop, you might have a 30-day warranty. Sweet deal if you've just unboxed. Within 30 days? You're set for a new replacement or a refund, whichever you prefer.
:::
[title] MAX Mapper
[path] ZEN STUDIO/Plugins/
Easily remap any buttons, analog sticks, or sensors to accurately customize the controller layout for any game, as well as advanced sensitivity adjustments for any button.
The MAX Mapper plugin enables you to easily remap any buttons, analog sticks, or sensors to accurately customize the controller layout for any game, as well as sensitivity adjustments for any button and advanced sensitivity adjustments for analog sticks.
The plugin can generate GPC scripts based on any profile created, allowing the user to extend its functionalities by manually programming extra features. You can create and maintain an unlimited number of 'Remapper Profiles', which are a specific set of remaps and sensitivity adjustments. All created profiles are made available in Zen Studio's **Programmer **panel, which can then be programmed to any Cronus Zen memory slot with a simple drag-and-drop.

# Managing Profiles
***
A profile is a data structured arrangement that describes a specific set of remaps and sensitivity adjustments. The MAX Mapper plugin supports the creation and maintenance of an unlimited number of profiles. The profiles can be shared, or backed up, through the Export/Import operations.
While the MAX Mapper plugin is running, all changes made in the profile configuration area take effect instantly. This allows you to check and test all remaps and sensitivity adjustments on-the-fly before you actually store the profile in a Cronus Zen memory slot. To perform the tests keep a controller connected to your Cronus Zen, the output (remapping results) can be checked during gameplay or in the Device Monitor.

# Profile Menu

The Profile menu contains two commands as follows:
- Create a brand new profile, with the default remapping settings. A dialog box will pop up to enter the profile name.
- Import a Max Mapper profile file, the imported profile may need to be renamed if the original name is being used by another profile. The Export combined with the import operation can be used to clone a profile since the basic configuration is already done.
# Active Remap

This combo box lists all profiles you created in the MAX Mapper plugin and it is used to select a profile you want to configure. The active profile is also to generate GPC scripts, export, rename and delete operations.
# Input
::Image[]{src="https://archbee-image-uploads.s3.amazonaws.com/IwUlH55FdaPsVELSqm1Fc/VO3w8TNw6QFJ15GiO3Emh_image.png" size="96" width="95" height="43" position="flex-start" showCaption="false"}
This box allows you to select the controller input in the MAX Mapper plugin, which the input controller you can select are **Playstation 4, Xbox One, Playstation 3, Xbox 360, and Switch Joy-Cons**.
**NOTE:** If using a PS5, select PlayStation 4, and if you are using an Xbox Series X|S, select Xbox One.
# Output

This box allows you to select the console output in the MAX Mapper plugin, which the input consoles you can select are **Playstation 4, Xbox One, Playstation 3, Xbox 360, and Switch**.
# Profile Operations

This is a set of tools and operations for the configuration of the active MAX Mapper profile, as described below:
- This operation generates a GPC script based on the active profile. The GPC script is exported into Cronus Zen source code editor, where it can be edited and saved as a regular GPC script file.
- Profile exporting enables you to share profiles with your friends and have a backup copy. The export combined with the import operation can be used to clone a profile, this may help with the creation of a new profile since the basic configuration is already done.
- This shows a dialog box to rename the active profile.
- Delete the currently active profile. A warning message will show to confirm the deletion. This operation cannot be reversed once it has been done.
# Mapping

When you click on the **Mapping** Icon it maps the input button to any output button you would like it to be.
:::hint{type="danger"}
**Warning:** Xbox One Elite v1 Paddles can be re-mapped independently from the face buttons. This feature is not available with the Xbox Elite S2 controller.
The GPC identifiers for the Elite v1 paddles are shown here:

**Note:** Other controllers that have paddles such as Scuf can be re-mapped using GPC script but not independently from the face buttons.
:::
# Sticks
::Image[]{src="https://archbee-image-uploads.s3.amazonaws.com/IwUlH55FdaPsVELSqm1Fc/-pZgTKORriuqIwhc-87uN_image.png" size="44" width="378" height="499" position="flex-start" showCaption="false"}
When you click on **Sticks **it will allow you to adjust and set your Left Stick and Right Stick **Size, X & Y Sensitivity, X & Y Deadzone, X & Y Midpoint.**
- Sets how sensitive the horizontal (left or right) will be with the stick.
- Sets how sensitive the Vertical (up or down) will be with the stick.
- Is the area around the center of a joystick that does not respond to movement. It is designed to cut down on accidental movement caused by "jitter". All joysticks have at least a small degree of "jitter" when centered. The deadzone adjustment is intended to cancel out this jitter by making the console completely ignore any input from the stick that falls within the deadzone.
- Invert the direction of the analog stick axis. If activated, pushing the stick UP will result in a DOWN value. The same applies to the X axis if invert is activated, pushing the stick LEFT will result in a RIGHT value.
- Sets the midpoint value of the controller entry. The default value is 50%. By changing this value, you are setting two sensitivity ranges. With a value lower than 50% a high sensitivity range is created closer to the rest position and a low sensitivity range when far from the rest position as shown in the figure below:
::Image[]{src="https://archbee-image-uploads.s3.amazonaws.com/IwUlH55FdaPsVELSqm1Fc/JRZS9pnFdWEBDNgwaemET_image.png" size="56" width="343" height="158" position="center" showCaption="false"}
If you configure this parameter with 80 you are defining a zone of low sensitivity when close to the rest position (better accuracy), and a zone of high sensitivity when far from rest position (fast movements).
- PlayStation 3 and PlayStation 4 consoles and their controllers will not let you move the analog stick to the X and Y axis of a full square when diagonal, it only moves in circles, regardless of how you are moving the stick. However, with an Xbox you can have both X and Y axis fully register a square shape (+100 /-100) despite the stick being circular.
The Stick size option converts the values of the Wiimote IR sensor (or mouse) to match the circle area of the analog stick (essentially adding an outside deadzone). The possible values of the analog sticks are usually confined to the area of a circle, being impossible to reach the maximum values in the diagonals. In this case, the stick size setting can be adjusted to cancel this effect, enabling access to the full X and Y access and essentially erasing any deadzone. The behavior of some mice/games react differently to this of course. You may find that the default max value of 142 works perfectly, whereas you may have a game that is far more responsive with a setting of 115.
We have tried to illustrate this as best as possible in the graphic below.
::Image[]{src="https://archbee-image-uploads.s3.amazonaws.com/IwUlH55FdaPsVELSqm1Fc/Pm2PQnT4vbEF2FQKQClgl_image.png" size="66" width="522" height="256" position="center" showCaption="false"}
With Xbox games, this should be left at its default value (142). For PlayStation games, the only one that we know that specifically requires this adjustment is Battlefield Bad Company 1 (PS3), however. there are reports that a value of 115-120 works well with some PS3/PS4 games. As always every mouse and game will be different, and we recommend that you keep the setting as default (142) unless you find it absolutely necessary.
# Triggers

When you click on **Triggers **it will allow you to adjust and set how sensitive your Left Trigger and Right Trigger will be.
# Profile Configuration Area

The profile configuration area is where you will configure your profile. Any configuration should start with the selections of the input and output protocols. The input represents the controller you pretend to use with this particular profile setting and the output represents the console. NOTE The controller shown in the center is actually representing the Output Protocol (Console). The entries (Controller) are available in the combo boxes around the controller picture.
# Storing Profiles to your Cronus Zen

The Cronus Zen Programmer panel gives easy access to all your MAX Mapper Profiles. Simply click on the Remapper Profiles Icon on the left of the studio to open the remapper profiles. To insert a particular profile into a Cronus Zen memory slot simply drag and drop from the list to one of the Cronus Memory Slots.
[title] USB (Non-PS5®)
[path] SETUP GUIDES/STEP 4: Controller Setup/
Everything you need to connect any supported controller to your game system using a **Cronus Zen™**
# Output Protocol
***
Before setting up your controller, you will need to use **Zen Studio** to set the **Output Protocol** of the game system you are using. This is especially important if you are using the new expansion module.
:::::WorkflowBlock{src="https://api.archbee.com/api/optimize/IwUlH55FdaPsVELSqm1Fc/EPNyhjN3UNb5irSiP8h7R_xboxxstoxboxx.png" size="100" width="841" height="300" darkWidth="841" darkHeight="300" position="center"}
:::WorkflowBlockItem
Connect **Cronus Zen™** to a **Windows® PC**: **PROG USB** and open **Zen Studio**.
![]()
:::
::::WorkflowBlockItem
Select the **Device** panel and set the **Output Protocol** to the system you are using. **Note:** Auto should also work if you are not using the expansion module.

:::hint{type="danger"}
A [Hard Reset](docId\:YYPr5YvpVLS896Z4hspfd) changes this to **AUTO**, which should still work for most setups. However if you are using the Expansion Module, you'll need to make sure it's corrected to the system you're using or it will not function correctly.
:::
| **Game System** | **Output Protocol** |
| --------------------------- | ---------------------------------------------- |
| PlayStation**®** 5 | [See PS5® Guide](docId\:GfEYdRLIZsJZUO-c7qGf4) |
| PlayStation**®** 4 | **PLAYSTATION 4** |
| Xbox**®** | **XBOX ONE X/S** |
| Nintendo**®** Switch\* | **NINTENDO SWITCH** |
The [Nintendo® Switch](docId\:Z6K65ua4BrNymolyFjo6w) must have wired communication enabled. Go to **System Settings** > **Controllers and Sensors** > **Pro Controller Wired Communication**:** On **
**NINTENDO**®** SWITCH: **If using a Switch TV Dock, make sure the 15v power supply is connected or the Zen will not power on. If you are using the Switch in Handheld mode, you'll also need an [OTG USB-C adapter](https://cronus.shop/products/usb-c-otg-adapter).
::::
:::::
# USB (Default)
***
The default USB setup pairs the same controller with the same console *(example Xbox***®*** Series controller to the Xbox***®*** Series X console).*
:::::WorkflowBlock{src="https://api.archbee.com/api/optimize/IwUlH55FdaPsVELSqm1Fc/EPNyhjN3UNb5irSiP8h7R_xboxxstoxboxx.png" size="100" width="841" height="300" darkWidth="841" darkHeight="300" position="center"}
:::WorkflowBlockItem
Connect **Cronus Zen™** to **Game System**:** CONSOLE/PC USB** *(Short USB cable)*
Connect **Controller** to **Cronus Zen™**:** A1 USB **

:::
::::WorkflowBlockItem
Power on the controller and tap Zen's small reset button. It will pair to the Zen & console in just a few seconds.
:::hint{type="info"}
**WIRED HEADSET (DEFAULT)**
If you wish to use a wired headset, first connect it directly to your controller, then connect the controller to A1, and finally connect the Zen to your console. Please understand there are a wide variety of different headsets, controllers, and consoles, so we can't guarantee audio support for every combination.
:::
::::
:::::
# USB (Crossover)
***
The crossover USB setup pairs the controller with a different console *(example DualSense***®*** controller to an Xbox***®*** Series X console).*
:::::WorkflowBlock{src="https://api.archbee.com/api/optimize/IwUlH55FdaPsVELSqm1Fc/EPNyhjN3UNb5irSiP8h7R_xboxxstoxboxx.png" size="100" width="841" height="300" darkWidth="841" darkHeight="300" position="center"}
:::WorkflowBlockItem
Connect **Cronus Zen™** to **Game System**:** CONSOLE/PC USB** *(Short USB cable)*
Connect **Default Controller** to **Cronus Zen™**:** A1 USB*** (aka AUTH controller)*
Connect **Crossover Controller** to **Cronus Zen™**:** A3 USB **

:::
::::WorkflowBlockItem
Power on the controller and tap Zen's small reset button. It will pair to the Zen & console in just a few seconds.
:::hint{type="info"}
**WIRED HEADSET (CROSSOVER)**
If you wish to use a wired headset, first connect it directly to your crossover controller, then connect the controller to A3 *(or to the AUTH controller connected to A1 if that doesn't work)*, and finally connect the Zen to your console. Please understand there are a wide variety of different headsets, controllers, and consoles, so we can't guarantee audio support for every combination.
:::
::::
:::::
[title] WHEEL MODE
[path] /
[title] Introduction
[path] WELCOME TO CRONUS/
Welcome to the ! 👋
Since 2013, Cronus has pioneered cross-platform console gaming with cutting-edge scripting and technology. is the next-generation successor, adding powerful script and macro tools, advanced PlayStation & Xbox mouse and keyboard support, and universal controller compatibility.
You're not just buying a piece of tech; you're joining a massive global community of passionate gamers, all united by the freedom to game on your own terms.

# What Does Cronus Zen Do?
***
Experience the magic of seamlessly blending different gaming platforms and peripherals. Imagine using a DUALSENSE® on an Xbox Series X/S® or mastering the PS5® with a mouse and keyboard, all with full access to the famous Cronus and .
# Controller/Console Support
***
One of the primary attractions of the is its ability to break down platform barriers. Want to use your PlayStation® controller on an Xbox®? Or maybe your Xbox® Elite controller on a PS5®? With Cronus Zen, you can.
:::hint{type="info"}
For full PS5® console support, you will need the Wi-Fi Expansion module 👉 [available at cronus.shop](https://cronus.shop/collections/cronus-zen/products/cronus-zenlink)
:::
- **All Major Platforms:** Connect any supported controller, mouse, keyboard, or racing wheel to any supported console.
- **Supported Consoles:** PS5® *(requires Zen LINK)*, PS4®, PS3®, Xbox® Series X|S, Xbox® One, Xbox®360, and the Nintendo® Switch are fully supported.
- **Supported Controllers:** All official PS5®, PS4®, PS3®, Xbox® Series X|S, Xbox® One, Xbox® 360, Nintendo® Switch, and the Nintendo® Wii controllers. Zen also supports most third-party licensed controllers.
- **Supports All Games:** The outputs as a game controller, so if a game supports controllers, then it will work.
# Mouse & Keyboard Support
***
The is well-known for its ability to provide gamers with a superior level of customization and flexibility, and one of its standout features is its support for mouse and keyboard on consoles.
- **Precision and Customization:** Players can achieve a level of precision typically reserved for PC gamers. You can adjust settings like DPI, mouse speed, and key bindings to get everything feeling just right.
- **Ballistic Curves:** Incredible control and accuracy, includes support for XIM curves.
- **MK Profiles:** Easily import/export settings for your MK setup.
- **Supported Brands:** boasts compatibility with popular gaming mice and keyboards, including brands like Logitech®, Razer®, Corsair®, and many more.
# GamePacks
***
are a free pre-configured solution built by Cronus Community experts and are ideal for both beginners and advanced users who want the latest MACROs without needing any coding knowledge.
- **Drag & Drop:** Quickly assign a GamePack to one of eight available memory slots.
- **All Games:** Cronus operates as a controller, so it doesn't matter what the game is.
- **Regular Updates:** Including new features, bug fixes, community requests and more.
- **OLED Menu:** You can set up and adjust most settings right on 's OLED screen, no computer required!

# Scripts
***
are written in an open-source code format using our GPC language *(similar to C#)*, allowing for greater flexibility for more advanced users.
- **GPC Script Engine:** All Zen users get access to a powerful script compiler.
- **GPC Library:** Access to thousands of free scripts, directly from .
- **Developer Resources:** Visit the [GPC Developers Guide](https://cronus.support/gpc) which provides a comprehensive overview of GPC syntax, data types, and functions, as well as advanced development techniques.
- **Script Support:** As scripts are created by members of the , you can speak directly to the creator of any script *(they usually provide contact information)*, or get great assistance from the Cronus Forum & Discord communities. All you need to do is register your Zen to get free access to all Cronus Community resources.

***
:::hint{type="danger"}
# Disclaimer
CronusMAX®, Cronus Zen®, and Zen LINK are trademarks of Collective Minds Gaming Co. Ltd. . All product names, logos, brands, and other trademarks, images, or videos mentioned in this manual or on the website are used solely for identification purposes and remain the property of their respective trademark holders. These trademark holders are NOT affiliated with Collective Minds Gaming Co. Ltd., and they DO NOT sponsor or endorse its products, services, or websites.
"Sony®", "PlayStation®", "PS5®", "PS4®", "PS3®", "DUALSENSE®", "DUALSHOCK®", and "PS REMOTE PLAY®" are trademarks or registered trademarks of Sony Interactive Entertainment Inc.
"Xbox®", "Xbox Series X|S®", "Xbox One®", "Xbox 360®", and "Xbox Wireless®" are trademarks or registered trademarks of Microsoft Corporation.
"Nintendo®", "Switch®", "Wii®", and "Wii U®" are trademarks or registered trademarks of Nintendo Co., Ltd.
Neither Collective Minds Gaming Company, Inc. nor Blue Ridge Electronics, LLC is affiliated with, endorsed by, or sponsored by any of the aforementioned trademark owners.
Copyright or trademark concerns should be directed to the owner or their legally authorized representative in accordance with the U.S. Copyright Act. We reserve the right to disclose infringement notices to involved parties, including the alleged infringer. For inquiries or to report concerns, please contact dmca (at) cronusmax.com
:::
[title] USB & Wireless (PS5® Console)
[path] SETUP GUIDES/STEP 4: Controller Setup/
[title] Android®
[path] SUPPORTED DEVICES/
Cronus Zen allows you to enjoy your favorite games across multiple Android platforms using any controller, with any M.O.D. Whether it's on a phone, tablet, or laptop, Cronus Zen ensures you can dive into your preferred gaming worlds without being tethered to a single device type.
:::::WorkflowBlock
:::WorkflowBlockItem
Connect your Cronus Zen to a Windows® computer `PROG USB`.

:::
::::WorkflowBlockItem
Open Zen Studio , select the Device panel and enable PS Remote Play. You can now disconnect the `PROG USB`.
:::hint{type="info"}
You're not actually using PS Remote Play. It has another function that ensures any controller you connect to your Android device will detect as an original DUALSHOCK4®
:::

::::
:::WorkflowBlockItem
Connect your Cronus Zen to any USB-C Android device `CONSOLE/PC USB`. You will need a special [USB-C OTG Adapter](https://cronus.shop/collections/cronus-zen/products/usb-c-otg-adapter).
:::
:::WorkflowBlockItem
🚫 **IMPORTANT:** Make sure the Zen is powered on then **wait 10 seconds** 🕑 before connecting a controller.
:::
:::WorkflowBlockItem
After 10 seconds, connect any supported controller to the Zen `A3 USB`.
**Note:** If you're using a wireless controller, make sure it is fully charged as it will not charge from the Android device.
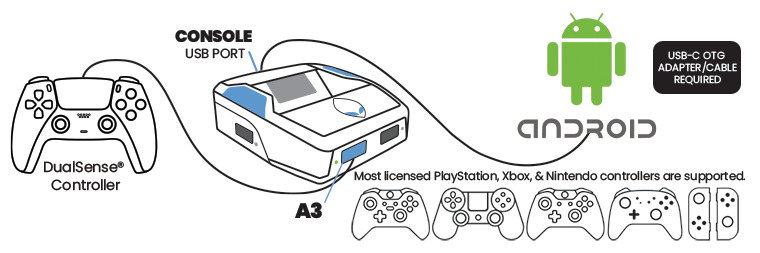
:::
:::::
:::hint{type="danger"}
Before using any GamePacks or scripts, it is important that you first test your controller in a game to ensure that your Zen is properly set up.
Incorrect GamePack configurations or bad scripts can lead to controller disconnects and other issues.
:::
[title] PlayStation® 5
[path] SUPPORTED DEVICES/
has full native PlayStation® 5 console support, including both DualSense® and DualSense® Edge controllers with full functionality when using the new **Cronus **&#xNAN;** Wi-Fi Expansion Module** ([available to purchase here](https://cronus.shop/collections/cronus-zen/products/cronus-zenlink)*)*.
# Step-by-Step Guides
***
It is important to note that your controller will disconnect from the PS5® if you are not using a Zen LINK™. There is an unofficial workaround called the PS5® Bypass and does not require the Zen LINK™, however there can't be any guarantees of its availability, features, or performance.
If you wish to have a plug-and-play solution with full native PS5® support, we highly recommend using the new [Zen LINK™ expansion module](https://cronus.shop/collections/cronus-zen/products/cronus-zenlink).
- [Full Native PS5® Native Support](docId\:GfEYdRLIZsJZUO-c7qGf4) *(Requires Zen LINK™)*
- ~~PS5~~®~~ Bypass~~ *(No Longer Supported)*
# PlayStation® 5 Consoles
***

| **PS5® Version** | **Supported** |
| ---------------------- | -------------------------------- |
| PlayStation® 5 | YES |
| PlayStation® 5 Digital | YES |
| PlayStation® 5 Pro | YES |
# DualSense® Controllers
***
All variations of the official Sony® DualSense® and DualSense® Edge controllers are compatible with Cronus Zen.

| **Controller Version** | **Supported** |
| -------------------------- | -------------------------------- |
| DualSense® (CFI-ZCT1W) | YES |
| DualSense Edge® (CFI-ZCP1) | YES |
| **DualSense**®** Functions**
**Requires Cronus ** | **Supported** |
| ---------------------------------------------------------------- | -------------------------------- |
| Rumbles & Haptic Feedback | YES |
| Adaptive Triggers | YES |
| Two Finger/Swipe Touchpad | YES |
| Gyroscope | YES |
| Wired Headset *(USB)* | YES |
| DualSense Speaker *(USB)* | YES |
| DualSense Mic *(USB)* | YES |
:::hint{type="danger"}
# Trademark Notice
All product names, logos, brands, and other trademarks, images, or videos mentioned in this manual or on the website are used solely for identification purposes and remain the property of their respective trademark holders. These trademark holders are NOT affiliated with Collective Minds Gaming Co. Ltd., and they DO NOT sponsor or endorse its products, services, or websites. The trademarks "PlayStation®", PlayStation® 5", PS5®, PSN®, DualSense® are owned by Sony Interactive Entertainment.
:::
[title] PlayStation® 3
[path] SUPPORTED DEVICES/
Cronus Zen supports all versions of the PlayStation® 3 console, including all variations of DualShock3® & PlayStation® 3 Move controllers *(USB & Bluetooth)*.
:::hint{type="success"}
Remember, when using Cronus Zen, any supported device *(controllers, mice, keyboards)* will work with your PlayStation® 3 console! 🎮🚀
:::
# PlayStation® 3 Consoles
***

| **Console Version** | **Supported** |
| ------------------------------------- | -------------------------------- |
| PlayStation® 3 (CECH-L00) | YES |
| PlayStation® 3 Slim (CECH-2000) | YES |
| PlayStation® 3 Slim (CECH-3000) | YES |
| PlayStation® 3 Super Slim (CECH-4000) | YES |
# DualShock3® Controllers
***
All special editions and variations of the official Sony DualShock3® are compatible with Cronus Zen *(both USB & Bluetooth supported)*.

| **Controller Model** | **USB** | **Bluetooth** | **Audio** |
| ----------------------------- | -------------------------------- | -------------------------------- | ------------------------------- |
| DualShock3® (SCPH-98050
) | YES | YES | NO |
| DualShock3® (CECH-ZC2) | YES | YES | NO |
# PlayStation® 3 Move Controllers
***
The **PlayStation® 3 Move Motion** *(Blue Ball Gyro)* and** Navigation** *(Analog Stick)* Controllers can either be connected to the Zen by mini-USB cable or paired using Bluetooth (Left Bluetooth channel for the Motion controller, and Right Bluetooth channel for the Navigation controller)

| **Controller Model** | **USB** | **Bluetooth** |
| ---------------------------------------------------------------------- | ------------------------------- | -------------------------------- |
| PlayStation® Move Motion (CECH-ZCM1X) | NO | YES |
| PlayStation® Move Navigation (CECH-ZCS1X) | NO | YES |
*X: U=USA, E=Europe, J=Japan*
:::hint{type="success"}
**🖱️COMBINE NAVCON WITH A MOUSE**
You can also combine just the PlayStation® Navigation Controller and a mouse for enhanced FPS gaming. The Navigation Controller facilitates smooth in-game movement, while the mouse provides precise aiming and shooting. This setup allows for comfortable, accurate, and immersive gameplay. Ensure to configure your devices properly before diving into your gaming session.
:::
# Licensed Controllers
***
The market is flooded with un-licensed PlayStation® 3 controllers. Some may work, some won't. We can only guarantee that the original DualShock3® is supported. 👍🎮
# Controller Setup
***
This guide will show you how to connect any controller to a PlayStation**®** 3 console.
First make sure your Zen is updated to . If it isn't, you'll need to visit [STEP 1: Update Firmware](docId:9U47MtFRK1z6gjIle0uv5).
OK, Let's get after it.
1. Connect the Cronus Zen to your PC using the `PROG` USB port.
2. Open Zen Studio .
3. Select the **Device** panel.
4. The **Emulator Output Protocol** must be set to **PLAYSTATION 3**.


- **DualShock3® Controller (USB Only):**
- Connect to the `A3` USB port. That's it. 😁
- **Crossover Gameplay:**
- Other devices such as non-PS3 controllers, mice, keyboards etc. use the `A3` USB port, and also the `A2` port if you need to connect two devices.
- You can also use a secondary device alongside a DualShock3® controller such as a mouse for enhanced aiming, or a keypad with dozens of assigned MACROs.
- **Crossover Note:**
- **Note:** You do not need to connect an AUTH controller to `A1`.
- **Bluetooth Pairing:**
- Tap Zen's Bluetooth pairing button (P2) for pairing mode, then...
- **DualSense****®** **Controllers:** There is currently no Bluetooth support. Use USB.
- **Xbox**®** Controllers:** There is currently no Bluetooth support. Requires [adapter](https://cronus.shop/products/xbox-one-wireless-adapter).
- **Nintendo**® **Switch**** Controllers:** Hold down sync button for pairing mode.
- **DualShock®**** Controllers:** Hold down `SHARE + PS` for pairing mode.
- **PlayStation 3 Move® Motion & Navigator Controllers (Bluetooth):**
- The PlayStation Move® Motion and Navigation Left & Right Controllers have to be paired separately to the Cronus Zen.
- **Move Motion :** Tap Zen's Bluetooth pairing button (P2) for pairing mode, hold down `SHARE + PS` for pairing mode.
- **Move Navigation :** Tap Zen's Bluetooth pairing button again, Hold down `SHARE + PS` for pairing mode. That's it. 😁
- **Wireless Adapters:**
- To achieve wireless support for Xbox controllers, the [Xbox Wireless Adapter is required](https://cronus.shop/products/xbox-one-wireless-adapter). Plug it into `A3`, connect the Xbox® controller to `A2` for a few seconds, then unplug. Soon, the LED on the Adapter and controller will turn solid white, indicating successful pairing.
- The Astro C40 adapter can also be connected to `A3`.
:::hint{type="success"}
**🔋 IMPORTANT**
Your controller might not charge when connected via Zen. Ensure its fully charged or equipped with fresh batteries to prevent disconnections.
:::
:::hint{type="danger"}
🎧 **WIRED HEADSETS**
There is no headset support with the PlayStation® 3 console or controllers.
:::
# Known Issues
***
:::Changelog{title="Known Issues Last Updated: Sept 18th 2023"}
::ChangelogItem{type="knownIssue" description="Connecting a controller to Zen can sometimes cause an E3 error code. Don't Panic! Sometimes it takes a couple of unplug/replug of the USB cable for it to sync correctly."}
:::
[title] Working Panels
[path] ZEN STUDIO/
Zen Studio is organized into five main working panels. Use the navigation tabs to switch between them.
# Working Panels

# 1. Library
***
Provides access to downloadable GPC scripts from the online database.
Intended for:
- Users who want ready-made scripts
- Learning GPC through community examples
# 2. Compiler
***
Integrated development environment (IDE) for GPC scripting.
Includes:
- Source code editor
- Syntax highlighting
- Integrated compile
- Debug and testing tools
Used for creating and modifying custom scripts.
# 3. Programmer
***
Used to manage and assign content to the Zen’s memory slots.
Provides access to:
- GPC Scripts
- Remapper Profiles
- Local GPC files
Cronus Zen™ includes **8 × 32KB memory slots**. Any combination of supported content can be assigned.
# 4. Device
***
Contains configuration and maintenance options, including:
- Device settings
- Output protocol selection
- PS4 Speciality and Remote Play options
- Memory slot management
- Factory Reset and Erase Memory Slots
- Device Monitor access
- Connected device display
Used for device configuration and troubleshooting.
# 5. M\&K Settings
***
Mouse & Keyboard configuration interface.
Allows:
- Mouse sensitivity tuning
- Deadzone configuration
- Ballistic curve adjustment
- Button and key remapping
- Loading premade game profiles
Used to optimize mouse translation within console input limits
[title] Tournament Mode
[path] ZEN STUDIO/Untitled/
Tournament Mode disables all features that may give users an unfair advantage such as Scripts, Macros, and GamePacks. Cross-Over Controller and Automatic Button Remapping are fully supported.
First, connect Cronus Zen to a Windows PC *(or Mac with Windows 10 installed)* using a mini-USB cable from the **PROG USB Port*** (See highlighted in red below).* Then open Zen Studio.
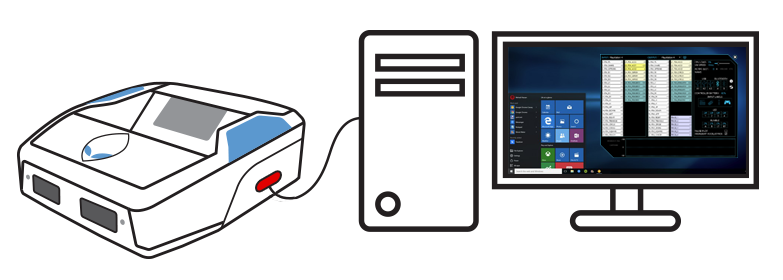

Open the Zen Operational Mode interface by selecting **Tools 👉 Zen Operational Mode**. Then select **'Tournament Mode'** and click **Finish**.

Once Tournament Mode is active, the letters TE will appear to the right of Zen's firmware version (**FW v2.1.0-beta 17** Device Settings: Tournament Mode selected in the above example). The active Operational Mode is displayed in the **status bar**, and you can also click this area to load the Zen Operational Mode interface.
In case you are in a Tournament setting and need to display that your Cronus Zen is in fact in Tournament Mode, the OLED
Message Screen displays the following graphic.

[title] Controller Testing
[path] TROUBLESHOOTING/
Follow these easy steps to test Xbox® and PlayStation® controllers on a Windows® PC with your Cronus Zen. As a bonus, you'll also be checking that the firmware, USB ports, Zen Studio, and USB cables are all in good shape.
Winner winner, chicken dinner! 🐔🚀
Before doing anything else, watch this video first, it will clarify pretty much everything.
::embed[]{url="https://www.youtube.com/watch?v=mBtYtsUeVik"}
# Getting Started
***
We will assume your Zen is updated to using Zen Studio .
If not, here's what to do:
- [STEP 1: Update Firmware](docId:9U47MtFRK1z6gjIle0uv5)
- [STEP 2: Setup Zen Studio](docId\:NG3ONmxDsQcPrmgw_6R5y)
Once you're updated, connect both the `CONSOLE/PC` and `PROG `USB cables to your Zen and PC. This is for testing only, not gameplay.
The `PROG` cable syncs the Cronus Zen with Zen Studio for settings, library, scripts, GamePacks, and so on. Meanwhile, the `CONSOLE/PC` cable manages the controller signals.


Once everything is hooked up and your Cronus Zen is detected by Zen Studio, you're ready to setup and test your controller. 👍
# Xbox® Controller
***
Set up an Xbox® controller and connect to any Zen-supported platform in minutes.
::::WorkflowBlock
:::WorkflowBlockItem
Tap Zen's reset button, **wait 5 seconds**, then plug the controller into `A1`. It should turn on by itself while pairing to the Zen. If it doesn't you can manually turn it on.
:::
:::WorkflowBlockItem
Open Zen Studio . Go to the Device panel and set the Output Protocol to '**XBOX ONE X/S**'. If everything's detected, you'll see the joypad and console icons light up.

:::
:::WorkflowBlockItem
Hit `F3` to launch the device monitor. Test out your controller buttons and see if Zen Studio picks up the outputs right.
:::
:::WorkflowBlockItem
🚫 **Important:** Unplug the `PROG` USB cable from the Zen. 👈
:::
:::WorkflowBlockItem
Tap Zen's reset button. After a few seconds, the RGB LEDs should glow solid **GREEN**. If it doesn't, unplug the `CONSOLE/PC` USB, wait a few seconds, plug it back in. That should do the trick.
:::
:::WorkflowBlockItem
Visit [gamepad-tester.com](https://gamepad-tester.com) to see if Windows® is picking up your controller correctly. Once confirmed, enjoy gaming on a Windows® PC with your Xbox® controller, or plug the `CONSOLE/PC` USB directly into an Xbox® Series X|S or Xbox® One console.

:::
:::WorkflowBlockItem
**Crossover Magic:** With Cronus Zen, your Xbox® controller isn't just for Xbox® anymore! You can plug it into PlayStation® or Nintendo® Switch consoles too. Just change the Xbox® controller to `A3`, and depending on the console you're hooking up to, connect a PlayStation® or Nintendo® Switch controller to `A1`.
Happy gaming! 😁
:::
::::
# PlayStation® Controller
***
Set up a PlayStation® controller and connect to any Zen-supported platform in minutes.
::::WorkflowBlock
:::WorkflowBlockItem
Tap Zen's reset button, **wait 5 seconds**, then plug the controller into `A1`. It should turn on by itself while pairing to the Zen. If it doesn't you can manually turn it on.
:::
:::WorkflowBlockItem
Open Zen Studio . Go to the Device panel and set the Output Protocol to '**PLAYSTATION 5**' or '**PLAYSTATION 4**' If everything's detected, you'll see the joypad and console icons light up.
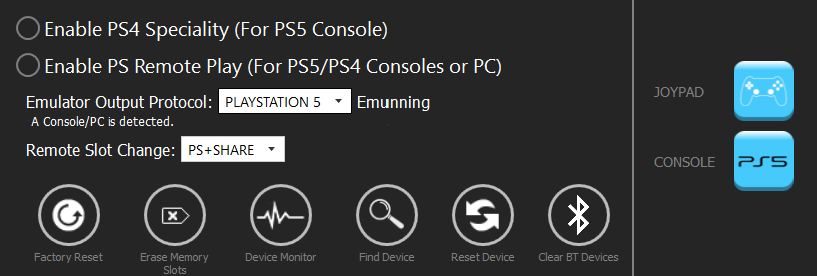
:::
:::WorkflowBlockItem
Hit `F3` to launch the device monitor. Test out your controller buttons and see if Zen Studio picks up the outputs right.
:::
:::WorkflowBlockItem
🚫 **Important:** Unplug the `PROG` USB cable from the Zen. 👈
:::
:::WorkflowBlockItem
Tap Zen's reset button. The RGB LEDs will stay off. **Note: **The PlayStation® controller touchpad may light up **ORANGE** for a second then turn off. This is expected behavior, totally fine. 👍
:::
:::WorkflowBlockItem
Visit [gamepad-tester.com](https://gamepad-tester.com) to see if Windows® is picking up your controller correctly. Once confirmed, enjoy gaming on a Windows® PC with your PlayStation® controller, or plug the `CONSOLE/PC` USB directly into a PlayStation® 5 or PlayStation® 4 console.

:::
:::WorkflowBlockItem
**Crossover Magic:** With Cronus Zen, your PlayStation® controller isn't just for PlayStation® anymore! You can plug it into Xbox® or Nintendo® Switch consoles too. Just change the PlayStation® controller to `A3`, and depending on the console you're hooking up to, connect an Xbox® or Nintendo® Switch controller to `A1`.
Happy gaming! 😁
:::
::::
# DualShock4® Emulation
***
Transform any PlayStation®, Xbox®, or Nintendo Switch® controller to behave like a traditional DualShock4®. Perfect for devices or games that only recognize DualShock4® controllers!
::::WorkflowBlock
:::WorkflowBlockItem
Tap Zen's reset button, **wait 5 seconds**, then plug the controller into `A3`. It should turn on by itself while pairing to the Zen. If it doesn't you can manually turn it on.
:::
:::WorkflowBlockItem
Open Zen Studio . Go to the Device panel and choose '**Enable PS Remote Play**'. If everything's detected, you'll see the joypad and console icons light up.

:::
:::WorkflowBlockItem
Hit `F3` to launch the device monitor. Test out your controller buttons and see if Zen Studio picks up the outputs right.
:::
:::WorkflowBlockItem
🚫 **Important:** Unplug the `PROG` USB cable from the Zen. 👈
:::
:::WorkflowBlockItem
Tap Zen's reset button. The RGB LEDs will stay off *(expected behavior)*. **Note: **The PlayStation® controller touchpad will light up **BLUE**.
:::
:::WorkflowBlockItem
Visit [gamepad-tester.com](https://gamepad-tester.com) to see if Windows® is picking up your controller correctly. If it's not, unplug the `CONSOLE/PC` USB, wait a few seconds, plug it back in, and give it another go.

:::
:::WorkflowBlockItem
Thanks to DualShock4® emulation, simply connect the `CONSOLE/PC` USB cable to any console or mobile device *(using an OTG adapter)*, and voilà! 💥 Your controller will mimic a DualShock4® perfectly. 🎮🚀
Happy gaming! 😁
:::
::::
[title] GameSir® Fix 2
[path] TROUBLESHOOTING/
After the latest firmware update, **GameSir® G7 HE/SE controllers** no longer work when directly connected to the **Cronus Zen**.
This guide shows you exactly how to fix the GameSir**®** G7 HE/SE compatibility issues with Cronus Zen device.
# ✅ Getting Started
***
1. Set the polling rate to 250Hz or 500Hz (⚠️ DO NOT use 1000Hz)
2. Update the firmware using the Nexus app
3. Open Zen Studio > Device tab (with all cables unplugged)
# 🎮 Xbox® & PC Setup
***
1. Launch the Nexus app and connect the controller (do not press any buttons)
2. Hold Xbox**®** + Share until you hear the Windows disconnect sound or see a screen flash
3. Plug the top USB into the Zen, then connect the right-side PROG port
4. Connect the controller to the Zen and wait for it to power up
5. Hold Xbox**®** + Share again (for 2–3 seconds) until:
6. The Xbox**®** logo and controller icon appear
7. Input mode = Mirror Mode
8. Open the Device Monitor in Zen Studio to confirm everything is working
# 🎮 PS5® Setup
***
1. Perform the PS5**®** controller bypass (required for DualSense**®** and DualSense**®** Edge)
- You can find the bypass guide here: [PS5® Bypass](docId\:wtopYfR7VTTCMbcAB64rv)
2. Connect the DualSense**® **or DualSense**®** Edge controller to your PC
3. Hold PS + Menu until you hear the Windows disconnect sound
4. Plug into the A3 port on the Zen
5. Hold PS + Menu again (for 2–3 seconds) until connected.
# ❗ GameSir + PS5® Limitations
***
| Mode | View Button | Share Button | XBOX Button |
| ------------------ | ----------- | ------------ | ----------- |
| XBOX**®** 360 | ✅ | ❌ | ✅ |
| XBOX**®** ONE | ✅ | ✅ | ❌ |
💡 You can switch modes anytime by holding Xbox + Share while in Device Monitor.
:::hint{type="danger"}
### ⚠️ Note the following:
GameSir settings may reset after disconnecting the controller
If the Xbox button appears stuck, press it once to release
You may need to keep the PROG cable connected for it to function (unlikely but possible)
:::
[title] Firmware Errors
[path] TROUBLESHOOTING/
It's important to know there are three types of error categories:
- [Hardware Errors](docId\:DWx5SvUf5Snfju-f3vu2_)
This is when there is an issue with the actual Cronus Zen itself, such as error codes and a blank OLED screen.
- **Firmware Errors (This Page)**
This is when there is an issue when using the Firmware Update Tool, such as Device Not Found, 0.0.0 error, and network errors.
- [Zen Studio Errors](docId\:xrFAY4U9Buyb9SO7ONL07)
This is when there is an issue when using Zen Studio , such as Device Disconnected, registration issues, and unable to download GamePacks.
Before doing anything else, watch this video first, it will clarify pretty much everything.
# Check First
***
Before you start, it's crucial to be aware of the following when recovering from an error:
- **USB Cables:** Check that they work and firmly connected. The best way to test is to connect your controller directly to your PC or console and see if it detects correctly.
- **No Scripts or GamePacks:** Ensure no Scripts or GamePacks are loaded. Why? Because sometimes, these can be the cause behind the fault you’re wrestling with. If you find a script or GamePack causing havoc, give a shout out to its creator to get any bugs squashed.
- **Protect Your MK Profiles:** Ensure that all MK profiles are securely backed up, to avoid losing any of your tailored settings.
- **Script Safeguarding**: Unfortunately, scripts cannot be backed up directly. Ensure that you retain a separate copy of any script you've been utilizing to avoid any potential gaming disruptions.
OK, let's get after it....

Here's the complete list of firmware errors and verified solutions.
# No Devices Found
***
This error usually happens due using the wrong USB port, or a faulty USB cable. Here's a list of proven solutions. If these don't resolve the issue, it might be best to get a replacement.
1. Ensure the USB cable is good and plugged into the correct `CONSOLE/PC` USB port.
2. Test with a different USB cable; yours might be faulty.
3. If your PC USB port isn't supplying enough power, use a [powered USB hub](https://cronus.shop/collections/cronus-zen/products/cronus-mk-switch).
4. For Mac users with the newer M1/M2 chipsets, [BootCamp](https://machow2.com/windows-11-mac-boot-camp/) isn't compatible. Instead, try using **VMware Fusion Technology Preview 2023** 👉[Free Trial](https://customerconnect.vmware.com/downloads/get-download?downloadGroup=FUS-TP2023). We do not offer Mac support and we have not tested this, but other users have said it works fine.
If you've tried all the above and it's still not working, your Cronus Zen might be defective. Please refer to the [Warranty Instructions](docId\:ly6Zi3tqakUyk8HhzB3kI) for the next steps.
# Firmware Version Incompatible
***
You are either not running Zen Studio , or you haven't yet updated Zen's firmware to . Go to [STEP 1: Update Firmware](docId:9U47MtFRK1z6gjIle0uv5) and try again.
# DFU Download Failed State
***
This usually happens when the USB cable is bad or not getting enough power. Try using a powered USB hub. If this solution didn't work, unfortunately your Cronus Zen has developed a fault. Scroll down to the [Warranty Instructions](docId\:ly6Zi3tqakUyk8HhzB3kI) for what to do next.
# Firmware: 0.0.0
***
This usually happens when an update was interrupted, so the firmware is now corrupt and needs to be reset and reprogrammed.
- Go to [STEP 1: Update Firmware](docId:7cpnL5ScNTyU9B2dWqIyb) and update to .
- For Mac users with the newer M1/M2 chipsets, [BootCamp](https://machow2.com/windows-11-mac-boot-camp/) isn't compatible. Instead, try using **VMware Fusion Technology Preview 2023** 👉[Free Trial](https://customerconnect.vmware.com/downloads/get-download?downloadGroup=FUS-TP2023). We do not offer Mac support and we have not tested this but other users have said it works fine.
- If this solution didn't work, unfortunately your Cronus Zen has developed a fault. Scroll down to the [Warranty Instructions](docId\:ly6Zi3tqakUyk8HhzB3kI) for what to do next.
# Network Error
***
Your internet provider or firewall is blocking access to our server, so try temporarily disabling your firewall or use a [free VPN like Proton](https://protonvpn.com/free-vpn).
# Stuck on Flashing Firmware...
***
You should unplug all the USB cables from the Zen and reboot your computer. That should clear the problem.
# Unexpected Error
***
This usually happens if programming was interrupted. You should unplug all the USB cables from the Zen and reboot your computer. That should clear the problem.
:::hint{type="danger"}
# Still Not Working? 😲
If your Zen's pulling a vanishing act with a blank OLED, skipping the RGB LED party, or flat out refusing to reset, that’s a huge bummer because it sounds like it’s developed a fault. **DON'T PANIC!**
**Here's Your Game Plan:**
**Warranty Wonders:** Bought directly from [cronus.shop](https://cronus.shop)? The warranty is between 90 days and 1 year depending on the package you purchased. But if you snagged yours from another store like GameStop, you might have a 30-day warranty. Sweet deal if you've just unboxed. Within 30 days? You're set for a new replacement or a refund, whichever you prefer.
**Let's get you back in the game!**
:::
[title] Run Zen Studio on Mac
[path] TROUBLESHOOTING/
How to successfully run Zen Studio on a Mac using Boot Camp and Windows 10 or Windows 11.
::Image[]{src="https://archbee-image-uploads.s3.amazonaws.com/IwUlH55FdaPsVELSqm1Fc/4qwUTYaH6u_J6HC9u31xs_image.png" size="94" width="1024" height="514" position="center" darkWidth="1024" darkHeight="514" showCaption="false"}
The **Zen Studio** software is designed for Windows only. This would usually restrict you to using a PC, however, you can also run Windows 10 or Windows 11 on a Mac in a simple dual-boot configuration using the free tool [Boot Camp](https://support.apple.com/boot-camp), and this is fully compatible with Zen Studio and the Cronus Zen hardware.
:::hint{type="danger"}
**Important: **Most Virtual or Cloud setups will not work. You must use Bootcamp and install Windows 10 locally. Apple M1 users will need to use Parallels 18 in order to use Zen Studio on a Mac.
[https://www.parallels.com/products/desktop/](https://www.parallels.com/products/desktop/)
:::
This guide *seems* like a lot of steps but it's all on-screen prompts and very easy to do, it shouldn't take you longer than 30 minutes and is quite simple to uninstall later.
::embed[]{url="https://youtu.be/Hmm9Q-T0oTo"}
# Mac's that support Windows 10/11
***
- [MacBook](https://support.apple.com/en-us/HT201608) introduced in 2015 or later
- [MacBook Air](https://support.apple.com/en-us/HT201862) introduced in 2012 or later
- [MacBook Pro](https://support.apple.com/en-us/HT201300) introduced in 2012 or later
- [Mac mini](https://support.apple.com/en-us/HT201894) introduced in 2012 or later
- [iMac](https://support.apple.com/en-us/HT201634) introduced in 2012 or later
- iMac Pro (all models)
- [Mac Pro](https://support.apple.com/en-us/HT202888) introduced in 2013 or later
:::hint{type="danger"}
**Important:** Most Mac's since 2020 now use the new [Apple M1 chip](https://www.macrumors.com/guide/m1/) which, unfortunately, is not compatible with this setup and Zen Studio.
:::
## Supported macOS Versions
These are all Mac operating systems compatible with Boot Camp and Windows 10/11, starting with the most recent. When a major new macOS is released, it gets a new name, such as macOS Monterey.
If your Mac is using an earlier version of any Mac operating system, you should [install the latest Apple software updates](https://support.apple.com/en-us/HT201260), which can include important [security updates ](https://support.apple.com/en-us/HT201222)and updates for the apps that are installed by macOS, such as [Safari](https://support.apple.com/en-us/HT204416), Books, Messages, Mail, Music, Calendar, and Photos.
:::hint{type="success"}
## Mac Updater Tool
If you're having trouble updating the Zen firmware using the Windows version of the Collective Minds update tool, we also provide a Mac Updater which you can find below. Be sure to use the correct tool for your version of macOS.
***Note:** You will still need to install Windows to run Zen Studio. If you are using an M1 Mac you will need to download and run the macOS Monterey version of the updater tool linked below. The Windows version of the tool will not run correctly even when using Parallels or other Windows solutions currently.*
:::
| OS Codename | Version | Mac Updater |
| ----------------- | ------- | ------------------------------------------------------------------------------------------------------------------ |
| macOS Ventura | 13.0 | [Link](https://cdn.shopify.com/s/files/1/0301/9790/7501/files/CMUpdateTool_Monterey.zip?v=1644006156) |
| macOS Monterey | 12.6 | [Link](https://cdn.shopify.com/s/files/1/0301/9790/7501/files/CMUpdateTool_Monterey.zip?v=1644006156) |
| macOS Big Sur | 11.7 | [](https://cdn.shopify.com/s/files/1/0301/9790/7501/files/CMUpdateTool10.zip?v=1616002291) |
| macOS Catalina | 10.15.7 | [Link](https://cdn.shopify.com/s/files/1/0320/0856/8964/files/cm_osx_new_updatetool.zip?v=1606756545) |
| macOS Mojave | 10.14.6 | [Link](https://cdn.shopify.com/s/files/1/0301/9790/7501/files/MACUpdateTool_Yosemite_High_Sierra.zip?v=1644275798) |
| macOS High Sierra | 10.13.6 | [Link](https://cdn.shopify.com/s/files/1/0301/9790/7501/files/MACUpdateTool_Yosemite_High_Sierra.zip?v=1644275798) |
| macOS Sierra | 10.12.6 | [Link](https://cdn.shopify.com/s/files/1/0301/9790/7501/files/MACUpdateTool_Yosemite_High_Sierra.zip?v=1644275798) |
| OS X El Capitan | 10.11.6 | [Link](https://cdn.shopify.com/s/files/1/0301/9790/7501/files/MACUpdateTool_Yosemite_High_Sierra.zip?v=1644275798) |
| OS X Yosemite | 10.10.5 | [Link](https://cdn.shopify.com/s/files/1/0301/9790/7501/files/MACUpdateTool_Yosemite_High_Sierra.zip?v=1644275798) |
## Requirements
- 8GB+ USB Drive *(Some newer models don't require a USB stick)*.
- 40GB+ Free Hard Drive Space.
- OS X Yosemite 10.10 or newer.
- Windows 11 iSO ([Download Here](https://quickfever.com/windows-11-iso-download/))
- Windows 10 iSO ([](https://quickfever.com/windows-10-iso-download/))
- Zen Studio ([](https://www.cronusmax.com/downloads/))
:::hint{type="success"}
**Note: **Make sure all macOS and driver updates are completed before you begin to use Boot Camp as you may experience partition errors. To download macOS software updates, choose Apple menu System Preferences, then click Software Update.

:::
# Download Windows
***
**Step 1:** For this example we'll use Windcows 10, but you can also use Windows 11.
Visit Microsoft’s [Download Windows 10 Disc Image (ISO File)](https://www.microsoft.com/en-us/software-download/windows10ISO) page. For Edition, choose Windows 10, and click Confirm. Next, select the desired language, and click Confirm. Finally, click the 64-bit Download button to begin the Windows 10 ISO download.
# Run Boot Camp Assistant
**Step 2:** Once the Windows iSO download is completed, launch Boot Camp Assistant in Applications Utilities and click Continue *(if it's not in the utilities folder, it may be in the 'Other' folder)*.
**Step 3:** If you're asked to insert a USB drive, plug your USB flash drive into your Mac. Boot Camp Assistant will use it to create a bootable USB drive for Windows installation. Next, click the Choose button next to the ISO image box, and select the Windows 10 iSO file downloaded in Step 1.
**Step 4:** You can leave the Windows partition size as default (it was 39 GB for us), or you can adjust the Boot Camp partition size by moving the Windows partition to the desired amount of space (100 GB in the example below).

**Step 5:** After selecting the Windows 10 iSO file and adjusting the partition sizes, click Install. **The Boot Camp Assistant will automatically download Windows support software from the internet, partition the disk, and copy the necessary Windows files**. You will then be prompted to enter your macOS administrator password, and shortly thereafter, macOS will then reboot into Windows Setup.

# Install Windows 10
**Step 6:** Upon reboot, you’ll see the Windows logo followed by the Windows Setup screen. Select the desired language, time, and country format, along with the keyboard or input method, and click Next.
**Step 7:** You’ll now arrive at the Activate Windows box. If you already have a Windows 10 product key, enter it and click Next for trial mode (you can enter a key later). Otherwise, click I don’t have a product key at the bottom of the box.
:::hint{type="info"}
**Info: **You can buy a genuine OEM Windows 10 product key from eBay for around $5 - there are hundreds of listings.
:::
**Step 8: **Select either Windows 10 Pro or Windows 10 Home. You can [compare each version of Windows 10 here](https://www.microsoft.com/en-us/WindowsForBusiness/Compare?ranMID=24542\&ranEAID=je6NUbpObpQ\&ranSiteID=je6NUbpObpQ-JS6Pv4wuX0MoQPPTdKBW1w\&epi=je6NUbpObpQ-JS6Pv4wuX0MoQPPTdKBW1w\&irgwc=1\&OCID=AID2200057_aff_7593_1243925\&tduid=%28ir__god0ra9efokf6nyskg6fwnqce32xtrdiixstuc1100%29%287593%29%281243925%29%28je6NUbpObpQ-JS6Pv4wuX0MoQPPTdKBW1w%29%28%29\&irclickid=_god0ra9efokf6nyskg6fwnqce32xtrdiixstuc1100) - Zen Studio works with both so it's purely your own personal reference. Click Next after choosing the preferred version.
**Step 9:** On the Applicable notices and license terms screen, check the **I accept the license terms box** in the bottom left-hand corner, and click Next.
**Step 10: **The installation process will now commence. Windows Setup will copy needed files, and install features and updates. The installation process should only take a few minutes. Once it’s complete, your Mac will automatically reboot after 10 seconds.
:::hint{type="danger"}
**Important:** At this point, you must unplug the USB stick, or it will try to install Windows again.
:::
**Step 11:** Upon rebooting, the Windows logo will appear again, and the setup process will continue and reboot again. Eventually. You’ll see the blue "Get Going Fast" screen. You can opt to use express settings, but **we recommend clicking the Customize button and disabling all of the switches**. Click Next to proceed to the next pages.

**Step 12:** You’ll now be asked to create an account or sign in with your current Microsoft account (outlook.com, live.com, hotmail.com etc.) **An account name is required, but a password is not.** Click Next once you select the desired user name and password combination.
**Step 13:** On the Meet Cortana screen, you can choose to enable the Cortana personal assistant. **We recommend keeping it disabled **by clicking the Not now button.

**Step 14:** Windows will now finish up the setup process, and you’ll eventually be taken to the Windows 10 desktop. On the Welcome to Boot Camp installer box, click Next and accept the terms of the license agreement. Click Install to proceed with the installation. **If any additional driver installation boxes appear, be sure to Install those as well**. Once the installer completes, make sure the Restart System box is checked, and click Finish to reboot your machine.
**Step 15:** Upon rebooting, click the Wi-Fi icon in the system tray and connect to your local Wi-Fi network.
# Apple Software Update
***
:::hint{type="danger"}
**This next step is very important** because it updates to the latest sound drivers. The initial driver is known to cause sound problems, so it’s important that you update.
:::
**Step 16:** Click the Start Button and select Apple Software Update. Select any of the updates that appear, and click the Install items button in the bottom right-hand corner. Click Yes on the User Account Control pop up windows that appears, and **click Install on any additional related software installations**.
**Step 17:** Ensure that any in-progress installations complete, and then click Yes on the Apple Software Update Restart pop up window that appears. Your Mac will reboot back into Windows 10.

**Step 18:** Finally, go to **Start 👉 Settings 👉 Update & security**, and click the Check for updates button. **Windows will download any needed updates**, and prompt you to restart after doing so. Click Restart now to complete the installation and reboot.
**Step 19:** This Windows 10 trial will last for 180 days with limited functionality (Zen works 100% in trial mode). You can activate it at any time with a genuine registration key which you can purchase on eBay for around $5.
**Step 20:** You can now proceed to setup your **Cronus Zen ** 👇
::::LinkArray{contentSource="CUSTOM"}
:::LinkArrayItem{headerType="COLOR" headerColor="#2166ae"}
[Step 1 - Program Zen Firmware](docId\:G_O0738_K6HcTiE5U-N9N)
:::
::::
:::hint{type="danger"}
**Important: **If your Cronus Zen is not detected by your Mac, it's likely because it's a newer model with a USB-C port (most models 2017+). In these cases, simply use a **powered USB Hub** and the Mac will correctly detect the Zen. You can also use a Micro-USB to USB-C adapter if you only have a Micro-USB cable.
**Note:** In our own tests we used a MacBook Pro 2017 with this [Belkin USB3.0 4 Port Powered Hub](https://www.amazon.com/Belkin-SuperSpeed-USB-3-0-4-Port/dp/B009AR2MD2/), but any powered hub should work (it MUST be powered - with its own power supply - not powered by a USB port)
:::
# Restart your Mac in macOS or Windows
***
After installing Microsoft Windows on your Mac, you can choose whether your Mac starts up in macOS or Windows.
## Boot to macOS from Windows
1. From the notification area on the right side of the Windows taskbar, click 🔼 to show hidden icons.
2. Click the Boot Camp icon.
3. From the menu shown, choose Restart in macOS...

:::hint{type="danger"}
**Important:** If you haven't[ installed the latest Boot Camp updates](https://support.apple.com/en-us/HT208038), you might get the message ”Could not locate the OS X boot volume."
:::
## Boot to Windows from macOS
Click **Apple Menu System 👉 Preferences 👉 Startup Disk 👉 BOOTCAMP Windows** and restart.

# Rebooting into macOS or Windows
***
When you use Startup Manager to select a startup disk, your Mac starts up from that disk once, then returns to using the disk selected in [Startup Disk preferences](https://support.apple.com/guide/mac-help/change-your-mac-startup-disk-mchlp1034/mac#startupdisk).
1. Press and hold the [Option (or Alt) ⌥ key](https://www.macobserver.com/tmo/article/how-to-really-use-the-magical-option-key-on-the-mac) immediately after turning on or restarting your Mac (Some newer models require that you press Option + S).
2. Release the [Option (or Alt) ⌥ key](https://www.macobserver.com/tmo/article/how-to-really-use-the-magical-option-key-on-the-mac) when you see the Startup Manager window.
3. If your Mac is protected by a [firmware password](https://support.apple.com/en-us/HT204455), you can release the key when you're asked to enter the password.
Select your startup disk (Macintosh HD = macOS & Boot Camp = Windows 10), then click the arrow under its icon, or press Return.
:::hint{type="info"}
**Info:** If you press and hold the [Control (or Ctrl) ⌃ key](https://support.apple.com/en-us/HT201236) during step 3, your selection is saved in Startup Disk preferences, so it persists until you change it.
:::

:::hint{type="danger"}
If your Cronus Zen is not detected by your Mac, it's likely because it's a newer model with a USB-C port (most models 2017+). In these cases, simply use a **powered USB Hub** and the Mac will correctly detect the Zen. You can also use a Micro-USB to USB-C adapter if you only have a Micro-USB cable.
***Note:** In our own tests we used a MacBook Pro 2017 with this *[Belkin USB3.0 4 Port Powered Hub](https://www.amazon.com/Belkin-SuperSpeed-USB-3-0-4-Port/dp/B009AR2MD2/)*, but any powered hub should work (it MUST be powered - with its own power supply - not powered by a USB port).*
:::
# Uninstall Windows
***
To remove Windows from your Mac, use Boot Camp Assistant only, not any other utility.
# More Info
***
For more information about using Windows on your Mac, open Boot Camp Assistant and click the Open Boot Camp Help button. Here is the 👉 [Official Apple Guide](https://support.apple.com/en-us/HT201468) for your reference.
We also invite you to post comments or suggestions to the 👉 [Zen Studio on Mac w/BootCamp Support Topic](https://forums.cronusmax.com/threads/guide-to-running-zen-studio-on-macosx-using-bootcamp-assistant.201545/) in the Cronus Community.
[title] Run Zen Studio on Linux
[path] TROUBLESHOOTING/
This guide explains step-by-step how to set up a Windows VM on Ubuntu, Debian, or Arch Linux, allowing you to install Zen Studio and connect your Cronus Zen.
### 🪟Create the Windows VM
- **Open VirtualBox and click New**
- Name: ZenWindowsVM
- Type: Microsoft Windows
- Version: Windows 10 (64-bit)
- **Allocate resources
**
- Memory: 4096 MB or more
- Hard disk: 30 GB (VDI, dynamically allocated)
- **Mount the Windows ISO**
- Select VM → Settings → Storage
- Under IDE controller, click the empty disk
- Choose a disk file → select your ISO**
**
- Start the VM and complete the Windows installation wizard
### ⚙️Configure the VM Post-Install
- **Windows Update**
- Open Settings → Update & Security → Check for updates.
- Install all updates and reboot.
- **Guest Additions**
- In the VirtualBox VM menu: Devices → Insert Guest Additions CD image
- In Windows Explorer, run *VBoxWindowsAdditions.exe *
- Reboot
- **USB Passthrough**
- Power off the VM
- **Settings **→ **USB **→ enable **USB 2.0** or **USB 3.0** controller,
Click + → select **Cronus ZEN** → **OK**
### 🧘Install Zen Studio
- Power on the Windows VM
- Inside Windows, open your browser and go to:
- [https://guide.cronus.support/downloads](https://guide.cronus.support/downloads)
- Download **ZEN Studio**
- Run the installer: **Next **→ **Accept License** → **Install **→ **Finish**
- If the installer fails while downloading .NET Framework 4.8.1:
- Download the offline installer from Microsoft
- [https://dotnet.microsoft.com/download/dotnet-framework/thank-you/net48-offline-installer](https://dotnet.microsoft.com/download/dotnet-framework/thank-you/net48-offline-installer)
- Run the .NET installer and reboot Windows
- Rerun the Zen Studio installer
### 🔌 Connect your Cronus Zen
- **Hold the Blue Button** under the Cronus Zen
- **Plug in the Cronus ZEN** into your PC/Laptop using the **TOP port**
- In **VirtualBox** menu: **Devices → USB → select Cronus Zen**
- Launch the **firmware update tool**: https\://firmware.modcentral.ca/
- Click on **Connect**, then **Update Firmware**
- After the Zen reboots, **connect the PROG port** on the right side of the Zen
- In **Windows**, launch **ZEN Studio** and confirm device detection
### 🚨Tips & Troubleshooting
- Add your Linux user to the vboxusers group
- *sudo usermod -aG vboxusers $USER*
- Then log out and back in
- On Arch, ensure VirtualBox kernel modules are loaded
- *sudo modprobe vboxdrv vboxnetflt vboxnetadp*
- If USB passthrough fails
- toggle between USB 2.0 and USB 3.0 in VM settings
- Enable nested paging and I/O APIC
- under **System **→ **Acceleration **for better performance
- For automation or headless use
- explore **VBoxManage **to script VM creation and USB filters
🫰Special thanks to *Gatsugatsusama (Cronus Zen Discord Moderator)* for the methods
[title] PlayStation 5 Setup
[path] WHEEL MODE/
Breathe new life into your old racing wheel with Cronus Zen. Now supporting a range of awesome, but forgotten wheels from Logitech and Fanatec, fully functional on a PlayStation 5 with full Force Feedback, Pedals, Brakes, Clutch, and Shifter support for the latest SIM Racers!
:::hint{type="success"}
## LOGITECH QUOTE
*"Unfortunately, our existing Logitech G wheels don’t work with next-generation systems. This is often a side effect of a new platform launch."*
## CRONUS QUOTE
*"Nope."*
:::

👉 This page includes the following guides for PlayStation SIM Racer gaming:
- [Supported Wheels](docId\:EU_wEhzykudZMJ75pcUzG)
- [Supported Games](docId\:EU_wEhzykudZMJ75pcUzG)
- [PS5 Console Settings](./#ps5-console-settings)
- [Setup Wheel Mode](docId\:EU_wEhzykudZMJ75pcUzG)
- [Tips & Tricks](docId\:EU_wEhzykudZMJ75pcUzG)
# SUPPORTED WHEELS
***

::::hint{type="success"}
# 🏁 DRIVE HUB
If you require more advanced support for newer games, and a much larger range of wheels, clutches, brakes, and shifters, as well as support for both the PS5 and XBOX Series X/S - we invite you to check out our dedicated Racing Wheel product, the [Drive Hub](https://shop.cronusmax.com/drivehub.html)** 🛒**
:::BlockQuote
Use coupon code **ZENOWNERBB10** for a 10% discount!
:::
::::
:::hint{type="danger"}
Please note there will be no further updates to Zen's Wheel mode *(final update was Jan 2020)* as there simply isn't enough space to handle the huge list of different brands of wheels, brakes, shifters and clutches, with support for both PlayStation and Xbox and dozens of games across multiple platforms.
That's why we developed the amazing **Drive Hub** - which has been [GTPlanet's favorite wheel adapter since 2017](https://www.gtplanet.net/drivehub-allows-use-almost-driving-wheel-console/)!
:::
This is the complete list of Logitech and Fanatec Wheels that are supported on a PlayStation 5 by Cronus Zen's Wheel Mode, including full Force Feedback support.
- Fanatec ClubSport Wheel Base v1
- Fanatec ClubSport Wheel Base v1.5
- Fanatec ClubSport Wheel Base v2
- Fanatec CSR
- Fanatec CSR Elite
- Fanatec Porsche 911 GT2
- Fanatec Porsche 911 GT3
- Fanatec Porsche 911 GT3 R
- Fanatec Porsche 911 GT3 RS v2
- Fanatec Porsche 911 Turbo
- Fanatec Porsche 911 Turbo S
- Logitech Driving Force GT
- Logitech G25
- Logitech G27
**Fanatec Notes:** Must be switched to PS3 mode with DC power supply connected. See the [Fanatec PS3 Mode](docId\:i74HMDnFmBeSDeUxZC41m) page for detailed instructions.
**Logitech G25 Notes:** The wheel must be switched to PS3 mode with the DC power supply connected. To change between six-speed and sequential mode, push straight down on shift knob and turn Mode Selection Dial so the red arrow points to the desired symbol. In sequential mode, the Sequential Mode Status Light will be on. In six-speed mode, the light will be off - [Instructions PDF
](https://www.logitech.com/assets/47297/g25-racing-wheel-qsg.pdf)**Logitech G27 Notes:** The wheel must be switched to PS3 mode with the DC power supply connected - [Instructions PDF](https://www.logitech.com/assets/47059/g27-racing-wheel-quickstart-guide.pdf)
**Logitech G29 Notes:** Works on a PS5 without using Zen *(PS4 version of GT7 works 100%)* The wheel must be switched to PS4 mode with the DC power supply connected - [Instructions PDF](https://www.logitech.com/assets/53755/3/g29-driving-force-racing-wheel.pdf)
**Logitech Gaming Software:** [Download](https://support.logi.com/hc/en-us/articles/360024699674--Downloads-G27-Racing-Wheel)****
# PS5 SUPPORTED GAMES
***
Zen's Wheel Mode has been tested working with the vast majority of SIM Racers that support racing wheels on the PS5, such as *Gran Turismo 7, Assetto Corsa Competizione, F1 22, GRID Legends, and WRC 10.*
This is the complete list of known compatible SIM Racers that work with Cronus Zen and the PS5. If the version is labeled **PS4**, then Wheel Mode will work with the PS4 version of the game using the [PS4 SPECIALITY](docId\:biRfFZ4lTIcVh4pNd2IMK) method. If the version is labeled **PS5 TBC**, the PS5 version of the game hasn't been confirmed yet *(let us know if you have tested one of the PS5 titles)*.
:::hint{type="info"}
We are currently testing all the PS5 versions of these games with Zen's Wheel Mode and will update the chart from 'PS5 TBC' to **PS5** *(supported)* or ~~**PS5**~~ *(not supported)*.
*\~ Charlie/MaxADMIN*
:::
| **GAME** | **VERSION** | **US RELEASE DATE** |
| -------------------------- | ----------- | ------------------- |
| Assetto Corsa | PS4 | August 30, 2016 |
| Assetto Corsa Competizione | PS4 | June 23, 2020 |
| Assetto Corsa Competizione | PS5 TBC | February 24, 2022 |
| Baja: Edge of Control | PS4 | September 14, 2017 |
| Dakar 18 | PS4 | September 25, 2018 |
| DiRT 4 | PS4 | June 6, 2017 |
| DiRT 5 | PS4 | November 6, 2020 |
| DiRT 5 | PS5 TBC | November 12, 2020 |
| Dirt Rally | PS4 | April 5, 2016 |
| Dirt Rally 2.0 | PS4 | February 26, 2019 |
| DRIVECLUB | PS4 | October 7, 2014 |
| F1 2015 | PS4 | July 21, 2015 |
| F1 2016 | PS4 | August 19, 2016 |
| F1 2017 | PS4 | August 25, 2017 |
| F1 2018 | PS4 | August 24, 2018 |
| F1 2019 | PS4 | June 28, 2019 |
| F1 2020 | PS4 | July 10, 2020 |
| F1 2021 | PS4 | July 16, 2021 |
| FA 2021 | PS5 TBC | July 16, 2021 |
| F1 22 | PS4 | July 1, 2022 |
| F1 22 | PS5 TBC | July 1, 2022 |
| Farming Simulator 15 | PS4 | May 19, 2015 |
| Farming Simulator 17 | PS4 | October 25, 2016 |
| Farming Simulator 19 | PS4 | November 20, 2018 |
| Gran Turismo 7 | PS4 | March 4, 2022 |
| Gran Turismo 7 | PS5 TBC | March 4, 2022 |
| Gran Turismo Sport | PS4 | October 17, 2017 |
| Gravel | PS4 | February 27, 2018 |
| GRID (2019) | PS4 | October 11, 2019 |
| GRID Legends | PS4 | February 25, 2022 |
| GRID Legends | PS5 TBC | February 25, 2022 |
| GRIP: Combat Racing | PS4 | November 6, 2018 |
| Monster Jam Steel Titans | PS4 | June 25, 2019 |
| Monster Jam Steel Titans 2 | PS4 | March 2, 2021 |
| NASCAR Heat 3 | PS4 | September 7, 2018 |
| NASCAR Heat 4 | PS4 | September 13, 2019 |
| NASCAR Heat 5 | PS4 | July 7, 2020 |
| Need for Speed Heat | PS4 | November 8, 2019 |
| Need for Speed Payback | PS4 | November 10, 2017 |
| Project CARS | PS4 | May 6, 2015 |
| Project CARS 2 | PS4 | September 22, 2017 |
| Project CARS 3 | PS4 | August 28, 2020 |
| Snowrunner | PS4 | April 28, 2020 |
| Snowrunner | PS5 TBC | May 31, 2022 |
| Spintires: Mudrunner | PS4 | October 31, 2017 |
| The Crew 2 | PS4 | June 29, 2018 |
| Truck Driver | PS4 | September 19, 2019 |
| V-Rally 4 | PS4 | September 11, 2018 |
| WRC 5 | PS4 | October 13, 2015 |
| WRC 6 | PS4 | October 7, 2016 |
| WRC 7 | PS4 | September 15, 2017 |
| WRC 8 | PS4 | September 10, 2019 |
| WRC 9 | PS4 | September 3, 2020 |
| WRC 10 | PS4 | September 2, 2021 |
| WRC 10 | PS5 TBC | September 2, 2021 |
| Wreckfest | PS4 | August 27, 2019 |
| Wreckfest | PS5 TBC | May 4, 2021 |
| Xenon Racer | PS4 | March 26, 2019 |
:::hint{type="info"}
Remember, Wheel Mode is only intended for SIM Racers that support Force Feedback, Clutch, Brakes, Shifter and Pedals. It doesn't support Arcade Racers such as *Gear Club Unlimited 2, Hot Wheels Unleashed and Inertial Drift: Twilight Rivals Edition, *which all work with a standard controller.
:::
# PS5 CONSOLE SETTINGS
***
Now for the fun part. Follow these steps to get you started...
- Check the game is compatible with PS5 *(see above list)*
- No PlayStation controllers paired to the PS5 *(delete them from Bluetooth Accessories)*
- Do not have any scripts or GamePacks enabled while setting up your wheel
:::hint{type="danger"}
When connecting a DUALSENSE or DUALSHOCK 4 to your PlayStation 5 using an USB cable, it also pairs it to the console via Bluetooth. So, to correctly unpair a DS/DS4 Bluetooth controller, simply connect Zen to the PlayStation using any controller, then it won't auto pair to the console after you delete it👍
:::
Be sure to apply the PS5 Settings below *(or risk your wheel disconnecting)* 👇
Settings > System > Power Saving > Set Time Until Controllers Turn Off > **Don't Turn Off**
Settings > System > Power Saving > Features Available in Rest Mode > Supply Power to USB ports > **Always**
Settings > Accessories > Controllers > Communication > **Use USB Cable**
::::VerticalSplit
:::VerticalSplitItem


:::
:::VerticalSplitItem

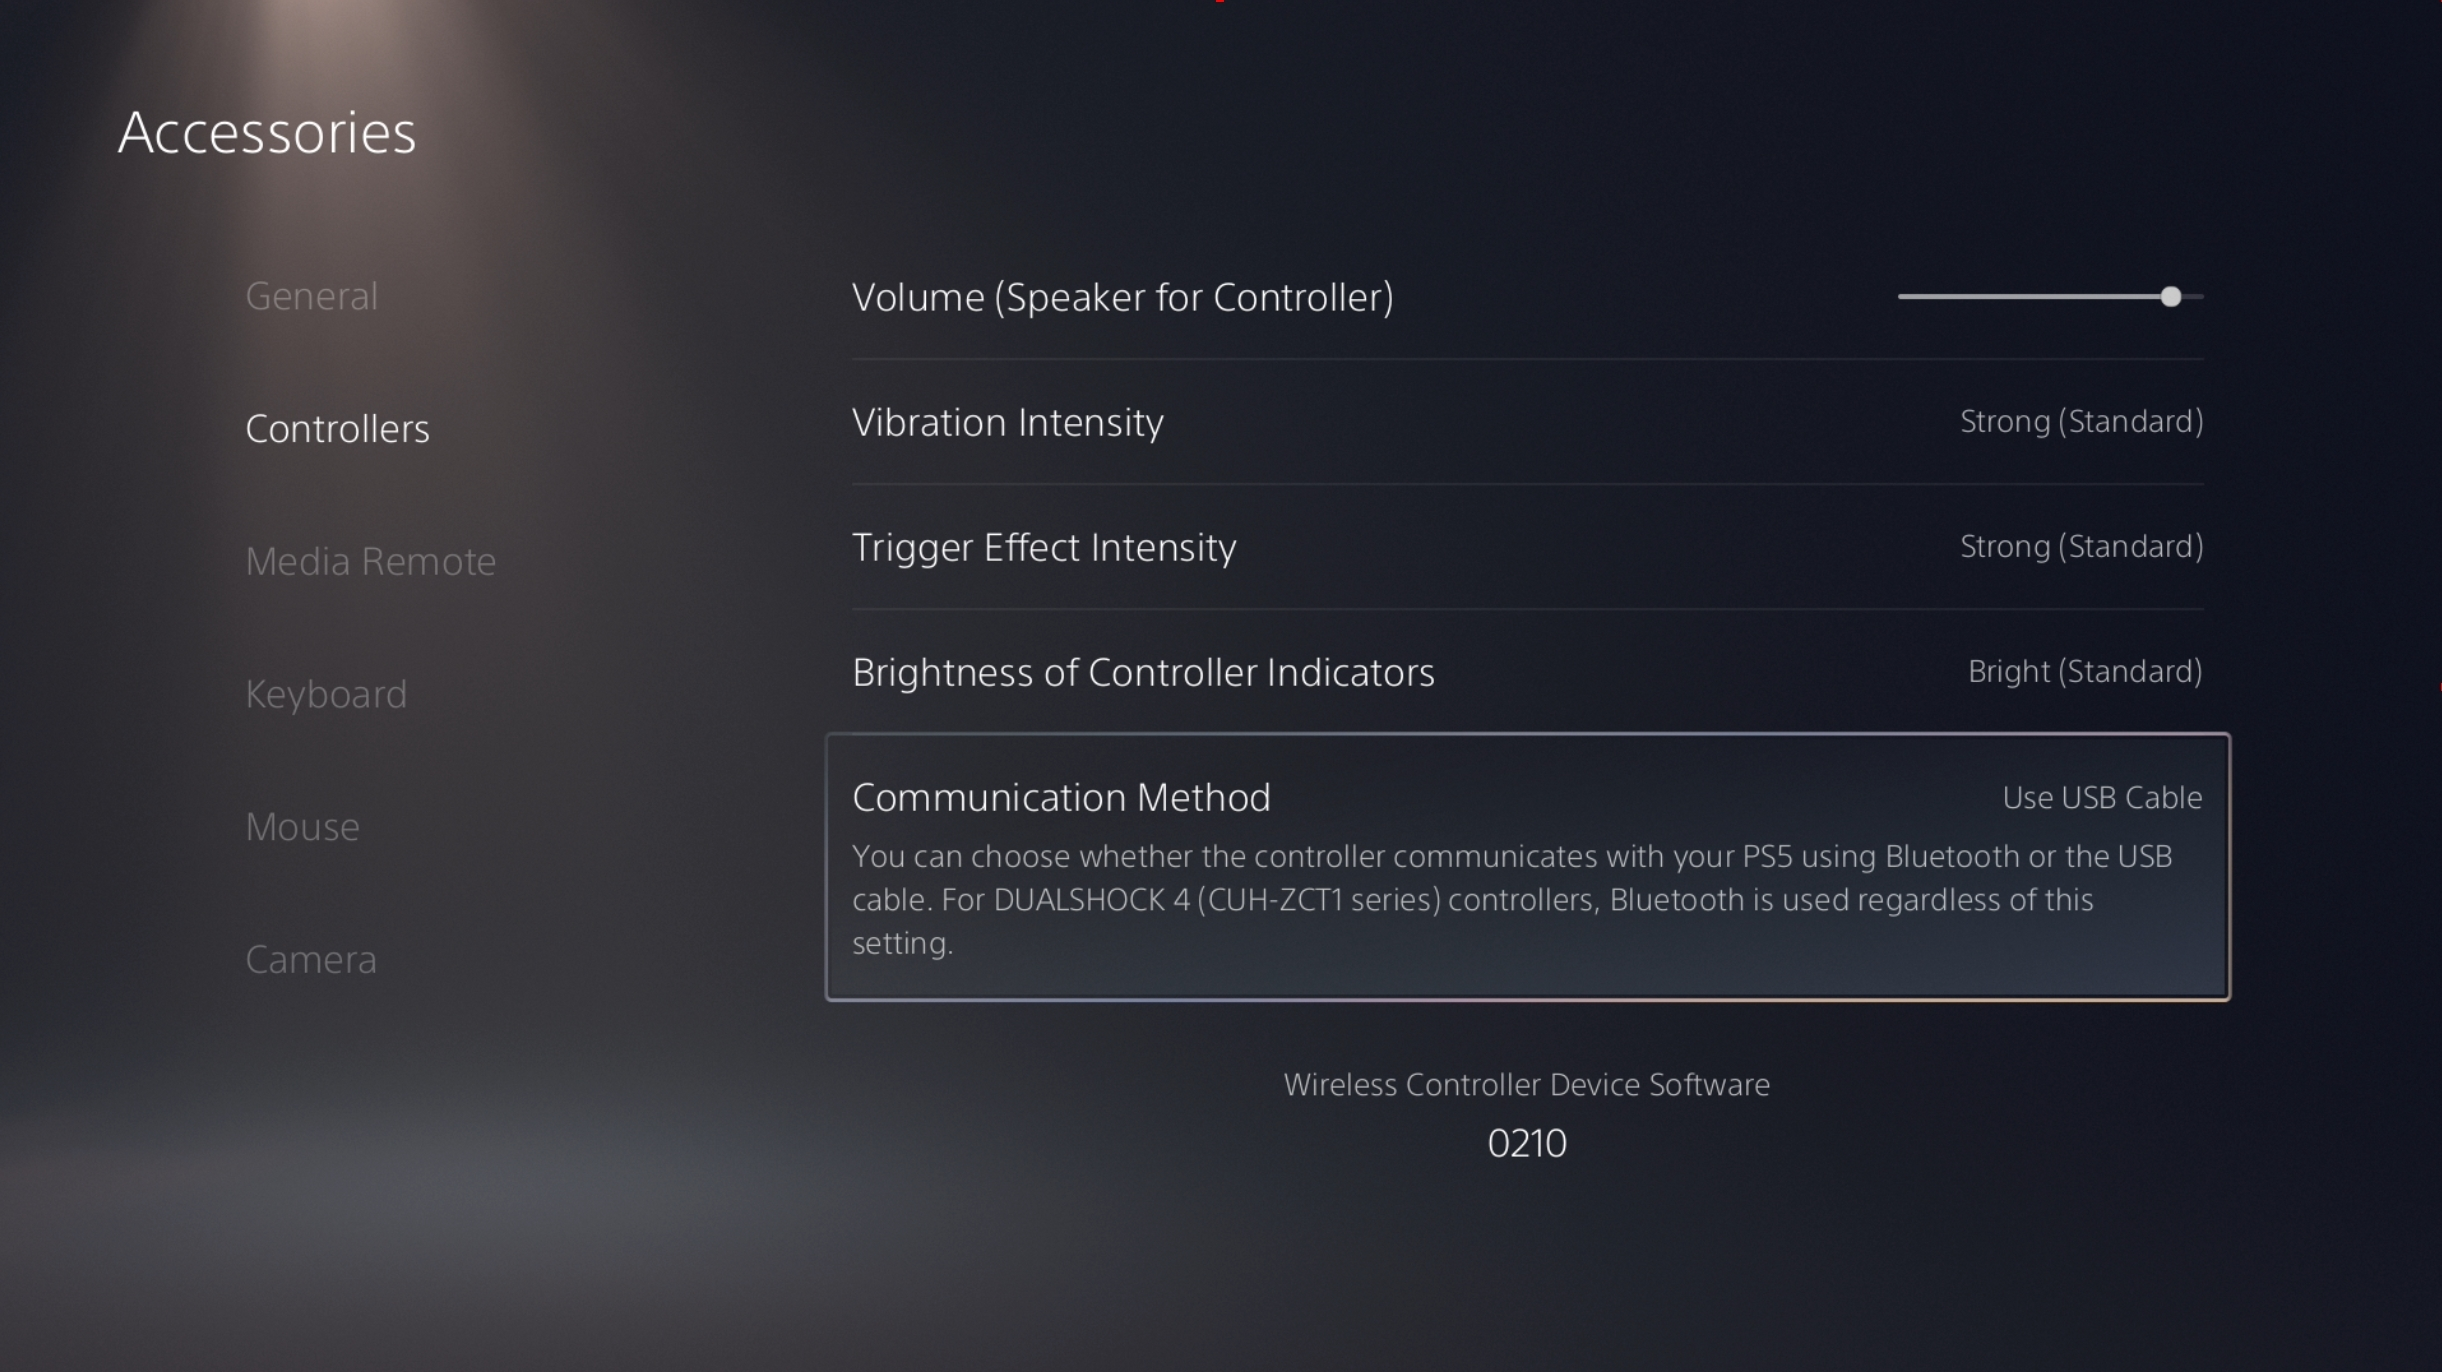
:::
::::
# SETUP PS5 WHEEL MODE
***
Unlike other inferior products, all supported wheels are automatically re-mapped and converted so they detect in-game as a **Logitech G29 with Force Feedback (FFB)**�� We do all the heavy lifting for you!
:::hint{type="danger"}
# ⚡IMPORTANT
If your wheel requires a power supply such as Logitech G25, G27 & G29 wheels (DC 24V 2A / 2000mA 48W), it must be connected (if you don't have the PSU, you can buy one from eBay for less than $20), and if you have any pedals, brakes, shifter, clutch, etc. that came with your wheel, make sure they all connected too.
If the power supply is not connected, then your wheel will output strange behavior, for example when playing GT7 with a Logitech G27 and no AC/DC power supply connected, there may be no Force Feedback, the left D-PAD is continuously pressing, and the clutch will not detect at all.
:::
# RACING WHEEL (USB)
***
**Setup Hardware:** PlayStation 5 console, Racing Wheel, Zen Studio and Zen Firmware . We will be using a [HORI PS4 Mini-Pad](https://shop.cronusmax.com/hori-ps4-mini-pad.html) as the PS4 SPECIALITY license donor, however you can use any of the compatible [PS4 SPECIALITY](docId\:biRfFZ4lTIcVh4pNd2IMK), or the Cronus Zen PS5 Dongle *(no longer manufactured)*.
::Image[]{src="https://archbee-image-uploads.s3.amazonaws.com/IwUlH55FdaPsVELSqm1Fc/VEvgnT4k4Ps7CeJs8D1Mw_progtopc.png" size="96" width="1081" height="381" position="center" darkWidth="800" darkHeight="282" showCaption="false"}
1. Connect the **CRONUS ZEN** to a PC using the `PROG` USB port *(mini-USB).*
2. **ZEN STUDIO** V > Tools > Zen Operational Mode > select **Wheel Mode** then click the **FINISH** button.
3. The Wheel Mode logo should now appear on Zen's OLED screen.
::Image[]{src="https://archbee-image-uploads.s3.amazonaws.com/IwUlH55FdaPsVELSqm1Fc/KvaKrVh4o8J4Y5bMaEWzs_wheelmodeoled.png" size="86" width="350" height="176" position="flex-start" darkWidth="800" darkHeight="402" showCaption="false"}
4. Tap Zen's reset button and the firmware version in the status bar should now read "Firmware version v WE. The active Operational Mode 'PS4 Wheel Edition Mode' is also displayed in the status bar *(supports PS5 too)*.
***NOTE:** If it says, 'Device Disconnected', unplug and reconnect the *`PROG`* (mini-USB) cable.*
5. Now go to Zen Studio's **Device** panel and select '**Enable PS4 Speciality**'.
6. Wait for the Zen to restart, then check **PS4 SPECIALITY** is correctly enabled by unplugging the `PROG` *(mini-USB) cable*, then reconnect to see if it is still enabled. If not, try again.
7. Next, unplug all cables from the Zen *(no power)*, then connect the **HORI MINI-PAD** to `A1`*.*
8. Connect a compatible **RACING WHEEL** to `A3` *(don't forget the power supply)*.
9. Finally, connect the **CRONUS ZEN** to a **PS5 CONSOLE** with the `CONSOLE/PC`* (micro-USB) cable, then tap Zen's reset button so that everything syncs up correctly.*
:::hint{type="danger"}
# ⛔ HAZARD WARNING!
**DO NOT** touch the wheel while the Force Feedback initialization and auto calibration is in progress. It will avoid injuries and/or incorrect calibration.
:::
:::BlockQuote
If successful, the Zen RGBs will change to solid **BLUE**, and the wheel will begin calibrating itself (**DO NOT TOUCH!**) indicating that Zen, wheel and console are now correctly paired. If not? make sure the wheel's power supply is connected and powered on, then press Zen's reset button a couple of times and that should re-sync everything.
:::
******AUDIO:** It is recommended that you use a wireless headset, or one that connects directly to the console and not the controller. For more details see the [Wired Headset Users](docId\:lvkPb9xmRzZelQ-HGnS83) page.
# TIPS & TRICKS
***
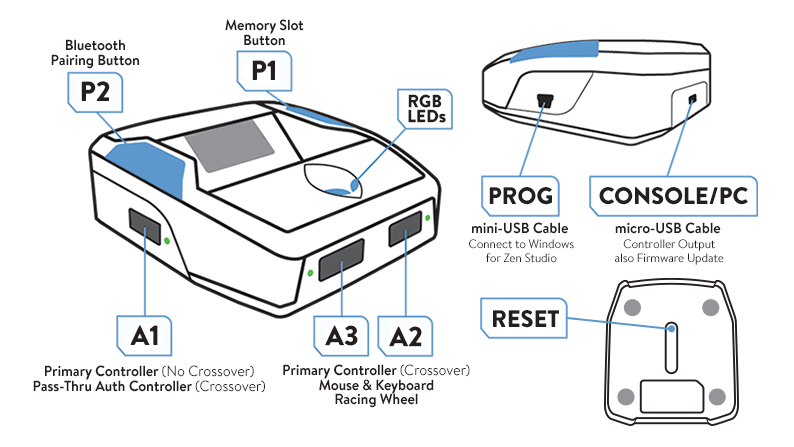
:::hint{type="success"}
## 💡EXPERT LOGITECH SETTINGS
If you are looking for the best Logitech wheel settings, we highly recommend [Brian Koponen's website](https://www.briankoponen.com/simracing.html), he is an expert in all things SIM Racers and guides you through settings for the [Logitech GHUB software](https://www.logitechg.com/en-us/innovation/g-hub.html), and also in-game settings for every major racing game!
:::
:::hint{type="info"}
## 🚦LIVE MONITORING
If you wish to monitor controller outputs in real-time with Zen Studio, connect the `PROG`* (mini-USB)* cable from Zen to PC, and keep the Zen connected to your PS4 with the `CONSOLE/PC` *(micro-USB)* cable. Open Zen Studio and make sure the Zen is detected, then go to the Device panel and select Tools > **Device Monitor** *(Shortcut: F3)*.
:::
:::hint{type="danger"}
## ☢️TROUBLESHOOTING
If the Zen RGB LEDs do not light up, or if the wheel is not responding, unplug all USB cables from the Zen, reconnect, then press Zen's reset button and that should fix it. Make sure the controllers are powered on.
If your controller disconnects:
- The controller connected to `A1` does not work as a donor *(e.g., DS4 v1).*
- The USB cable from the donor controller to the Zen is bad.
- The USB port on the controller is damaged.
- The DUALSENSE controller is paired to the console by Bluetooth.
For more detailed help, check out the extensive [Cronus Support Checklist](docId\:mK29nh7YlnPpSRlRBDuDL) 👈 guide.
:::
::::LinkArray
:::LinkArrayItem
[Fanatec PS3 Mode](docId\:i74HMDnFmBeSDeUxZC41m)
:::
:::LinkArrayItem
[Logitech G Shifter Overlay](docId\:R5cKMpxzuwgq6trbMSZ31)
:::
:::LinkArrayItem
[Compatible Racing Games](docId\:IzkMLUuRmlbKsl6Iod-lG)
:::
::::
[title] Xbox Wireless
[path] TROUBLESHOOTING/
After 2016, when Bluetooth connectivity was introduced with the second controller revision (Model 1708) alongside the Xbox One S, Microsoft rebranded its proprietary connection protocol as "Xbox Wireless".
Xbox Wireless uses a higher frequency than Bluetooth (2.4 GHz), improving bandwidth and lag. Starting in 2017, Microsoft began working with third-party manufacturers to produce additional accessories using Xbox Wireless, with the first class being headsets.
With a firmware update that began rolling out in September 2021, controllers with Bluetooth are able to pair with devices using both wireless protocols, allowing those controllers to switch connections by double-tapping the pairing button.
This proprietary format delivers superior bandwidth, ensuring snappier speeds and minimal latency during your gaming sessions. Notably, with the aid of the [Xbox Wireless Adapter](https://cronus.shop/collections/cronus-zen/products/xbox-one-wireless-adapter), these controllers also maintain compatibility with PCs and, crucially, the Cronus Zen.
In the following guide, we’ll dive deep into all facets of Xbox Wireless, elucidating its advantages for gamers and providing essential troubleshooting tips for any potential audio or connectivity issues you might encounter
- [What is Xbox Wireless?](docId\:xF-IuBXTYC-vHDaxMQ9qJ)
- [Why Use Xbox Wireless?](docId\:xF-IuBXTYC-vHDaxMQ9qJ)
- [Using Xbox Wireless with Cronus Zen](docId\:xF-IuBXTYC-vHDaxMQ9qJ)
- [Xbox Wireless Headsets](docId\:xF-IuBXTYC-vHDaxMQ9qJ)
- [Navigating Disconnections](docId\:xF-IuBXTYC-vHDaxMQ9qJ)
- [Connection Sniffing](docId\:xF-IuBXTYC-vHDaxMQ9qJ)
- [Is 2.4 GHz Better?](docId\:xF-IuBXTYC-vHDaxMQ9qJ)
- [Summary](docId\:xF-IuBXTYC-vHDaxMQ9qJ)
- [Looking For More?](docId\:xF-IuBXTYC-vHDaxMQ9qJ)

# What is Xbox Wireless?
***
Xbox Wireless, a Wi-Fi Direct protocol crafted by Microsoft, that wirelessly links accessories to Xbox Series X|S, Xbox One consoles, Windows PCs and of course, the Cronus Zen.
This technology enables controllers and select headsets to create a seamless wireless connection with the console, bypassing the hassles of physical cables.

The Xbox Wireless Wi-Fi Direct protocol initially launched with the Xbox One, acting as the underlying, unbranded technology for connecting controllers to the Xbox console. Subsequently, Microsoft broadened its utility to Windows devices through a special [wireless adapter](https://cronus.shop/collections/cronus-zen/products/xbox-one-wireless-adapter), facilitating the use of Xbox accessories on Windows PCs and, with the use of Cronus Zen, on any console.
**Official Technical Specifications:**
- **VendorID: **045E
- **ProductID: ** 02E6 02E6
- **Chipset: **Mediatek MT7612U(S), Ralink RT2870
- **Frequency: **2.4 / 5 GHz
# Why Use Xbox Wireless?
***

Although wireless technologies like Bluetooth are widely utilized for various gaming peripherals, Microsoft carved its path, devising its proprietary protocol for enhanced versatility. Xbox Wireless promises superior speed and reduced latency compared to Bluetooth, offering a potentially game-changing millisecond advantage in competitive gameplay.
:::hint{type="success"}
**WIRELESS AUDIO**
Xbox Wireless can transmit wireless stereo audio, a feature employed by specialized Xbox Wireless headsets. Notably, this enables the Xbox controller's integrated 3.5mm jack to serve as an audio output, a functionality NOT available with a Bluetooth connection.
:::
[https://apps.microsoft.com/detail/9NBLGGH30XJ3](https://apps.microsoft.com/detail/9NBLGGH30XJ3)
# Using Xbox Wireless with Cronus Zen
***

**Wi-Fi Direct **is a certified standard for connecting devices directly without the need for a wireless router. Developed by the Wi-Fi Alliance, it currently stands as the sole method for wirelessly connecting official Xbox controllers to a Cronus Zen.
You will need an [Xbox Wireless Adapter v2](https://cronus.shop/collections/cronus-zen/products/xbox-one-wireless-adapter) which are always available at a discounted price at [cronus.shop](https://cronus.shop). The smaller format design trims the adapter’s size to a third of its predecessor and guarantees full compatibility with the latest Cronus Zen updates.
Here's a straightforward guide on setting up the [Xbox Wireless adapter](https://cronus.shop/collections/cronus-zen/products/xbox-one-wireless-adapter) with Cronus Zen:
1. First make sure your Xbox controller is updated to the [latest version firmware](https://apps.microsoft.com/detail/9NBLGGH30XJ3).
2. Connect Cronus Zen to a PC using the `PROG` USB cable.
3. Open Zen Studio
- Navigate to the Device Panel.
- Set Emulator Output Protocol to **AUTO**.
4. Connect the [Xbox Wireless adapter](https://cronus.shop/collections/cronus-zen/products/xbox-one-wireless-adapter) to `A3`.
5. Connect the Xbox Controller to `A2` and make sure it is powered on. Wait 5 seconds then disconnect the controller, causing both the controller and adapter LEDs to flash momentarily before stabilizing to solid **WHITE,** confirming successful pairing.
6. **Important:** Always tap Zen's reset button whenever you're ready to use the controller, just to make sure everything is synced up nicely.
# Xbox Wireless Headsets
***
Microsoft has broadened its horizons beyond controllers, forging partnerships with assorted third-party accessory manufacturers such as Astro, HyperX, LucidSound, PDP, Plantronics, SteelSeries, Razer, and Turtle Beach, to devise Xbox Wireless devices.
A setback, however, emerged with the early models of these headsets, all of which operate within the 5GHz range. The burgeoning popularity of the 5GHz wireless range in home networks was unanticipated at the time of their development. The appeal of a modern wireless router that navigates the 2.4GHz / 5GHz spectrum is evident in its speed and range but comes with a downside: interference.
:::hint{type="danger"}
Utilizing early model Xbox Wireless headsets in a heavily trafficked wireless network environment can not only impair audio quality but also potentially disrupt your controller's connection to the Cronus Zen.
:::
# Navigating Disconnections
***
The appeal of Xbox Wireless is underscored by its seamless connectivity, albeit it's not devoid of occasional vexations, notably those stemming from the 5GHz band now commonly utilized by modern wireless routers. This sometimes spells trouble, manifesting as audio interference and intermittent controller disconnects.
A closer examination reveals that the adapter transmits data using the 802.11a and 802.11n 5GHz protocols, not engaging the widely-used 802.11ac, with Orthogonal Frequency-Division Multiplexing *(OFDM)* and a data rate of 6 Mbit/s.
Despite bypassing the ubiquity of 802.11ac *(5G Wi-Fi)*, it operates within the 5GHz band, presenting an elevated likelihood of home network interference.
:::hint{type="success"}
In tests, the wireless adapter conveyed the most substantial traffic over 5GHz channels 36, 40, 44, and 48, with channel 44 being particularly burdened. If feasible, adjusting your wireless router's channel priority to alleviate traffic around these channels is recommended, which will markedly refine the radio frequency environment within your gaming space.
For those employing a router that accommodates both 2.4GHz and 5GHz, and with an Xbox connected wirelessly to said router, it’s advisable to transition the Xbox connection to 2.4GHz - particularly if the 5GHz connection is hampered by disconnection issues - to pave the way for a smoother gaming experience.
:::
# Connection Sniffing
***
Here's a full capture of every channel the controller and [wireless adapter](https://cronus.shop/collections/cronus-zen/products/xbox-one-wireless-adapter) is scanning. This should help aid in any fine tuning of your Wi-Fi network.
- The Xbox Controller is...
- **actively scanning** for available access points (Xbox wireless adapters)
- by sending out probe requests and waiting for probe responses
- channels 1, 6 and 11 (2.4GHz)
- **passively scanning** for available access points (Xbox wireless adapters)
- by searching for beacon frames and reacting with association requests, was controller paired to this AP before
- channels 1, 6, 11 (2.4GHz) beside 36, 40, 44, 48, 153, 157, 161 and 165 (5 GHz)
- The Xbox Wireless Adapter is...
- sending out **beacon frames** to tell the Xbox Controller on which channel it is
- The Xbox Wireless Adapter is selecting a channel out of 1, 6, 11, 36, 40, 44, 48, 153, 157, 161 and 165. The most notable beacons were observed on channels 36, 40, 44 and 48. Channel 44 5GHz being the heaviest traffic.
# Is 2.4GHz Better?
***
The 2.4GHz band, despite its relatively modest speeds, commands a superior capability for wireless signal transmission. Renowned for its adept proficiency in facilitating wireless data conveyance, the 2.4GHz frequency stands out, justifying its initial selection as the foundational band for Wi-Fi.
The merit lies in its more extensive range and robust penetration, particularly when navigating through physical obstructions like walls and furniture, affirming a stable and resilient connectivity, especially in an environment laden with potential interference and barriers.
However, problems arose when the 2.4GHz band became saturated with numerous wireless signals, leading to network congestion. When one wireless data packet clashes with another, it needs to be retransmitted, diminishing the overall network speed.
Despite this, an antiquated 2.4GHz, wireless-N connection still boasts a speed rated at 300Mbps, far surpassing the 3Mbps recommended by Xbox Live for online gaming.
Ultimately, while the 2.4GHz Wi-Fi band is potentially much more stable compared to the 5GHz band, it illustrates that sometimes, faster does not necessarily equate to better.
# Summary
***
Navigating through Wi-Fi issues on your Xbox, especially those involving dropping connections, might require exploring various solutions since each situation is unique and doesn’t have a one-size-fits-all fix. Occasionally, a simple router restart might be all you need, but more commonly, experimenting with different bands or channels becomes necessary.
:::hint{type="info"}
**Customer Feedback 🧑 **
This happened to me yesterday. It turned out to be because my Xbox was set to use my router's 5GHz channel in 20/40/80 mode, without utilizing any 2.4GHz channel. Switching back to a 2.4GHz channel at 40MHz - and resetting the 5GHz channel to only 80MHz - entirely resolved the issue!
:::
While utilizing a wired Ethernet cable is often the optimal choice, it might not be feasible for everyone. In such instances, alternatives like Power Line Adapters or Ethernet to Wi-Fi converters can be valuable allies. Minimizing wireless signals from your Xbox typically proves advantageous.
For those keen on delving deeper, [a 71 page thread exists on the Xbox forums](https://answers.microsoft.com/en-us/xbox/forum/all/xbox-series-x-wifi-issue/92270086-1adc-4ad9-b8ab-dc17662239dd?page=13\&messageId=ad35734b-e52f-40cd-8785-7b4123004dbf), providing a platform where numerous users discuss their challenges and experiences with Xbox wireless issues.
# Looking For More?
***
Here's the official Wi-Fi Direct spec sheet if you're into this sort of thing. 😁
**Wi-Fi Direct** is a certified standard for connecting devices directly without the need for a wireless router. Developed by the **Wi-Fi Alliance**, it allows devices to connect to each other seamlessly, even in the absence of a traditional network.
Amidst the rapid evolution of wireless communication technologies, Wi-Fi Direct emerged as a paramount utility, providing an intuitive and efficient means for devices to communicate without the conventional need for a network infrastructure.
## 1. Streamlined Connectivity
- **Router-Free Communication**: Devices engage in mutual communication without necessitating an intermediary, like a router, thereby reducing setup complexity and enhancing spontaneity in connections.
## 2. Device Discovery and Management
- **Intuitive Interface**: Wi-Fi Direct offers a self-explanatory interface whereby devices identify and recognize potential connection candidates within proximity, automating the tedious manual search process.
- **Management Framework**: An internal management platform administers the connection protocols, overseeing authentications and ensuring stability in data transfer between devices.
## 3. Security Protocols
- **WPA3 Encryption**: With a commitment to maintaining data integrity and security, Wi-Fi Direct incorporates WPA3 encryption, safeguarding data exchanges against potential intrusions and unauthorized access.
## 4. Versatile Applicability
- **Broad Applicability**: The technology can be aptly utilized across a myriad of applications, from effortless file sharing between devices to enabling multi-player gaming scenarios, augmenting real-time interaction and data exchange.
## 5. Consistent User Experience
- **Uniformity in Operation**: Irrespective of the device type or operating system, Wi-Fi Direct ensures a consistent user interface and experience, facilitating ease of use and ensuring widespread adoption.
## 6. Interoperability
- **Device Compatibility**: Wi-Fi Direct prides itself on its robustness in connecting different devices, fostering an environment where gadgets of varied brands and operating systems can communicate unhindered.
## Practical Implications
In the realm of practicality, Wi-Fi Direct finds its place in multiple applications, such as:
- **Data Transfer**: Facilitates expedited data exchange between devices without data loss or corruption.
- **Peripheral Connection**: Enables seamless connection to peripherals like printers, thereby eliminating the need for wired connections or centralized network access.
- **Multiplayer Gaming**: Players can engage in multiplayer gaming scenarios without necessitating internet access, providing a stable and responsive gaming environment.
- **Screen Mirroring**: Users can effortlessly mirror device screens, making presentations or shared viewings straightforward and cable-free.
## Industry Adoption
In recent years, various industries have embedded Wi-Fi Direct technology into their products, thus recognizing its potential and adopting its connectivity framework to enhance user accessibility and operational efficiency. From consumer electronics, like smartphones and TVs, to peripherals, like printers and gaming consoles, the omnipresence of Wi-Fi Direct is conspicuous, underlining its integral role in shaping wireless communications in modern gadgets.
## Future Trajectory
As the digital era progresses, Wi-Fi Direct stands at the cusp of technological advancements, providing a dependable platform for devices to communicate while maintaining data security and operational efficiency. Its continual development and adoption across diverse devices and sectors exemplify the indispensable role it plays in driving forward the ethos of a connected, wireless future.
[title] STEP 2: Install Zen Studio
[path] SETUP GUIDES/
for Windows provides multiple levels of configuration for the , including exclusive access to thousands of free scripts with a fully featured code compiler, easy to use GamePacks, configuration options for your favorite supported controller, an advanced mouse & keyboard system, and tools for device development and maintenance.
# Step-by-Step Guide
***
**Zen Studio** requires that you are using a **Windows® 10/11 PC** with a good internet connection. The latest version is .
:::::WorkflowBlock
::::WorkflowBlockItem
:::CtaButton{label="Download Zen Studio for Windows 10/11" externalHref="https://guide.cronus.support/downloads#ZA3fI" openInNewTab="true"}
:::
::::
:::WorkflowBlockItem
Open the downloaded file **ZenStudio\_Setup\_v1.6.1\_Build\_82.exe** and run the installer. Both **Zen Studio** and **Zen LINK™ Configurator** shortcuts will be copied to your Windows® Start Menu and desktop *(see screenshots below)*.
::Image[]{src="https://archbee-image-uploads.s3.amazonaws.com/IwUlH55FdaPsVELSqm1Fc/suK5niRPg_o4oDCnarsEi_89a948c9-0957-49fc-8694-9b403f0678c1.png" size="64" width="499" height="388" darkWidth="499" darkHeight="388" position="flex-start" showCaption="false"}
:inlineImage[]{src="https://archbee-image-uploads.s3.amazonaws.com/IwUlH55FdaPsVELSqm1Fc/3KN9ZFi6r8iw9JR3TtdcS_8c114848-489d-4c28-aba3-f1352684a851.png" alt caption width="499" height="388"} :inlineImage[]{src="https://archbee-image-uploads.s3.amazonaws.com/IwUlH55FdaPsVELSqm1Fc/OYMF_riq-0bxufjdZkJU8_16f519a2-3204-4432-b79e-0ecece7ccdfe.png" alt caption width="499" height="388"} :inlineImage[]{src="https://archbee-image-uploads.s3.amazonaws.com/IwUlH55FdaPsVELSqm1Fc/n39WvRgzAQ7UNfVVxjk3G_a5d02c2d-d68c-45af-93b5-b6b445c345e9.png" alt caption width="499" height="388"} :inlineImage[]{src="https://archbee-image-uploads.s3.amazonaws.com/IwUlH55FdaPsVELSqm1Fc/gkxwFZBqyuRQ1RnCuiP2I_b28ed836-2c03-405f-b343-69d03e02a0a7.png" alt caption width="204" height="272"} :inlineImage[]{src="https://archbee-image-uploads.s3.amazonaws.com/IwUlH55FdaPsVELSqm1Fc/RPU22vDcNAPuILk6H9M8J_7deaf798-8389-4391-b322-fceb86cec6b7.png" alt caption width="324" height="173"}
:::
:::WorkflowBlockItem
Connect **Cronus Zen™** to a **Windows® PC**: **PROG USB ***(*not* the **CONSOLE/PC** USB Port used for upgrading the firmware)*.
![]()
:::
:::WorkflowBlockItem
Open **Zen Studio**, and if your **Cronus Zen™** was correctly updated to the latest firmware, the **Library Panel** should display the latest free scripts by members of the Cronus Community.
**Note:** If you see any firmware compatibility errors, go back to [STEP 1: Update Firmware](docId:7cpnL5ScNTyU9B2dWqIyb) and run the update again.

:::
:::WorkflowBlockItem
You are now ready for [STEP 3: Register Your Zen](docId\:IfSSF19ZgIoRxZdwlGVrF).
:::
:::::
# Troubleshooting
***
These are the most common problems & solutions when setting up Zen Studio.
## Device Not Connected
If **Zen Studio** says **Device Not Connected** or some other error, this is usually because of a poor connection or faulty USB cable. If you are sure the USB cable is good, try **Device Panel > Find Device 🔍 ***(see the *[Zen Studio Errors](docId\:xrFAY4U9Buyb9SO7ONL07)* guide for more troubleshooting tips)*.
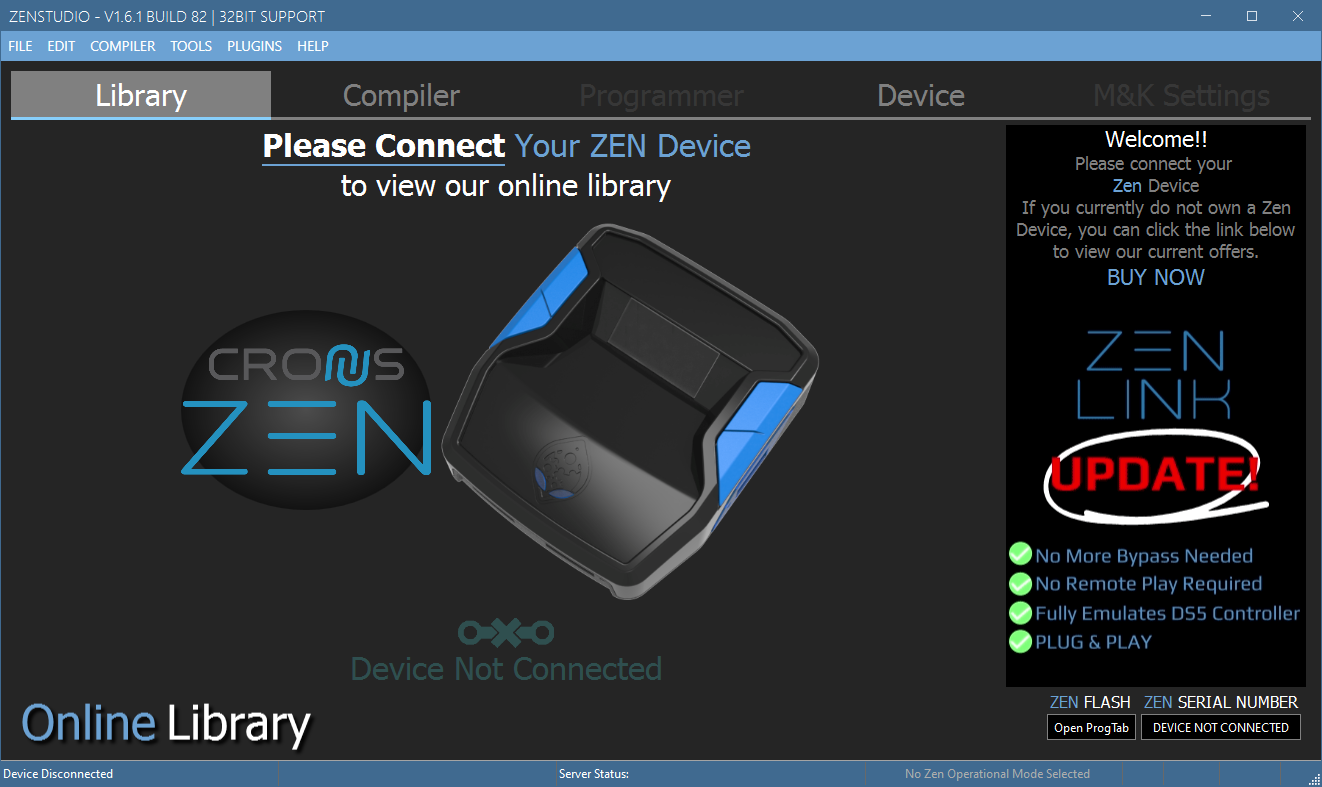
## Reset Zen Studio
If you were already using an older version of **Zen Studio**, we recommend running **Tools > Reset Zen Studio** to avoid any glitches or compatibility issues. You will need to accept the license terms before you can use the software.
**Note:** This will erase all backups, settings, and any previously stored files to your computer when using **Zen Studio**, however it won't erase anything from the **Cronus Zen™** itself.
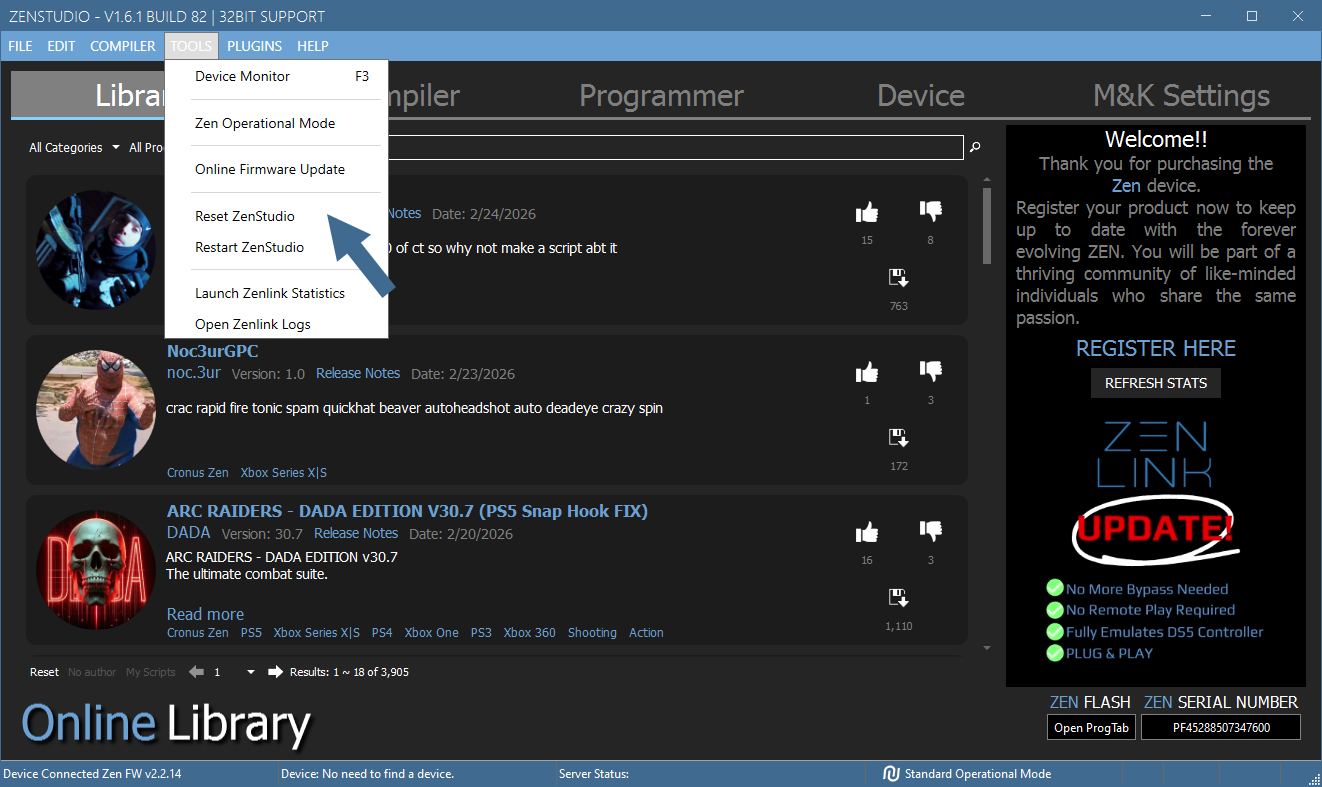
## Registered to Someone Else?
If your **Cronus Zen™** was purchased used, then it could still be registered to someone else's community and social media accounts, which denies you access to the Cronus Community. Given the care and extra steps involved, there is a small fee for support to do this remotely, or you can ask the original owner if they will unregister it for you.
Visit [cronus.support/unregister](https://cronus.support/unregister) for more details.

# Zen Studio (Main Guide)
***
If you wish to dive deeper into **Zen Studio**, here are the main instructions:
- [Main Interface](docId:0qUnXoMIqCK3TdVBy5cI6)
- [File Management](docId\:wsR2RdsAs_x-6sxH7pbOW)
- [Edit, Search, Replace](docId\:B0S3hVLm3nB4Zujq9cUV8)
- [Working Panels](docId\:eYewJikHXfmcCFt6e30th)
- [Zen Studio Update](docId\:wtYDSYdFa2jB_x8Yx517x)
- [Zen Operational Mode](docId\:Q0B3zItIKCjnFpbm3nuTV)
- [Device Monitor](docId\:bzqwLvypc8_k6_FFb4yHH)
- [Plugins](docId\:TqB0IjQl25RTwIcFrmeHO)
[title] Wheel Mode
[path] ZEN STUDIO/Untitled/
Breathe new life into your old racing wheel with Cronus Zen. Now supporting a range of awesome, but forgotten wheels from Logitech and Fanatec, fully functional on a PlayStation 4/5 with full Force Feedback, Pedals, Brakes, Clutch, and Shifter support for the latest SIM Racers!
[PlayStation 4 Setup](docId\:EU_wEhzykudZMJ75pcUzG) for detailed setup instructions.

[title] PlayStation 4 Setup
[path] WHEEL MODE/
Breathe new life into your old racing wheel with Cronus Zen. Now supporting a range of awesome, but forgotten wheels from Logitech and Fanatec, fully functional on a PlayStation 4 with full Force Feedback, Pedals, Brakes, Clutch, and Shifter support for the latest SIM Racers!
:::hint{type="success"}
## LOGITECH QUOTE
*"Unfortunately, our existing Logitech G wheels don’t work with next-generation systems. This is often a side effect of a new platform launch."*
## CRONUS QUOTE
*"Nope."*
:::

👉 This page includes the following guides for PlayStation SIM Racer gaming:
- [Supported Wheels](docId\:EU_wEhzykudZMJ75pcUzG)
- [Supported Games](docId\:EU_wEhzykudZMJ75pcUzG)
- [PS4 Console Settings](docId\:EU_wEhzykudZMJ75pcUzG)
- [Setup Wheel Mode](docId\:EU_wEhzykudZMJ75pcUzG)
- [Tips & Tricks](docId\:EU_wEhzykudZMJ75pcUzG)
# SUPPORTED WHEELS
***

::::hint{type="success"}
# 🏁 DRIVE HUB
If you require more advanced support for newer games, and a much larger range of wheels, clutches, brakes, and shifters, as well as support for both the PS5 and XBOX SERIES X/S - we invite you to check out our dedicated Racing Wheel product, the [Drive Hub](https://shop.cronusmax.com/drivehub.html)** 🛒**
:::BlockQuote
Use coupon code **ZENOWNERBB10** for a 10% discount!
:::
::::
:::hint{type="danger"}
Please note there will be no further updates to Zen's Wheel mode *(final update was Jan 2020)* as there simply isn't enough space to handle the huge list of different brands of wheels, brakes, shifters and clutches, with support for both PlayStation and Xbox and dozens of games across multiple platforms.
That's why we developed the amazing **Drive Hub** - which has been [GTPlanet's favorite wheel adapter since 2017](https://www.gtplanet.net/drivehub-allows-use-almost-driving-wheel-console/)!
:::
This is the complete list of Logitech and Fanatec Wheels that are supported on a PlayStation 4 by Cronus Zen's Wheel Mode, including full Force Feedback support.
- Fanatec ClubSport Wheel Base v1
- Fanatec ClubSport Wheel Base v1.5
- Fanatec ClubSport Wheel Base v2
- Fanatec CSR
- Fanatec CSR Elite
- Fanatec Porsche 911 GT2
- Fanatec Porsche 911 GT3
- Fanatec Porsche 911 GT3 R
- Fanatec Porsche 911 GT3 RS v2
- Fanatec Porsche 911 Turbo
- Fanatec Porsche 911 Turbo S
- Logitech Driving Force GT
- Logitech G25
- Logitech G27
**Fanatec Notes:** Must be switched to PS3 mode with DC power supply connected. See the [Fanatec PS3 Mode](docId\:i74HMDnFmBeSDeUxZC41m) page for detailed instructions.
**Logitech G25 Notes:** The wheel must be switched to PS3 mode with the DC power supply connected. To change between six-speed and sequential mode, push straight down on shift knob and turn Mode Selection Dial so the red arrow points to the desired symbol. In sequential mode, the Sequential Mode Status Light will be on. In six-speed mode, the light will be off - [Instructions PDF
](https://www.logitech.com/assets/47297/g25-racing-wheel-qsg.pdf)**Logitech G27 Notes:** The wheel must be switched to PS3 mode with the DC power supply connected - [Instructions PDF](https://www.logitech.com/assets/47059/g27-racing-wheel-quickstart-guide.pdf)
**Logitech G29 Notes:** Works on a PS4/PS5 without using Zen. The wheel must be switched to PS4 mode with the DC power supply connected - [Instructions PDF](https://www.logitech.com/assets/53755/3/g29-driving-force-racing-wheel.pdf)
**Logitech Gaming Software:** [Download](https://support.logi.com/hc/en-us/articles/360024699674--Downloads-G27-Racing-Wheel)
# SUPPORTED GAMES
***
Zen's Wheel Mode has been tested working with the vast majority of SIM Racers that support racing wheels on the PS4, such as *Gran Turismo 7, Assetto Corsa Competizione, F1 22, GRID Legends, and WRC 10.*
This is the complete list of known compatible PS4 SIM Racers that work with Cronus Zen and Wheel Mode.
| **GAME** | **VERSION** | **US RELEASE DATE** |
| -------------------------- | ----------- | ------------------- |
| Assetto Corsa | PS4 | August 30, 2016 |
| Assetto Corsa Competizione | PS4 | June 23, 2020 |
| Baja: Edge of Control | PS4 | September 14, 2017 |
| Dakar 18 | PS4 | September 25, 2018 |
| DiRT 4 | PS4 | June 6, 2017 |
| DiRT 5 | PS4 | November 6, 2020 |
| Dirt Rally | PS4 | April 5, 2016 |
| Dirt Rally 2.0 | PS4 | February 26, 2019 |
| DRIVECLUB | PS4 | October 7, 2014 |
| F1 2015 | PS4 | July 21, 2015 |
| F1 2016 | PS4 | August 19, 2016 |
| F1 2017 | PS4 | August 25, 2017 |
| F1 2018 | PS4 | August 24, 2018 |
| F1 2019 | PS4 | June 28, 2019 |
| F1 2020 | PS4 | July 10, 2020 |
| F1 2021 | PS4 | July 16, 2021 |
| F1 22 | PS4 | July 1, 2022 |
| Farming Simulator 15 | PS4 | May 19, 2015 |
| Farming Simulator 17 | PS4 | October 25, 2016 |
| Farming Simulator 19 | PS4 | November 20, 2018 |
| Gran Turismo 7 | PS4 | March 4, 2022 |
| Gran Turismo Sport | PS4 | October 17, 2017 |
| Gravel | PS4 | February 27, 2018 |
| GRID (2019) | PS4 | October 11, 2019 |
| GRID Legends | PS4 | February 25, 2022 |
| GRIP: Combat Racing | PS4 | November 6, 2018 |
| Monster Jam Steel Titans | PS4 | June 25, 2019 |
| Monster Jam Steel Titans 2 | PS4 | March 2, 2021 |
| NASCAR Heat 3 | PS4 | September 7, 2018 |
| NASCAR Heat 4 | PS4 | September 13, 2019 |
| NASCAR Heat 5 | PS4 | July 7, 2020 |
| Need for Speed Heat | PS4 | November 8, 2019 |
| Need for Speed Payback | PS4 | November 10, 2017 |
| Project CARS | PS4 | May 6, 2015 |
| Project CARS 2 | PS4 | September 22, 2017 |
| Project CARS 3 | PS4 | August 28, 2020 |
| Snowrunner | PS4 | April 28, 2020 |
| Spintires: Mudrunner | PS4 | October 31, 2017 |
| The Crew 2 | PS4 | June 29, 2018 |
| Truck Driver | PS4 | September 19, 2019 |
| V-Rally 4 | PS4 | September 11, 2018 |
| WRC 5 | PS4 | October 13, 2015 |
| WRC 6 | PS4 | October 7, 2016 |
| WRC 7 | PS4 | September 15, 2017 |
| WRC 8 | PS4 | September 10, 2019 |
| WRC 9 | PS4 | September 3, 2020 |
| WRC 10 | PS4 | September 2, 2021 |
| Wreckfest | PS4 | August 27, 2019 |
| Xenon Racer | PS4 | March 26, 2019 |
:::hint{type="info"}
Remember, Wheel Mode is only intended for SIM Racers that support Force Feedback, Clutch, Brakes, Shifter and Pedals. It doesn't support Arcade Racers such as *Gear Club Unlimited 2, Hot Wheels Unleashed and Inertial Drift: Twilight Rivals Edition, *which all work with a standard controller.
:::
# PS4 CONSOLE SETTINGS
***
Now for the fun part. Follow these steps to get you started...
- Check the game is compatible with PS4 *(see above list)*
- No PlayStation controllers paired to the PS4 *(delete them from Bluetooth Devices)*
- Do not have any scripts or GamePacks enabled while setting up your wheel
:::hint{type="danger"}
When connecting a DUALSHOCK 4 to your PlayStation using an USB cable, it also pairs it to the console via Bluetooth. So, to correctly unpair a DS4 Bluetooth controller, simply connect Zen to the PlayStation using any controller, then it won't auto pair to the console after you 'Forget Device'👍
:::
Be sure to apply the PS4 Settings below *(or risk your wheel disconnecting)* 👇
- Settings > Devices > Controllers > Select Controller then press **OPTIONS** > **Forget Device**
- Settings > Devices > Controllers > Communication Method: **Use USB Cable**
- Settings > Power Save Settings > Set Time Until Controllers Turn Off: **Do Not Turn Off**
::::VerticalSplit
:::VerticalSplitItem


:::
:::VerticalSplitItem
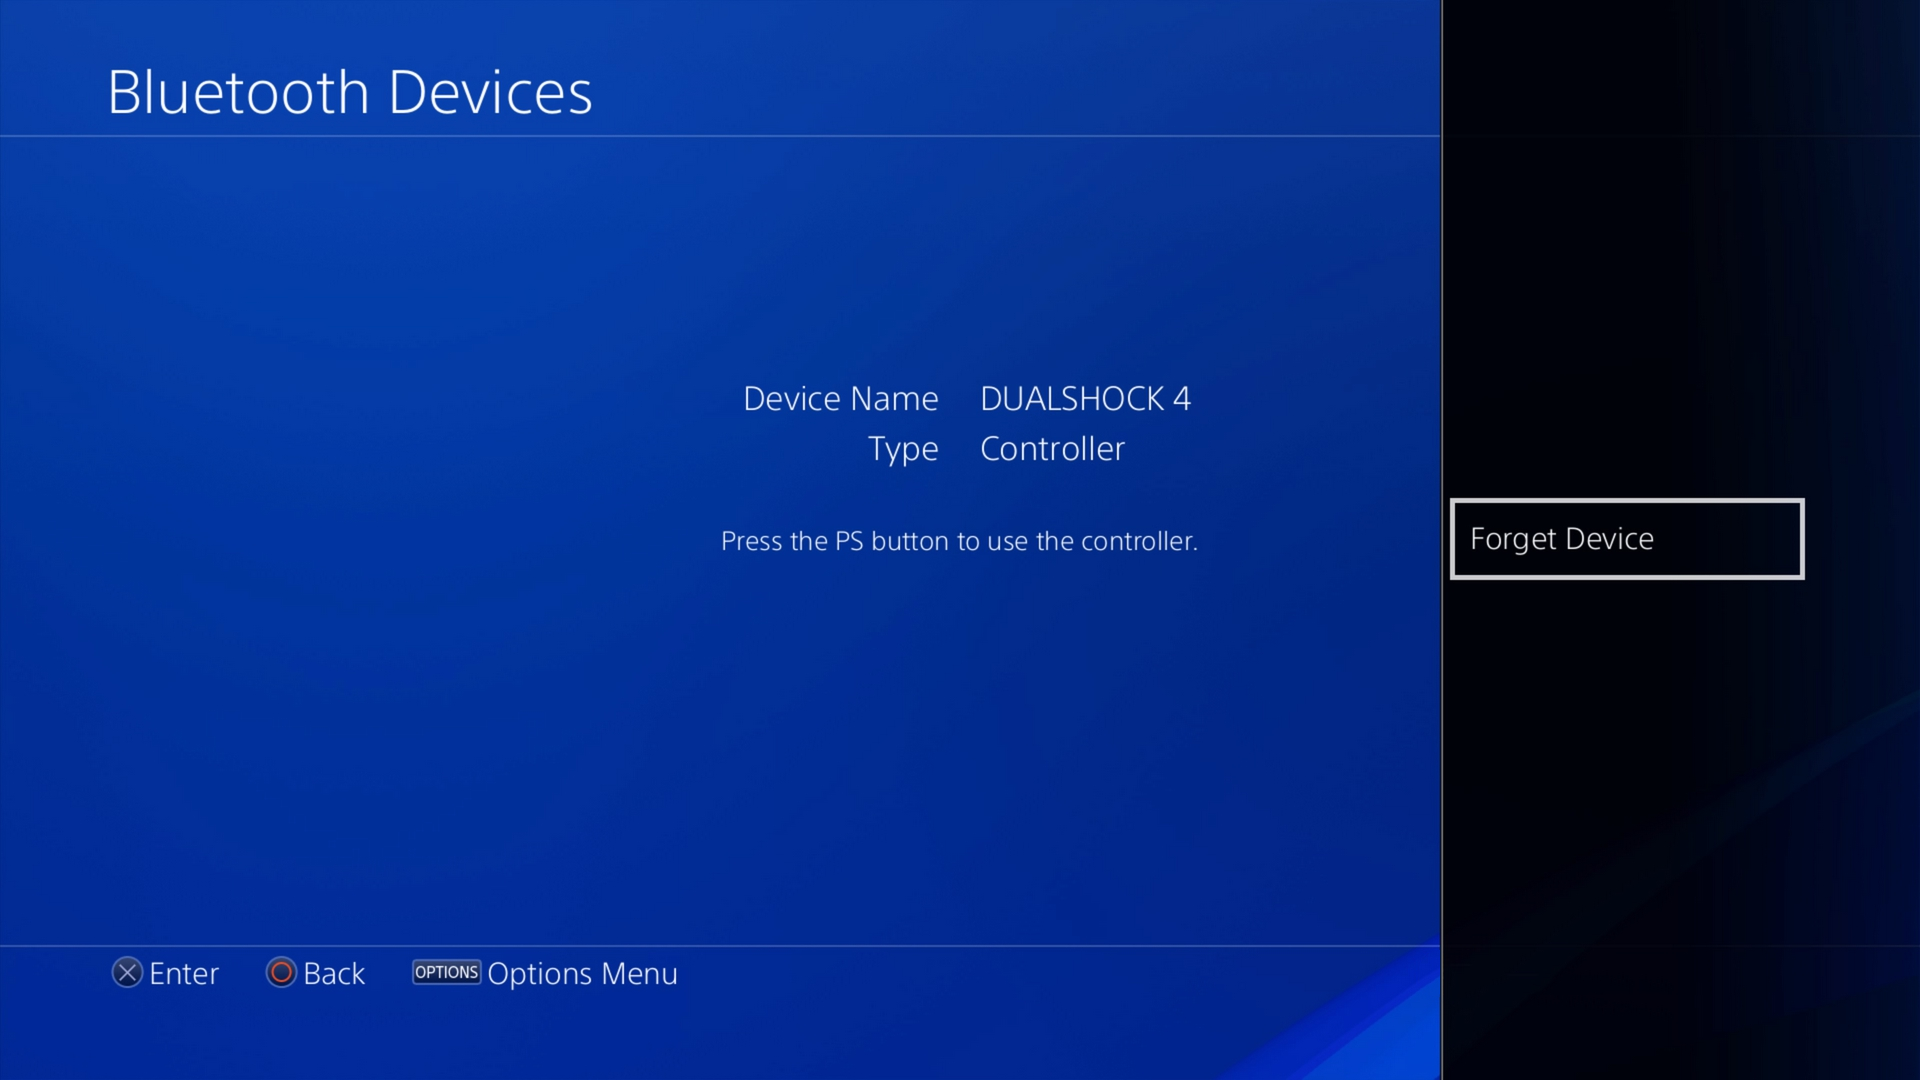

:::
::::
# SETUP PS4 WHEEL MODE
***
Unlike other inferior products, all supported wheels are automatically re-mapped and converted so they detect in-game as a **Logitech G29 with Force Feedback (FFB)**�� We do all the heavy lifting for you!
:::hint{type="danger"}
# ⚡IMPORTANT
If your wheel requires a power supply such as Logitech G25, G27 & G29 wheels (DC 24V 2A / 2000mA 48W), it must be connected (if you don't have the PSU, you can buy one from eBay for less than $20), and if you have any pedals, brakes, shifter, clutch, etc. that came with your wheel, make sure they all connected too.
If the power supply is not connected, then your wheel will output strange behavior, for example when playing GT7 with a Logitech G27 and no AC/DC power supply connected, there may be no Force Feedback, the left D-PAD is continuously pressing, and the clutch will not detect at all.
:::
You also need a PS4 license donor controller connected to `A1`, so that the wheel does not disconnect every 8-10 minutes. We recommend the **DUALSHOCK 4 CUH-ZCT2 (DS4 v2)** which is our preferred controller for all PS4 crossover setups. The table below speaks for itself 😁
| **DS4 Model** | **License Donor** | **Audio USB** | **Audio Bluetooth** | **DS4 Speaker** | **Switch Audio** |
| -------------------------------------- | -------------------------------- | -------------------------------- | -------------------------------- | -------------------------------- | -------------------------------- |
| CUH-ZCT1X | NO | NO | NO | NO | NO |
| CUH-ZCT2X | YES | YES | YES | YES | YES |
*X: U=USA, E=Europe, J=Japan***

# RACING WHEEL (USB)
***
**Setup Hardware:** PlayStation 4 console, DUALSHOCK 4 v2 controller, Zen Studio and Zen Firmware .
::Image[]{src="https://archbee-image-uploads.s3.amazonaws.com/IwUlH55FdaPsVELSqm1Fc/VEvgnT4k4Ps7CeJs8D1Mw_progtopc.png" size="96" width="1081" height="381" position="center" darkWidth="800" darkHeight="282" showCaption="false"}
1. Connect the **CRONUS ZEN** to a PC using the `PROG` USB port *(mini-USB)*.
2. Open **ZEN STUDIO** V > Tools > Zen Operational Mode > select **Wheel Mode** then click the **FINISH** button.
3. The Wheel Mode logo should now appear on Zen's OLED screen.

4. Now go to Zen Studio's **Device** panel and set the Emulator Output Protocol to **AUTO** if it isn't already, and make sure that PS4 Speciality and PS Remote Play are **NOT** enabled.
5. Tap Zen's reset button and the firmware version in the status bar should now read "Firmware version v WE. The active Operational Mode 'PS4 Wheel Edition Mode' is also displayed in the status bar.
***NOTE:** If it says, 'Device Disconnected', unplug and reconnect the *`PROG`* (mini-USB) cable.*
6. Next, unplug all cables from the Zen *(no power)*, then connect the **DUALSHOCK 4 v2** to `A1`*.*
7. Connect a compatible **RACING WHEEL** to `A3` *(don't forget the power supply)*.
8. Finally, connect the **CRONUS ZEN** to a **PS4 CONSOLE** with the `CONSOLE/PC`* (micro-USB) cable, then tap Zen's reset button so that everything syncs up correctly.* ***IMPORTANT NOTE:**** If using a PS4 PRO, Zen *must* connect to the consoles rear USB port.*
:::hint{type="danger"}
# ⛔ HAZARD WARNING!
**DO NOT** touch the wheel while the Force Feedback initialization and auto calibration is in progress. It will avoid injuries and/or incorrect calibration.
:::
:::BlockQuote
If successful, the Zen RGBs and DUALSHOCK 4 v2 lightbar will change to solid **BLUE**, and the wheel will begin calibrating itself (**DO NOT TOUCH!**) indicating that Zen, wheel and console are now correctly paired. If not? make sure the donor controller is powered on by pressing the PS button, and that the wheel's power supply is connected, then press Zen's reset button a couple of times and that should re-sync everything.
:::
**AUDIO:** You can connect a wired headset to the `A1` DUALSHOCK 4 v2 donor controller. However, it is recommended that you use a wireless headset, or one that connects directly to the console and not the controller. For more details see the [Wired Headset Users](docId\:lvkPb9xmRzZelQ-HGnS83) page.
# TIPS & TRICKS
***

:::hint{type="success"}
## 💡EXPERT LOGITECH SETTINGS
If you are looking for the best Logitech wheel settings, we highly recommend [Brian Koponen's website](https://www.briankoponen.com/simracing.html), he is an expert in all things SIM Racers and guides you through settings for the [Logitech GHUB software](https://www.logitechg.com/en-us/innovation/g-hub.html), and also in-game settings for every major racing game!
:::
:::hint{type="info"}
## 🚦LIVE MONITORING
If you wish to monitor controller outputs in real-time with Zen Studio, connect the `PROG`* (mini-USB)* cable from Zen to PC, and keep the Zen connected to your PS4 with the `CONSOLE/PC` *(micro-USB)* cable. Open Zen Studio and make sure the Zen is detected, then go to the Device panel and select Tools > **Device Monitor** *(Shortcut: F3)*.
:::
:::hint{type="danger"}
## ☢️TROUBLESHOOTING
If the Zen RGB LEDs do not light up, or if the wheel is not responding, unplug all USB cables from the Zen, reconnect, then press Zen's reset button and that should fix it. Make sure the controllers are powered on.
If your controller disconnects:
- The controller connected to `A1` does not work as a donor *(e.g., DS4 v1).*
- The USB cable from the donor controller to the Zen is bad.
- The USB port on the controller is damaged.
- The DUALSHOCK 4 is paired to the console by Bluetooth.
For more detailed help, check out the extensive [Cronus Support Checklist](docId\:mK29nh7YlnPpSRlRBDuDL) 👈 guide.
:::
::::LinkArray
:::LinkArrayItem
[Fanatec PS3 Mode](docId\:i74HMDnFmBeSDeUxZC41m)
:::
:::LinkArrayItem
[(H)Logitech G Shifter Overlay](docId\:R5cKMpxzuwgq6trbMSZ31)
:::
:::LinkArrayItem
[Compatible Racing Games](docId\:IzkMLUuRmlbKsl6Iod-lG)
:::
::::
[title] SETUP GUIDES
[path] /
Get your Cronus Zen game-ready with your favorite console in just four easy steps:
1. [Update Firmware](docId:7cpnL5ScNTyU9B2dWqIyb) (latest )
2. [Install Zen Studio](docId\:uvMc-vW2cI8sD09IzJ4EP) (latest )
3. [Register Your Zen](docId\:IfSSF19ZgIoRxZdwlGVrF)
4. [Controller Setup](docId\:si-fn5ysAQ3v1m4BFW9v_)

[title] Compatible Racing Games
[path] WHEEL MODE/
Zen's Wheel Mode has been tested working with the vast majority of SIM Racers that support racing wheels on the PS4 and PS5, such as *Gran Turismo 7, Assetto Corsa Competizione, F1 22, GRID Legends, and WRC 10.*
:::hint{type="success"}
## PS5 SUPPORT
The Wheel Mode feature was originally designed for use with the PlayStation 4. However, you can use the **PS4 SPECIALITY** mode with SIM Racers on the PlayStation 5 with full Force Feedback support!
:::
This is the complete list of known compatible SIM Racers that work with Cronus Zen and the PS4/PS5. If the version is labeled **PS4**, then Wheel Mode will work with the PS4 version of the game using the [PS4 SPECIALITY](docId\:biRfFZ4lTIcVh4pNd2IMK) method. If the version is labeled **PS5 TBC**, the PS5 version of the game hasn't been confirmed yet.
:::hint{type="info"}
We are currently testing all the PS5 versions of these games with Zen's Wheel Mode and will update the chart from 'PS5 TBC' to **PS5** *(supported)* or ~~**PS5**~~ *(not supported)*.
*\~ Charlie/MaxADMIN*
:::
| **GAME** | **VERSION** | **US RELEASE DATE** |
| -------------------------- | ----------- | ------------------- |
| Assetto Corsa | PS4 | August 30, 2016 |
| Assetto Corsa Competizione | PS4 | June 23, 2020 |
| Assetto Corsa Competizione | PS5 TBC | February 24, 2022 |
| Baja: Edge of Control | PS4 | September 14, 2017 |
| Dakar 18 | PS4 | September 25, 2018 |
| DiRT 4 | PS4 | June 6, 2017 |
| DiRT 5 | PS4 | November 6, 2020 |
| DiRT 5 | PS5 TBC | November 12, 2020 |
| Dirt Rally | PS4 | April 5, 2016 |
| Dirt Rally 2.0 | PS4 | February 26, 2019 |
| DRIVECLUB | PS4 | October 7, 2014 |
| F1 2015 | PS4 | July 21, 2015 |
| F1 2016 | PS4 | August 19, 2016 |
| F1 2017 | PS4 | August 25, 2017 |
| F1 2018 | PS4 | August 24, 2018 |
| F1 2019 | PS4 | June 28, 2019 |
| F1 2020 | PS4 | July 10, 2020 |
| F1 2021 | PS4 | July 16, 2021 |
| FA 2021 | PS5 TBC | July 16, 2021 |
| F1 22 | PS4 | July 1, 2022 |
| F1 22 | PS5 TBC | July 1, 2022 |
| Farming Simulator 15 | PS4 | May 19, 2015 |
| Farming Simulator 17 | PS4 | October 25, 2016 |
| Farming Simulator 19 | PS4 | November 20, 2018 |
| Gran Turismo 7 | PS4 | March 4, 2022 |
| Gran Turismo 7 | PS5 TBC | March 4, 2022 |
| Gran Turismo Sport | PS4 | October 17, 2017 |
| Gravel | PS4 | February 27, 2018 |
| GRID (2019) | PS4 | October 11, 2019 |
| GRID Legends | PS4 | February 25, 2022 |
| GRID Legends | PS5 TBC | February 25, 2022 |
| GRIP: Combat Racing | PS4 | November 6, 2018 |
| Monster Jam Steel Titans | PS4 | June 25, 2019 |
| Monster Jam Steel Titans 2 | PS4 | March 2, 2021 |
| NASCAR Heat 3 | PS4 | September 7, 2018 |
| NASCAR Heat 4 | PS4 | September 13, 2019 |
| NASCAR Heat 5 | PS4 | July 7, 2020 |
| Need for Speed Heat | PS4 | November 8, 2019 |
| Need for Speed Payback | PS4 | November 10, 2017 |
| Project CARS | PS4 | May 6, 2015 |
| Project CARS 2 | PS4 | September 22, 2017 |
| Project CARS 3 | PS4 | August 28, 2020 |
| Snowrunner | PS4 | April 28, 2020 |
| Snowrunner | PS5 TBC | May 31, 2022 |
| Spintires: Mudrunner | PS4 | October 31, 2017 |
| The Crew 2 | PS4 | June 29, 2018 |
| Truck Driver | PS4 | September 19, 2019 |
| V-Rally 4 | PS4 | September 11, 2018 |
| WRC 5 | PS4 | October 13, 2015 |
| WRC 6 | PS4 | October 7, 2016 |
| WRC 7 | PS4 | September 15, 2017 |
| WRC 8 | PS4 | September 10, 2019 |
| WRC 9 | PS4 | September 3, 2020 |
| WRC 10 | PS4 | September 2, 2021 |
| WRC 10 | PS5 TBC | September 2, 2021 |
| Wreckfest | PS4 | August 27, 2019 |
| Wreckfest | PS5 TBC | May 4, 2021 |
| Xenon Racer | PS4 | March 26, 2019 |
:::hint{type="info"}
Remember, Wheel Mode is only intended for SIM Racers that support Force Feedback, Clutch, Brakes, Shifter and Pedals. It doesn't support Arcade Racers such as *Gear Club Unlimited 2, Hot Wheels Unleashed and Inertial Drift: Twilight Rivals Edition, *which all work with a standard controller.
:::
::::LinkArray
:::LinkArrayItem
[PlayStation 4 Setup](docId\:EU_wEhzykudZMJ75pcUzG)
:::
:::LinkArrayItem
[PlayStation 5 Setup](docId\:zmmsvF6_IcRoI8K2NVoYH)
:::
::::
[title] Native vs Emulation
[path] MOUSE & KEYBOARD/
Understanding the difference between **Native Mouse & Keyboard support** and **Mouse & Keyboard Emulation** is essential for knowing how your inputs are handled in-game.
# 🤔Difference between Native and Emulation?
***
**Native MK support** means the game accepts mouse and keyboard input **directly.**
**MK Emulation** means your mouse and keyboard are translated into **controller inputs**.
**Native:** Mouse and Keyboard goes **directly **into the **PC/Console**
**Emulation:** Mouse and Keyboard goes into the **Cronus ZEN** first then into the **PC/Console**
# ❓ Why do we need MK Emulation?
***
Most console games **do not support native mouse and keyboard input.**
Mouse & Keyboard emulation is necessary because it **tricks the console into thinking your mouse & keyboard are a standard controller**.
# ⚖️ Native Pros & Cons
***
**✔️ Pros**
- **Direct Input** – No emulation or conversion needed
- **Plug & Play** – No additional software or setup
**❌ Cons**
- 🎯 **No Aim Assist** – Games treat you like a PC player, so aim assist is removed
- ❗ **Limited Game Support** – Only available in select titles
- 🚫 **No M.O.D Support** – You can’t use GamePacks or Scripts with native input
# ⚖️ Emulation Pros & Cons
***
**✔️ Pros**
- 🎯 **Controller Aim Assist** – Take advantage of **aim assist** in shooters
- 🎮 **Works in Any Game** – Even those with no native MK support
- ✅ **Full M.O.D. Support** – Use GamePacks, Scripts, Anti-Recoil, Rapid Fire, etc.
- 🧠 **Advanced Tuning** – Adjust sensitivity, smoothing, deadzones, aim assist behavior
- 🔧 **Custom Mapping** – Remap every key/button to fit your style
**❌ Cons**
- 🔁 **Input Translation** – Inputs are converted to controller signals, not raw MK
- ⚙️ **Initial Setup Required** – Needs Zen Studio, profile import, and tuning
[title] Changelog
[path] WELCOME TO CRONUS/Untitled/
# Cronus Zen Firmware
***
:::Changelog{title="v2.2.12 - June 17th 2025"}
::ChangelogItem{type="added" description="DS5 haptics translation to rumbles"}
::ChangelogItem{type="added" description="WiFi channel support for ZenLink UDP Statistics"}
::ChangelogItem{type="fixed" description="Factory erase at startup"}
::ChangelogItem{type="fixed" description="DS5 touchpad issues over Bluetooth"}
::ChangelogItem{type="fixed" description="DS5 compatibility with A3 Output Protocol on PS4"}
::ChangelogItem{type="fixed" description="GamePack flash race condition"}
::ChangelogItem{type="fixed" description="Haptics block for DS4 v1 in A2/A3"}
::ChangelogItem{type="fixed" description="DS5 audio issues in forced PS4 emulation on PC"}
::ChangelogItem{type="fixed" description="DS5 crossover audio on Xbox"}
::ChangelogItem{type="fixed" description="DS4 BT conflict when DS5 in A1"}
::ChangelogItem{type="improved" description="DS5 handling and stability"}
::ChangelogItem{type="improved" description="Consistent haptics-to-rumbles translation in GPC & Device Monitor"}
::ChangelogItem{type="improved" description="Haptics to rumbles sent only to cross-gaming pads (XB1/DS4)"}
:::
:::Changelog{title="v2.2.11 - April 3rd 2025"}
::ChangelogItem{type="added" description="ZenLINK HTTP server support"}
::ChangelogItem{type="fixed" description="Block haptics when using mouse & keyboard"}
::ChangelogItem{type="fixed" description="Redirect haptics to secondary DualSense/Edge"}
::ChangelogItem{type="improved" description="Various bug fixes and stability improvements"}
:::
:::Changelog{title="v2.2.10 - December 19th 2024"}
::ChangelogItem{type="fixed" description="Minor bugs"}
:::
:::Changelog{title="v2.2.9 - December 18th 2024"}
::ChangelogItem{type="added" description="Haptics detection (on/off) in get_rumble. Use identifier 26 and 27 for left / right."}
::ChangelogItem{type="fixed" description="Issue with DS4 Output protocol"}
::ChangelogItem{type="fixed" description="XB1 Wireless Dongle issue"}
::ChangelogItem{type="fixed" description="Factory reset issue"}
:::
:::Changelog{title="v2.2.8 - December 4th 2024"}
::ChangelogItem{type="added" description="support for Gamesir G7 SE."}
::ChangelogItem{type="fixed" description="Touchpad issue."}
::ChangelogItem{type="fixed" description="Touchpad fingers issue."}
::ChangelogItem{type="fixed" description="Output protocol cycle 16ms issue."}
::ChangelogItem{type="fixed" description="Rumble not resetting to 0."}
::ChangelogItem{type="fixed" description="ZenLINK remote play connection starting without connected devices."}
::ChangelogItem{type="fixed" description="Issue with Xbox One polars."}
::ChangelogItem{type="fixed" description="Issue with PS5 legacy rumbles."}
:::
:::Changelog{title="v2.2.7 - October 22th 2024"}
::ChangelogItem{type="fixed" description="PS5_MUTE event_press / event_release"}
::ChangelogItem{type="fixed" description="Legacy rumbles when Zenet is connected"}
::ChangelogItem{type="improved" description="Faster flash content synchronization"}
::ChangelogItem{type="improved" description="PS5 driver CPU usage"}
::ChangelogItem{type="added" description="ZENLINK_STATUS contant to GET_INFO (returns 1 if connected, 3 if connected and linked to PS5) get_info(ZENLINK_STATUS);"}
:::
:::Changelog{title="v2.2.6 - September 26th 2024"}
::ChangelogItem{type="improved" description="Device synchronization"}
:::
:::Changelog{title="v2.2.5 - September 18th 2024"}
::ChangelogItem{type="added" description="Upcoming Cronus Zen Marketplace integration"}
:::
:::Changelog{title="v2.2.4 - September 5th 2024"}
::ChangelogItem{type="added" description="ZenLink Support"}
::ChangelogItem{type="fixed" description="Minor issues"}
:::
:::Changelog{title="v2.2.3 - April 22th 2024"}
::ChangelogItem{type="fixed" description="set_ps4_lbar now order is BRG as per cronus player led order and the manual"}
::ChangelogItem{type="fixed" description="DS4 BT set lightbar"}
::ChangelogItem{type="fixed" description="Various bug Remote Play, BT, Audio, haptics, RGB, and rumbles related
"}
::ChangelogItem{type="fixed" description="Various M&K related bugs"}
::ChangelogItem{type="fixed" description="Variuus DS5 Edge related bugs"}
::ChangelogItem{type="fixed" description="Various Device Monitor related bugs"}
::ChangelogItem{type="fixed" description="Crossover over legacy rumbles and light bar to DS5 from console other than PS5"}
::ChangelogItem{type="fixed" description="Xbox Share button spamming from DS5 and DS4 gyros"}
::ChangelogItem{type="fixed" description="Issue with Xbox share button always presses on connection for series X and Adaptive controller"}
::ChangelogItem{type="improved" description="Sony to Xbox audio crossover process on headphone plugging"}
:::
:::Changelog{title="v2.2.2 - December 11th 2023"}
::ChangelogItem{type="fixed" description=" DualShock 4 Bluetooth"}
:::
:::Changelog{title="v2.2.1 - December 1th 2023"}
::ChangelogItem{type="fixed" description="PS5 controller built-in mic & headset mic (USB only)"}
:::
:::Changelog{title="v2.2.0 - November 30th 2023"}
::ChangelogItem{type="added" description="Upgraded support for the PlayStation 5 console."}
::ChangelogItem{type="added" description="Upgraded USB support for DualSense Controllers."}
::ChangelogItem{type="added" description="New Bluetooth support for DualSense controllers."}
::ChangelogItem{type="added" description="Support for Zen Studio v1.5.0 and above."}
:::
:::Changelog{title="v2.1.0 Beta.68 - May 12th 2023"}
::ChangelogItem{type="fixed" description="Support for the PS5 console"}
::ChangelogItem{type="fixed" description="Support for DualSense Controllers (USB)"}
::ChangelogItem{type="fixed" description="Various optimizations"}
:::
:::Changelog{title="v2.1.0 Beta.50 - March 20th 2023"}
::ChangelogItem{type="added" description="Support for Hori OCTA"}
::ChangelogItem{type="fixed" description="PS4 and PS5 mirror passing through input in error"}
::ChangelogItem{type="fixed" description="PS5 gyros in remote"}
:::
:::Changelog{title="v2.1.0 Beta.47 - February 3rd 2023"}
::ChangelogItem{type="added" description="DualSense Edge Controller support added (USB Only)."}
:::
:::Changelog{title="v2.1.0 Beta.43 - November 10th 2022"}
::ChangelogItem{type="fixed" description="Xbox Wireless Adapter bug fixed."}
:::
:::Changelog{title="v2.1.0 Beta.41 - November 2nd 2022"}
::ChangelogItem{type="fixed" description="Back Button issue"}
:::
:::Changelog{title="v2.1.0 Beta.35 - July 12th 2022"}
::ChangelogItem{type="added" description="get_ipolar (POLAR, RADIUS/ANGLE)"}
::ChangelogItem{type="added" description="Various minor fixes"}
::ChangelogItem{type="fixed" description="get_polar"}
::ChangelogItem{type="fixed" description="Bug police lights"}
::ChangelogItem{type="fixed" description="Bug in stickize for analog indexes"}
:::
:::Changelog{title="v2.1.0 Beta.22 - May 2nd 2022"}
::ChangelogItem{type="added" description="Support for PS5 DualSense volume control"}
::ChangelogItem{type="added" description="GPC_OP_SWITCH to interpreter"}
::ChangelogItem{type="added" description="Bluetooth Clear function (see Device Tab in Zen Studio)"}
::ChangelogItem{type="improved" description="Boosted Xbox One audio volume to DualShock 4 and DualSense controllers"}
::ChangelogItem{type="fixed" description="Elites S2 Paddles mapped with the Xbox are now working with the new controller firmware (Note: You can longer use GPC script to independently control the paddles. If you still wish to use GPC scripting for the paddles, you need to revert the Elite S2 controller firmware back to 4.8.1908.0)."}
::ChangelogItem{type="fixed" description="Issue with PS5 DualSense Mic in crossover"}
::ChangelogItem{type="fixed" description="Issue where PS5 DualSense controller in A2/A3 with no headset would not pull audio from a DualShock 4 v2 in A1 with headset."}
::ChangelogItem{type="fixed" description="DualShock 4 (Bluetooth) always switching Switch Emulator to audio mode even with no headset"}
::ChangelogItem{type="fixed" description="Issue with Build & Run"}
::ChangelogItem{type="fixed" description="GPC_OP_GPOLAR is now working correctly"}
::ChangelogItem{type="fixed" description="GPC_OP_GRUMBLE is now working correctly"}
:::
:::Changelog{title="v2.1.0 Beta.16 - Feb 25th 2022"}
::ChangelogItem{type="added" description="GPC errors will no longer display E2XXX error codes. You will now be returned to slot 0 where it will display the error message. Your Zen will not crash and you will be able to continue playing without having to reset."}
::ChangelogItem{type="fixed" description="XB1 Share button spamming when using MK"}
::ChangelogItem{type="fixed" description="General stability improvements"}
:::
:::Changelog{title="v2.1.0 Beta.6 - Feb 11th 2022"}
::ChangelogItem{type="added" description="random(min,max) will now work also in case of random(max,min)"}
::ChangelogItem{type="added" description="ResetDevice command"}
::ChangelogItem{type="added" description="Navcon and Joycon left to MK cfg activation"}
::ChangelogItem{type="improved" description="Stability Improvements"}
::ChangelogItem{type="fixed" description="Issue with Joycon left not working with MK on Bluetooth"}
::ChangelogItem{type="fixed" description="brtime being capped to INT16_MAX"}
:::
:::Changelog{title="v2.1.0 Beta.1 - Feb 7th 2022"}
::ChangelogItem{type="added" description="Official PS Remote Play Support (PS5 & PS4)"}
::ChangelogItem{type="added" description="New 32bit GPC interpreter!"}
::ChangelogItem{type="added" description="Support for PowerA Fusion Pro 2 Xbox Series X/S Controller"}
::ChangelogItem{type="added" description="Support for PowerA Spectra Xbox Series X/S Controller"}
::ChangelogItem{type="added" description="Support for Razer Wolverine v2 Xbox Series X/S Controller"}
::ChangelogItem{type="added" description="Path to rumble on Switch controllers from the interpreter"}
::ChangelogItem{type="added" description="Toggle to activate MK profiles"}
::ChangelogItem{type="added" description="PS5 DualSense Adaptive Triggers support with official PS Remote Play"}
::ChangelogItem{type="added" description="Block XB1 share for a non 1914 controller"}
::ChangelogItem{type="improved" description="Support for 2 channel mics on the PS4"}
::ChangelogItem{type="improved" description="Mouse & Keyboard detection"}
::ChangelogItem{type="fixed" description="Several Xbox One controller issues"}
::ChangelogItem{type="fixed" description="DualShock 4 Audio now supported over Bluetooth"}
::ChangelogItem{type="fixed" description="Xbox One Audio on Nintendo Switch"}
:::
# Zen Studio
***
:::Changelog{title="v1.6.1 Build 77 - June 17th 2025"}
::ChangelogItem{type="added" description="ZenLink Online Manual link"}
::ChangelogItem{type="added" description="sizeof support for uint16, int32, ps5adt, image, string"}
::ChangelogItem{type="added" description="DS5 haptics display in Device Monitor"}
::ChangelogItem{type="fixed" description="Missing DS5 icon in Device Monitor"}
::ChangelogItem{type="fixed" description="combo_step_time_left syntax highlight"}
::ChangelogItem{type="fixed" description="Offsets table for images and strings"}
::ChangelogItem{type="fixed" description="Binary operator precedence"}
::ChangelogItem{type="improved" description="Online Library UI and API"}
::ChangelogItem{type="improved" description="General UI responsiveness"}
:::
:::Changelog{title="v1.6.1 Build 20 - April 3rd 2025"}
::ChangelogItem{type="fixed" description="Race condition when an outdated gamepack is on flash and no cached data is available"}
::ChangelogItem{type="fixed" description="Loading gamepack PVARs"}
::ChangelogItem{type="fixed" description="Race condition when resetting script PVARs"}
::ChangelogItem{type="fixed" description="Minor bugs"}
::ChangelogItem{type="improved" description="Set default file type to `.zmk` when importing a mouse & keyboard profile"}
::ChangelogItem{type="improved" description="Removed CmUpdateTool from Tools menu (no longer supported)"}
:::
:::Changelog{title="v1.6.1 Build 7 - December 19th 2024"}
::ChangelogItem{type="fixed" description="Minor bugs"}
:::
:::Changelog{title="v1.6.1 Build 1 - December 4th 2024"}
::ChangelogItem{type="added" description="ALT or CTRL UP/DOWN gesture to move highlighted code blocks."}
::ChangelogItem{type="added" description="CTRL-SHIFT-Z as an alternate redo shortcut."}
::ChangelogItem{type="added" description="CTRL-/ to (un)comment lines or selections."}
::ChangelogItem{type="added" description="CTRL-Q to copy a line or selection."}
::ChangelogItem{type="added" description="CTRL-' (quote) for commenting gesture."}
::ChangelogItem{type="added" description="Bitwise Assignment Operators."}
::ChangelogItem{type="added" description="Combos and Functions navigation in GPC editor."}
::ChangelogItem{type="added" description="Mandatory internet connection."}
::ChangelogItem{type="added" description="Beta team in About section."}
::ChangelogItem{type="added" description="License agreement on setup and Zen Studio startup."}
::ChangelogItem{type="fixed" description="Focus issue in GPC script Find/Replace dialog."}
::ChangelogItem{type="fixed" description="Issue with Device Monitor labels."}
::ChangelogItem{type="fixed" description="Selection copy issue."}
::ChangelogItem{type="fixed" description="Date being cut off in Online Library."}
::ChangelogItem{type="fixed" description="Left/right arrow issue when selecting text."}
::ChangelogItem{type="fixed" description="Block comment `/* */` functionality."}
::ChangelogItem{type="fixed" description="Script hyperlink color in Online Library."}
::ChangelogItem{type="fixed" description="Programming tab hanging after factory erase."}
::ChangelogItem{type="fixed" description="JavaScript error in YouTube videos via setup."}
::ChangelogItem{type="fixed" description="Issue where Zen Studio closed after PC wake from sleep."}
::ChangelogItem{type="fixed" description="B&R closing unexpectedly the first time."}
::ChangelogItem{type="fixed" description="Small bug in Combos navigation."}
::ChangelogItem{type="fixed" description="WebHID issue by resetting the device when exiting due to Marketplace detection."}
::ChangelogItem{type="fixed" description="Issue with DS4 Output protocol"}
::ChangelogItem{type="improved" description="Compiler by removing deprecated 16-bit option."}
::ChangelogItem{type="improved" description="Code movement to allow moving single lines."}
::ChangelogItem{type="improved" description="Cursor positioning when using left/right arrow keys on selections."}
::ChangelogItem{type="improved" description="Cursor positioning when using up/down arrow keys on selections."}
::ChangelogItem{type="improved" description="Scrolling to cursor when using arrow keys on selections."}
::ChangelogItem{type="improved" description="Folding marker colors."}
::ChangelogItem{type="improved" description="Foreground color for strings."}
::ChangelogItem{type="improved" description="Device reset behavior after changing output protocol."}
::ChangelogItem{type="improved" description="GOTO window in editor."}
::ChangelogItem{type="improved" description="Device handling upon output protocol change (no reset needed)."}
::ChangelogItem{type="improved" description="Sorting of Combos and Functions lists by name."}
::ChangelogItem{type="improved" description="License information in About section."}
:::
:::Changelog{title="v1.6.0 Build 90 - October 22th 2024"}
::ChangelogItem{type="fixed" description="Various UI issues"}
::ChangelogItem{type="improved" description="Synchronization is now always executed to ensure content has not been tampered."}
::ChangelogItem{type="improved" description="Hitting the return key when searching for a text in gpc editor will show the next occurrence."}
::ChangelogItem{type="improved" description="Zen Studio will now close if PC is coming back from sleep mode due to USB communication re-sync."}
:::
:::Changelog{title="v1.6.0 Build 63 - September 30th 2024"}
::ChangelogItem{type="fixed" description="-- operation issue"}
::ChangelogItem{type="fixed" description="MaxRec and MaxMapper not being able to read inputs after first run."}
::ChangelogItem{type="fixed" description="UI for Programmer Tab readback"}
::ChangelogItem{type="fixed" description="++ / -- with var index"}
:::
:::Changelog{title="v1.6.0 Build 56 - September 26th 2024"}
::ChangelogItem{type="fixed" description="A race condition when an old version of a gamepack is on flash and Zen Studio starts the synchronization due to no cached data available."}
::ChangelogItem{type="fixed" description="Check cached slot integrity. Reload from device if integrity fails."}
::ChangelogItem{type="fixed" description="Missing plugin folder in %appadata%\ZenStudio."}
::ChangelogItem{type="fixed" description="Do not open script upload page if script has errors."}
::ChangelogItem{type="added" description="Synchronization message when reading back slots."}
::ChangelogItem{type="improved" description="Mainwindow MinHeight to 650."}
::ChangelogItem{type="improved" description="User stats font size."}
::ChangelogItem{type="improved" description="Message window display on warning or errors"}
::ChangelogItem{type="fixed" description="Issue with sub++ and add++"}
:::
:::Changelog{title="v1.6.0 Build 37/38 - September 18th 2024"}
::ChangelogItem{type="added" description="Upcoming Cronus Zen Marketplace integration"}
::ChangelogItem{type="fixed" description="Online library reloading issue upon device arrival"}
::ChangelogItem{type="fixed" description="Minor UI issues"}
:::
:::Changelog{title="v1.6.0 Build 16/19 - September 9th 2024"}
::ChangelogItem{type="fixed" description="Minor issues"}
:::
:::Changelog{title="v1.6.0 Build 13 - September 5th 2024"}
::ChangelogItem{type="added" description="Loading of pre-compiled script as .bin or .gbc"}
::ChangelogItem{type="added" description="ZenLink support"}
::ChangelogItem{type="added" description="ZenLink Configurator in installer"}
::ChangelogItem{type="added" description="Marketplace support"}
::ChangelogItem{type="fixed" description="Flash size display issue"}
::ChangelogItem{type="fixed" description="Issue when saving config not setting the gamepack flag properly"}
::ChangelogItem{type="fixed" description="Various UI and behind the scene issues"}
:::
:::Changelog{title="v1.5.0 Build 76 - April 22nd 2024"}
::ChangelogItem{type="fixed" description="Code folding not working when the script ends with } and not a newline, space or tab"}
::ChangelogItem{type="fixed" description="A crash that would happen when attempting to open a file which doesn't exist from for example recent files"}
::ChangelogItem{type="fixed" description="Online Library ExpandButton when only 3 lines are used"}
::ChangelogItem{type="fixed" description="OutputComboBox value when PS5 is selected."}
::ChangelogItem{type="fixed" description="Adaptive triggers being inverted on dev monitor.
"}
::ChangelogItem{type="improved" description="Comunication optimizatons."}
::ChangelogItem{type="improved" description="General stability improved."}
::ChangelogItem{type="improved" description="Device Tab text clean up and rephrase."}
::ChangelogItem{type="improved" description="Cronus Zen is required to run Zen Studio."}
::ChangelogItem{type="improved" description="Adjusted HighLight property for inputs and outputs in DeviceMonitor."}
::ChangelogItem{type="improved" description="Many visual fixes."}
::ChangelogItem{type="added" description="ADT_SETX opcode"}
::ChangelogItem{type="added" description="Copy to clipboard buttons for PS5 Adaptive Triggers in device monitor."}
::ChangelogItem{type="added" description="Changed XB1_SHARE to be enum 27"}
::ChangelogItem{type="added" description="Selected text in GPC editor is pasted into the find text when search popup is invoked."}
::ChangelogItem{type="added" description="XB1_SHARE/XB1_SYNC to Max Combo capture. GPC code will show button XB1_SHARE when captured."}
::ChangelogItem{type="added" description="DS5 Adaptive trigger packet out to device monitor.
Relabeled PS5 Adaptive triggers constants."}
::ChangelogItem{type="added" description="Top menu Tools option to open the Online Web Update Tool.
"}
:::
:::Changelog{title="v1.5.0 Build 24 - November 30th 2023"}
::ChangelogItem{type="added" description="zenstudio:// url hook (check manual for more details)"}
::ChangelogItem{type="added" description="Analog Sim for MK (HIP Movement Control)"}
::ChangelogItem{type="added" description="PS5 output protocol"}
::ChangelogItem{type="added" description="support for PS5_MUTE button get_val(PS5_MUTE) / set_val(PS5_MUTE, 100)"}
::ChangelogItem{type="added" description="Splash screen at startup"}
::ChangelogItem{type="improved" description="Updated to .Net Framework 4.8.1,"}
::ChangelogItem{type="improved" description="Updated to TLS 1.3"}
::ChangelogItem{type="fixed" description="Issue when saving slot due to device being disconnected."}
::ChangelogItem{type="fixed" description="Issue with slot syncronization"}
::ChangelogItem{type="fixed" description="Race condition when opening a gpc script"}
::ChangelogItem{type="fixed" description="Performance issues with the code folding feature"}
::ChangelogItem{type="fixed" description="Issue causing the device to be considered unresponsive."}
::ChangelogItem{type="fixed" description="An issue that would potentially lead to endless loops while using a do while loop"}
::ChangelogItem{type="fixed" description="Issues with compiling 32-bit multi-dimensional arrays"}
::ChangelogItem{type="fixed" description="Issue with settings"}
::ChangelogItem{type="fixed" description="Various GUI improvements"}
:::
:::Changelog{title="v1.3.1 Beta 46 - May 12th 2023"}
::ChangelogItem{type="added" description="Flyout for DualSense Adaptive triggers in device monitor"}
::ChangelogItem{type="added" description="PS5 Input/Output labels"}
::ChangelogItem{type="added" description="New Communication Library"}
::ChangelogItem{type="fixed" description="'Device not responding' issues"}
::ChangelogItem{type="fixed" description="Issue with Zen Studio device synchronization"}
::ChangelogItem{type="fixed" description="Various visual bugs"}
::ChangelogItem{type="fixed" description="Dozens of code optimizations"}
::ChangelogItem{type="fixed" description="GPC Compiler: Issue with const int32 multi array."}
::ChangelogItem{type="fixed" description="GPC Compiler: various typos and optimizations"}
:::
:::Changelog{title="v1.3.1 Beta 11 - March 20th 2023"}
::ChangelogItem{type="improved" description="Removed CronusMax Plus gamepacks"}
::ChangelogItem{type="fixed" description="Win11 GUI inconsistencies"}
::ChangelogItem{type="fixed" description="Wrong timestamp playback issue in MaxRec"}
::ChangelogItem{type="fixed" description="Importing CFG when gamepack update is available"}
::ChangelogItem{type="fixed" description="Missing PS5 case when setting the remote slot option"}
::ChangelogItem{type="fixed" description="Favorite's gamepack list not populating"}
::ChangelogItem{type="fixed" description="Gamepack update notify issue"}
::ChangelogItem{type="fixed" description="Nested switch statements"}
::ChangelogItem{type="fixed" description="A bad warning when using a return statement in a switch case instead of a break"}
::ChangelogItem{type="fixed" description="An issue causing a crash in certain cases"}
::ChangelogItem{type="fixed" description="An issue when using a switch inside of a for loop"}
::ChangelogItem{type="fixed" description="Get_Ledx issue."}
::ChangelogItem{type="fixed" description="no error for bad combo_* usage in assignment conditions"}
::ChangelogItem{type="fixed" description="crash when if, else if or else was last statement in a switch case"}
::ChangelogItem{type="fixed" description="typo in redefinition error message"}
:::
:::Changelog{title="v1.2.1 Beta 119 - November 2nd 2022"}
::ChangelogItem{type="added" description="A check to allow paste into the currently opened Compiler Tab via SendMessage by prepending a "#" to the pasted code"}
::ChangelogItem{type="added" description="ASCII_OPEN_BRACKET constant"}
::ChangelogItem{type="added" description="SET_POLAR2(POLAR, ANGLE, RADIUS), anticlockwise Angle, Radius max 15000"}
::ChangelogItem{type="added" description="POLAR_GHOST, ANALOG_GHOSTX, ANALOG_GHOSTY a virtual stick to help in math/trigonometry functions"}
::ChangelogItem{type="added" description="Tools->Restart ZenStudio"}
::ChangelogItem{type="added" description="Tools->Reset ZenStudio (deletes all files in AppdData\Roaming\CronusZenBeta)"}
::ChangelogItem{type="improved" description="Changed app exit cmd from SendMessage moved to value 99"}
::ChangelogItem{type="improved" description="SET_POLAR restored to its original behaviour alth0 GET_POLAR now follows the new SET_POLAR2 logic"}
::ChangelogItem{type="fixed" description="Multidimensional array issue"}
::ChangelogItem{type="fixed" description="GPC Guide link"}
::ChangelogItem{type="fixed" description="Windows 11 GUI issue"}
:::
:::Changelog{title="v1.2.1 Beta 105 - July 12th 2022"}
::ChangelogItem{type="added" description="A check to allow paste into the currently opened Compiler Tab via SendMessage by prepending a "#" to the pasted code"}
::ChangelogItem{type="added" description="SET_POLAR2(POLAR, ANGLE, RADIUS), anticlockwise Angle, Radius max 15000"}
::ChangelogItem{type="added" description="POLAR_GHOST, ANALOG_GHOSTX, ANALOG_GHOSTY a virtual stick to help in math/trigonometry functions"}
::ChangelogItem{type="added" description="Downloaded script will show their name in the Compiler Tab."}
::ChangelogItem{type="added" description="Tooltip on downloaded script to read the full name in the Programmer Tab."}
::ChangelogItem{type="added" description="A better error message when failing to add a script to the slots."}
::ChangelogItem{type="added" description="Various GUI fixes"}
::ChangelogItem{type="improved" description="some UI text to reflect new forum layout."}
::ChangelogItem{type="fixed" description="ASCII_OPEN_BRACKET constant"}
::ChangelogItem{type="fixed" description="Device Monitor long text labels animantion overlapping index and value"}
::ChangelogItem{type="fixed" description="INV opcode"}
::ChangelogItem{type="fixed" description="an issue with nested if statement"}
:::
:::Changelog{title="v1.2.1 Beta 85 - May 2nd 2022"}
::ChangelogItem{type="added" description="Support for the continue keyword in loops"}
::ChangelogItem{type="added" description="Zen server status is now shown on status bar. Clicking the status bar label will perform the check again"}
::ChangelogItem{type="added" description="Button to copy current device/software details to clipboard (Help > About Zen Studio...)"}
::ChangelogItem{type="added" description="Scrollable layout for low resolution monitors "}
::ChangelogItem{type="improved" description="Replaced Find Device Icon with a better one"}
::ChangelogItem{type="improved" description="Multiple GUI fixes, enhancements and stability improvements"}
::ChangelogItem{type="improved" description="Various compiler optimizations"}
::ChangelogItem{type="improved" description="Ballistic Curve buttons order"}
::ChangelogItem{type="improved" description="Updated the parser to treat : and ; as separate characters while maintaining the old syntax support for ending with : or ;"}
::ChangelogItem{type="fixed" description="Issue when GamePack/Scripts sync occurs"}
::ChangelogItem{type="fixed" description="Issue with GamePacks cached list"}
::ChangelogItem{type="fixed" description="Cached YouTube links not showing when clicking PRO GamePacks"}
::ChangelogItem{type="fixed" description="The compiler will now track possible overflow or underflow errors"}
::ChangelogItem{type="fixed" description="Issue with inc/dec issue in if statement."}
::ChangelogItem{type="fixed" description="Issue with binary operators."}
::ChangelogItem{type="fixed" description="SPVARS not loading after GamePack sync occurs (on APPDATA delete or PC change)"}
::ChangelogItem{type="fixed" description="GPC editor GOTO logic (finally)"}
::ChangelogItem{type="fixed" description="Issue with flashing some GPC scripts"}
::ChangelogItem{type="fixed" description="MAX MAPPER not exiting API MODE on close causing no output to be sent"}
::ChangelogItem{type="added" description="Append InGameSettingsFlyoutText when exporting M&K .bin layout"}
::ChangelogItem{type="added" description="Switch Case statement - Check GPC sample below"}
::ChangelogItem{type="added" description="Enum data definition - Check GPC sample below"}
::ChangelogItem{type="added" description="Bluetooth clear button - Check instructions below"}
::ChangelogItem{type="added" description="Support for any keyword as an identifier"}
:::
:::hint{type="success"}
We'd like to give a special mention to ***Swizzy*** for his invaluable assistance with this release 👍🥇💙
:::

💾 **Switch Case Statement Sample:**
::File{src="https://archbee-doc-uploads.s3.amazonaws.com/IwUlH55FdaPsVELSqm1Fc/HGxJFSNAPSE-XWn8zTVmU_switchexample.gpc" label="SwitchExample.gpc" uploadAsPublic="true"}
:::CodeblockTabs
GPC
```apex
int var = 1;
define FIVE = 5;
define SIX = FIVE + 1;
main {
switch(var) {
case 1 {
set_val(TRACE_1, 1); // THIS HAS NO BREAK SO IT WILL EVALUATE NEXT CASE!
}
case 2 : {
set_val(TRACE_1, 2);
set_val(TRACE_2, 2);
break;
}
case 0x3 {
break;
}
case 0x4 : {
break;
}
case FIVE {
break;
}
case SIX : {
}
default {
set_val(TRACE_3, 1);
}
}
switch(get_rumble(RUMBLE_RT)) {
case 0x10 {
break;
}
case 40 : {
break;
}
case 60 {
break;
}
case 80 : {
break;
}
}
}
```
:::
**💾 Enum Data Definition Sample:**
::File{src="https://archbee-doc-uploads.s3.amazonaws.com/IwUlH55FdaPsVELSqm1Fc/tBH7mEOca9nIk2kSbJcrf_enumexample.gpc" label="EnumExample.gpc" uploadAsPublic="true"}
:::CodeblockTabs
GPC
```apex
enum {
MYENUM_0 = 50,
MYENUM_1,
MYENUM_3,
MYENUM_4
}
enum {
MYENUM2_0,
MYENUM2_1,
MYENUM2_3,
MYENUM2_4
}
main {
set_val(TRACE_1, MYENUM_1); // THIS WILL OUTPUT 51 AS OUR ENUM STARTED FROM 50
set_val(TRACE_1, MYENUM2_1); // THIS WILL OUTPUT 1 AS DEFAULT ENUM START IS ALWAYS 0
}
```
:::
:::Changelog{title="v1.2.1 Beta 40 - Feb 26th 2022"}
::ChangelogItem{type="fixed" description="Bug that may occur when flashing some scripts."}
::ChangelogItem{type="added" description="Local directories refresh button"}
::ChangelogItem{type="fixed" description="GO TO Gpc Editor when selecting start of line option."}
:::
:::Changelog{title="v1.2.1 Beta 37 - Feb 25th 2022"}
::ChangelogItem{type="fixed" description="Gpc compiler issue."}
::ChangelogItem{type="added" description="Search device will now invoke FindDevice even if device is unresponsive"}
::ChangelogItem{type="fixed" description="GpcScript GO TO column"}
::ChangelogItem{type="fixed" description="GpcScript GO TO window size not showing all options"}
::ChangelogItem{type="fixed" description="Connected BT devices not showing in DeviceMonitor"}
::ChangelogItem{type="added" description="Now you need to click the Refresh icon if you plug/unplug a device from Zen in order to update the connected devices tree"}
::ChangelogItem{type="fixed" description="General stability improvements."}
:::
:::Changelog{title="v1.2.1 Beta 25 - Feb 15th 2022"}
::ChangelogItem{type="added" description="Find Device button in Device Tab"}
::ChangelogItem{type="added" description="Zen Studio will now check for new beta updates. It'll prompt you to download from the Beta #resources channel."}
::ChangelogItem{type="fixed" description="Changed device status check method"}
::ChangelogItem{type="fixed" description="Changed logic for ResetDevice"}
::ChangelogItem{type="fixed" description="Various GUI and stability fixes"}
:::
:::Changelog{title="v1.2.1 Beta 13 - Feb 11th 2022"}
::ChangelogItem{type="added" description="Support for ResetDevice command"}
::ChangelogItem{type="added" description="ResetDevice icon in Device Tab"}
::ChangelogItem{type="added" description="Now when setting PS4 Speciality or PS Remote the device will be reset automatically"}
::ChangelogItem{type="fixed" description="Missing case for GENERIC label load when loading a profile. (This fixed the empty MOUSEKEY assignment when opening the M&K Tab or loading a profile)"}
::ChangelogItem{type="fixed" description="32bit SPVARS causing slot not to be loaded correctly"}
::ChangelogItem{type="fixed" description="Issue when swapping slots"}
::ChangelogItem{type="fixed" description="Missing keyboard buttons 1 to 0 not showing as assigned when viewing Keyboard Layout"}
::ChangelogItem{type="fixed" description="Available flash size after synchronizing missing local scripts"}
::ChangelogItem{type="fixed" description="Text overflow when listening to assignment"}
::ChangelogItem{type="improved" description="Communication retries in case of bad device response"}
:::
:::Changelog{title="v1.2.1 Beta 12 - Feb 7th 2022"}
::ChangelogItem{type="added" description="New Mouse & Keyboard Settings Tab with a huge range of new & powerful features including Ballistic Curves, HIP & ADS profiles and 4 AUX profiles each with their own settings and keybinds"}
::ChangelogItem{type="added" description="Memory slots are now measured by memory space up to a massive 64k per script or GamePack - double the size that was previously available"}
::ChangelogItem{type="added" description="Added PIO_SWITCH (Enum 6)"}
::ChangelogItem{type="added" description="PS Remote Feature - Now supports the Sony PS Remote Play PC Software"}
::ChangelogItem{type="fixed" description="Disable Output Protocol when PS Remote Play is checked"}
::ChangelogItem{type="added" description="Added comand (CTRL / + and CTRL / -) to increase/decrease GPC editor font size (must be in an opened GPC script)"}
::ChangelogItem{type="improved" description="Compiler font size is now 7 to 20"}
::ChangelogItem{type="added" description="Added support to switch to a 16bit compiler with optimizations. All scripts must be closed to switch"}
::ChangelogItem{type="added" description="MK Settings ADS profile now accepts Deactivation Buttons. Example: Set Fire button to activate AUX1 which has a lower mouse sensitivity, set ADS deactivate button to Fire button. Now when you ADS and Fire, AUX1 will activate"}
::ChangelogItem{type="added" description="Recover unsaved GPC in case of Windows restart/crash"}
::ChangelogItem{type="added" description="GamePack size displayed in GamePack details"}
::ChangelogItem{type="added" description="Device Monitor Shortcut (F3)"}
::ChangelogItem{type="improved" description="Memory slot programming speed is now over 3x faster"}
::ChangelogItem{type="fixed" description="Multiple GUI fixes and tweaks"}
::ChangelogItem{type="added" description="GPC Clean - Correctly format GPC layout with the touch of a button. Shortcut (F6) Undo (Ctrl+F6)"}
:::
[title] Downloads
[path] WELCOME TO CRONUS/
These are the official printed guides included with every Cronus Zen, available in multiple languages for your convenience.
All files are in PDF format
- [English](https://archbee-doc-uploads.s3.amazonaws.com/IwUlH55FdaPsVELSqm1Fc/QRKPT402QsEUYk_Gbq63S_english-cronus-zen-quick-start-guide-v8.pdf)
- [French / Française](https://archbee-doc-uploads.s3.amazonaws.com/IwUlH55FdaPsVELSqm1Fc/xo3MGWkQvO0O-QhWBQE2i_french-cronus-zen-quick-start-guide-v2.pdf)
- [German / Deutsche](https://archbee-doc-uploads.s3.amazonaws.com/IwUlH55FdaPsVELSqm1Fc/x-2O4YVitCKaoXsW8AI3r_german-cronus-zen-quick-start-guide-v2.pdf)
- [Italian / Italiana](https://archbee-doc-uploads.s3.amazonaws.com/IwUlH55FdaPsVELSqm1Fc/4zGDiUyRemhdy6bYggRt__italian-cronus-zen-quick-start-guide-v2.pdf)
- [Portuguese / Português](https://archbee-doc-uploads.s3.amazonaws.com/IwUlH55FdaPsVELSqm1Fc/JPRRWBh7LmGp3EiSsqRVA_portugese-cronus-zen-quick-start-guide-v8.pdf)
- [Spanish / Español](https://archbee-doc-uploads.s3.amazonaws.com/IwUlH55FdaPsVELSqm1Fc/WKIOD_nzCwNhQ0g-4mEJ__spanish-cronus-zen-quick-start-guide-v3.pdf)
# Zen Studio
***
The latest version of Zen Studio includes the firmware update tool and the latest ZenLINK Config tool.
:::CtaButton{label="Download 1.6.1 Build 82" externalHref="https://cronusmax.com/files/ZenStudio_Setup_v1.6.1_Build_82.exe" openInNewTab="true"}
:::
:::hint{type="danger"}
**Redistribution **of this software in any form is strictly prohibited. Unauthorized sharing or distribution may lead to legal action.
:::

# Cronus Web Update Tool
***
Online firmware update tool for Chrome and Edge browsers.
- *(Supports Windows, macOS, and Android devices with USB OTG and a compatible web browser)*
:::CtaButton{label="Cronus Web Update Tool" externalHref="https://cronus.support/fw" openInNewTab="true"}
:::
::Image[]{src="https://archbee-image-uploads.s3.amazonaws.com/IwUlH55FdaPsVELSqm1Fc/ms3hh6jDDOUmNa6k_Sleo_image.png" size="80" width="708" height="646" darkWidth="708" darkHeight="646" position="center" showCaption="false"}
# Cronus Pro *(Discontinued)*
***
🛑 Final software release for CronusMAX (discontinued in 2019)
- No further updates will be provided
:::CtaButton{label="Cronus Pro v1.2.1" externalHref="https://www.cronusmax.com/files/Cronus_0121_Setup.zip" openInNewTab="false"}
:::
:::hint{type="danger"}
**Redistribution **of this software in any form is strictly prohibited.
Unauthorized sharing or distribution may lead to legal action.
:::
[title] Windows® PC
[path] SUPPORTED DEVICES/
Cronus Zen™ can be used on PC; however, official support is not provided for PC use.
:::hint{type="danger"}
## IMPORTANT
You must disconnect the **PROG USB** cable from Cronus Zen™ before starting any game.
:::
:::hint{type="info"}
## PC CONTROLLERS
Cronus Zen only supports licensed controllers designed for consoles. It *does not* support non-licensed controllers or any controller that is designed only for PC use such as the Scuf Envision Pro.
:::

:::hint{type="danger"}
Some PC games now detect and may block or penalize the use of third-party devices like ours. It's always in your best interest to read the EULA before using any third-party devices.
:::
[title] COMPATIBLE CONTROLLERS
[path] /
[title] Nintendo® Switch 2
[path] SUPPORTED DEVICES/
Cronus Zen does not currently support the Nintendo® Switch 2 console. Check back for future updates.
[title] Plugins
[path] ZEN STUDIO/
Add-ons for Zen Studio that expand and enhance its feature set.
Here are the articles in the section:
[MAX Combo](docId\:CUXkCFwx8sAQ2ZcKwWEwu)
[MAX Mapper](docId\:KcDDm7EV1UlIMDkboYVHd)
[MAX Rec](docId\:cbVl4WqwkXZGcNhMRAQGM)
[title] Zen Studio Errors
[path] TROUBLESHOOTING/
It's important to know there are three types of error categories:
- [Hardware Errors](docId\:DWx5SvUf5Snfju-f3vu2_)
This is when there is an issue with the actual Cronus Zen itself, such as error codes and a blank OLED screen.
- [Firmware Errors](docId\:ly6Zi3tqakUyk8HhzB3kI)
This is when there is an issue when using the Firmware Update Tool *(Zen Studio: Tools > Firmware Update)*, such as Device Not Found, 0.0.0 error, and network errors.
- **Zen Studio Errors (This Page)**
This is when there is an issue when using Zen Studio , such as Device Disconnected, registration issues, and unable to download GamePacks.
Before doing anything else, watch this video first, it will clarify pretty much everything.
# Check First
***
Before you start, it's crucial to be mindful of the following when recovering from an error:
- **USB Cables:** Check that they work and firmly connected. The best way to test is to connect your controller directly to your PC or console and see if it detects correctly.
- **No Scripts or GamePacks:** Ensure no Scripts or GamePacks are loaded. Why? Because sometimes, these can be the cause behind the fault you’re wrestling with. If you find a script or GamePack causing havoc, give a shout out to its creator to get any bugs squashed.
- **Protect Your MK Profiles:** Ensure that all MK profiles are securely backed up, to avoid losing any of your tailored settings.
- **Script Safeguarding**: Unfortunately, scripts cannot be backed up directly. Ensure that you retain a separate copy of any script you've been utilizing to avoid any potential gaming disruptions.
OK, let's get after it....

# Software Update
***
If you see this Software Update window, you must click 'CANCEL' due to a bug in Zen Studio 1.5.0 Build 24 that stops it from installing.
[Click here](https://zen.cmmodpass.com/upd/zen_studio_latest.exe) to download Zen Studio - for this release, we recommend that you first uninstall the previous version of Zen Studio before installing the new version.

# Error Opening File For Writing
***
This error appears if you ran the Zen Studio Build 24 Auto Update *(known bug, see above)*.

Uninstalling the older Zen Studio before installing the new should do the trick.

# Device Disconnected
***
The most common Zen Studio error that usually means the USB cable is not connected to the correct PROG USB port, or the cable is faulty.

It can also mean...
- The USB cable may be faulty - try another.
- The PC USB port isn't getting enough power - this can be solved with the [Cronus MK Switch](https://cronus.shop/products/cronus-mk-switch) which has a powered 5v AUX port.
- You are using am Apple Mac - BootCamp won't work with newer M1/M2 chipsets. You need to use **VMware Fusion Technology Preview 2023** 👉[Free Trial](https://customerconnect.vmware.com/downloads/get-download?downloadGroup=FUS-TP2023).
- If none of these solutions worked, the unfortunately your Cronus Zen has developed a fault. Scroll down to the [Warranty Instructions](docId\:xrFAY4U9Buyb9SO7ONL07) for what to do next.
# Device Connected But Not Responding
***
This happens when Zen Studio has lost its pairing to the Cronus Zen. Usually all you need to do is go to the Device panel and click on the **Find Device** button.

It can also mean...
- You're using an old firmware that doesn't work with Zen Studio
- If that doesn't work, simply unplug and reconnect the `PROG` USB cable.
- If none of these solutions worked, unfortunately your Cronus Zen has developed a fault. Scroll down to the [Warranty Instructions](docId\:xrFAY4U9Buyb9SO7ONL07) for what to do next.
# Zen Studio Not Opening
***
You are not connected to the internet, or your internet provider might be blocking our server because of tight security.
Use a VPN to get around it. We suggest trying [ProtonVPN](https://protonvpn.com/free-vpn) – it's free! 😊
# Programming Error
***
Usually this is when you have a faulty USB cable or when there are corrupt Zen Studio files. Simply go to **Tools > Reset Zen Studio**. It can also mean the script you are programming may be out of date with old code no longer compatible with the latest updates.

# Unable to Download GamePacks
***
Error message "Unable To Download GamePacks". Your internet provider or firewall is blocking access to our server.
Use a VPN to get around it. We suggest trying [ProtonVPN](https://protonvpn.com/free-vpn) – it's free! 😊
:::hint{type="info"}
If you are still unable to download GamePacks please wait for an hour as the GamePack server may be restarting.
:::
# Unable to Retrieve Data from the Server
***
Error message "Unable to retrieve data from the server". Your internet provider or firewall is blocking access to our server.
Use a VPN to get around it. We suggest trying [ProtonVPN](https://protonvpn.com/free-vpn) – it's free! 😊
:::hint{type="info"}
If you are still get the error message please wait for an hour as the server may be restarting.
:::
# More Than a Month Old
***
You're using an old version of Zen Studio. Go to [STEP 2: Install Zen Studio](docId\:uvMc-vW2cI8sD09IzJ4EP) and update to version .
::Image[]{src="https://archbee-image-uploads.s3.amazonaws.com/IwUlH55FdaPsVELSqm1Fc/Hh8Vdcy8i7cYLv1j_hXJw_image.png" size="70" width="404" height="147" position="flex-start" showCaption="false"}
# Stuck on Programming....
***
This is a known issue, but with a simple workaround.
- Unplug and reconnect the `PROG` USB cable.
- Run **Tools > Reset Zen Studio**. This will revert everything to their default.
- After Zen Studio reboots, go to the Device panel and click on the Find Device button.
:::hint{type="danger"}
# Still Not Working? 😲
If your Zen's pulling a vanishing act with a blank OLED, skipping the RGB LED party, or flat out refusing to reset, that’s a huge bummer because it sounds like it’s developed a fault. **DON'T PANIC!**
**Here's Your Game Plan:**
1. **Warranty Wonders:** Bought directly from [cronus.shop](https://cronus.shop)? The warranty is between 90 days and 1 year depending on the package you purchased. But if you snagged yours from another store like GameStop, you might have a 30-day warranty. Sweet deal if you've just unboxed. Within 30 days? You're set for a new replacement or a refund, whichever you prefer.
2. **Passed the Warranty Deadline? We've Got a Plan B: **This [Extended Warranty Service](https://cronus.shop/collections/cronus-zen/products/cronus-zen-mail-in-out-of-warranty-service) is here to the rescue. Doesn't matter when or where you got it - GameStop, Amazon....anywhere! we’ve got you covered. 🚑
**Let's get you back in the game!**
:::
[title] URL Hooks
[path] ZEN STUDIO/
Using URL Hooks is a new feature added to Zen Studio 1.5.0 Build 24.
It allows you to add any web hosted script to Zen Studio's script compiler with a simple command. Once you're happy with the script, simply compile, then program. 🙂
## Open Zen Studio
`zenstudio://` - Opens Zen Studio.
## Add GPC Library Script to Compiler
`zenstudio://lib/script/?scripts=12345` - Adds [GPC Library](https://cronus.support/gpclib) script ID 12345 to Zen Studio's compiler.
## Add any GPC to Compiler
`zenstudio://www.mywebsite.my/myscript.gpc` - Adds any web hosted GPC script directly to Zen Studio's compiler.
:::CtaButton{label="Example Web Hosted GPC Script" externalHref="https://tinyurl.com/testgpc" openInNewTab="true"}
:::

[title] Normal Mode
[path] ZEN STUDIO/Untitled/
This mode unlocks all main functions of the Cronus Zen, including the GPC script compiler, GamePacks, GPC Library, Mouse & Keyboard, and more.
First, connect Cronus Zen to a Windows PC *(or Mac with Windows 10 installed)* using a mini-USB cable from the **PROG USB Port*** (See highlighted in red below).* Then open Zen Studio.


Open the Zen Operational Mode interface by selecting **Tools 👉 Zen Operational Mode**. Then select **'Normal Mode'** and click **Finish**.
::Image[]{src="https://archbee-image-uploads.s3.amazonaws.com/IwUlH55FdaPsVELSqm1Fc/9EtOwhGtLHEnhGAPfFcsD_image.png" size="68" width="214" height="25" position="flex-start" showCaption="false"}
The active Operational Mode is displayed in the **status bar**. You can also click this area to load the Zen Operational Mode interface.
[title] Zen Studio Update
[path] ZEN STUDIO/
How to update to the latest version of Zen Studio.
Some older versions of Zen Studio do not have a functional manual update. If you haven't updated Zen Studio in the last couple of months, we recommend that you manually download a fresh copy of the latest version.
:::BlockQuote
**Zen Studio:** ([Download](https://www.cronusmax.com/downloads/))
:::
# Mandatory Update
***
Updating Zen Studio is very simple, you only need to be connected to the internet.
If there is an important update detected which fixes a critical bug, you'll see this warning. Simply click OK and it will auto direct you to the Software Update interface.
[title] Library
[path] ZEN STUDIO/Working Panels/
The GPC Library provides access to community-created GPC scripts.
Access requires a registered Cronus Zen™ device
The library contains a large collection of downloadable scripts for various supported games and controllers.
# Script Information Panel
***
When selecting a script, the information panel displays:
- Script title
- Version numbe
- Author name
- Author notes
This section provides important usage details and compatibility information before downloading or compiling a script.