Zen LINK™
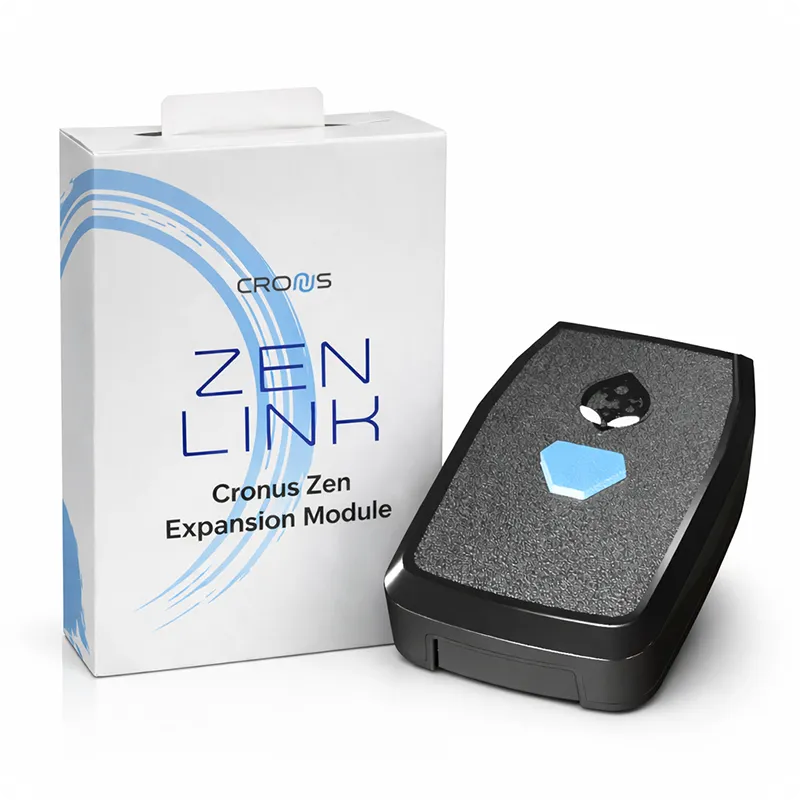
The Cronus Zen LINK™ is a powerful Wi-Fi Expansion Module for the Cronus Zen™ (purchase separately). It adds powerful new capabilities, including full native PlayStation®5 support with no PS Remote Play® or Windows® PC tether required!
Another amazing feature is that you can wirelessly program and configure Cronus GamePacks and scripts through a compatible Chromium based browser like Google® Chrome & Microsoft® Edge on a wide variety of devices and platforms, including Windows®, macOS®, Chromebook™, Android™, and iOS™. All you need is a Windows® 10/11 computer for the initial setup and a 2.4GHz compatible Wi-Fi connection and you'll be up and running in just a few minutes.
DualSense® Functions Requires Cronus Zen LINK™ | Supported |
|---|---|
Rumbles & Haptic Feedback | YES |
Adaptive Triggers | YES |
Two Finger/Swipe Touchpad | YES |
Gyroscope | YES |
Wired Headset (USB) | YES |
DualSense® Speaker (USB) | YES |
DualSense® Mic (USB) | YES |
Requirements
Here are the requirements for using Cronus Zen™ & Zen LINK™
- Cronus Zen 👉 purchase here & Cronus Zen LINK 👉 purchase here
- Windows 10/11 Computer (for initial setup - not required while gaming)
- Zen Studio 1.6.1 Build 82 👉 Downloads
- Zen Firmware 2.2.14 👉 Online Update App
- A 2.4GHz compatible Wi-Fi connection
PS5® Console Settings
The following settings must be applied on your PlayStation®5 before using a Cronus Zen™ with the Zen LINK™. It's important to note that Bluetooth will be disabled on the console so it won't be possible to power on the PS5 with your controller.
Users and Accounts
Users and Accounts > Other > Console Sharing and Offline Play > Enable
System
⚙️ System > Remote Play > Enable Remote Play
⚙️ System > System Software > Console Information > Name (make sure there is a name here)
It's recommended these two other system settings are disabled as a precautionary measure to protect against future system updates that may affect compatibility or functionality with the Cronus Zen or Zen LINK.
System > System Software > System Software Update and Settings > Disable: Download Update Files Automatically Disable: Install Update Files Automatically
Power Saving
⚙️ System > Power Saving > Set Time Until PS5 Enters Rest Mode > Set While Playing Games to Don't Put in Rest Mode
⚙️ System > Power Saving > Features Available in Rest Mode > Supply Power to USB ports > Always
⚙️ System > Power Saving > Features Available in Rest Mode > Enable Stay Connected to the Internet
⚙️ System > Power Saving > Features Available in Rest Mode > Enable Turning on PS5 from Network
⚙️ System > Power Saving > Set Time Until Controllers Turn Off > Don't Turn Off
Controller (General)
⚙️ Accessories > Controller (General) > Vibration Intensity > Strong (Standard)
⚙️ Accessories > Controller (General) > Trigger Effect Intensity > Strong (Standard)
⚙️ Accessories > Controller (General) > Communication Method > Use USB Cable
⚙️ Accessories > Controller (General) > Advanced Settings > Turn Off Bluetooth
Note: DualSense Edge Controller settings can be found in Profile 1
Native PS5® Mode
Make sure you are using the latest version of Cronus Zen firmware & Zen Studio then follow the video below to get started.
For the initial setup you will need a Windows® 11/10 PC and Wi-Fi that supports 2.4GHz. Your PS5® must also be connected to this same Wi-FI network.
Navigate to https://zenlink.local in a compatible browser such as Chrome or Edge (Firefox, Safari, Opera do not work).
Our video will guide you through the Zen Link™ setup process for use on a PS5® console in just a few minutes.
Controller Setup
All DualSense® features are supported (audio features USB only), however you can use any supported Xbox or Switch controller too.
Connect Cronus Zen™ to Game System: CONSOLE/PC USB (Short USB cable) Connect Zen LINK™ to Cronus Zen™: A1 USB The Zen LINK LED will change to ORANGE when it successfully connects to your 2.4GHz Wi-Fi.
Connect Controller to Cronus Zen™: A3 USB The Zen LINK LED will change to GREEN when it successfully pairs to the controller.
Wireless Support: You can also pair your controller to the Cronus Zen™ using Bluetooth, but you will lose audio features.
Press the left Bluetooth pairing button P2 on your Zen. The RGB LEDs will flash blue – that's your sign it's in pairing mode. PlayStation controller: hold down SHARE + PS and wait for the lightbar to start flashing.
When the controller and Zen are paired, both lightbar and RGB LEDs will stop flashing.
Once your Cronus Zen™ successfully syncs with your PS5®, the ZenLINK™ LEDs will change to BLUE as soon as you start playing a PS5® game, signaling you're connected and ready to enjoy full Cronus Zen™ functionality on your PS5®. 🙂
ZenLINK™ Device Buttons
Config Mode
HOLD the BLUE CONFIG BUTTON for at least 5 seconds while plugging into PC until the LEDs turn PURPLE. They will then either turn ORANGE (Wi-Fi connected) or BLINK RED (no Wi-Fi set).
If the LEDs flash PURPLE and GREEN it means there is no update available.
Factory Reset
To perform a Factory Reset, HOLD the FACTORY RESET BUTTON (paperclip hole underneath) while plugging into the PC until the LEDs turn PURPLE then BLINK RED.
Troubleshooting
ZenLINK™ LEDs
Please refer to the various ZenLINK™ LED indicators and their meanings below to assist with troubleshooting.
Device LED (Config Mode):
- PURPLE LED means config mode.
- ORANGE LED means successfully connected to Wi-Fi.
- Blinking RED LED means no Wi-Fi settings are setup.
- Blinking BLUE LED in config mode means firmware is updating (DO NOT UNPLUG!)
- CYAN LED means Zen Console Mode ready. Note: This is briefly shown when the ZenLINK™ is unplugged/plugged back in.
Device LED (Console Mode):
- CYAN LED means Console Mode ready.
- ORANGE LED means successfully connected to Wi-Fi.
- Blinking RED LED means no Wi-Fi found.
- Blinking PURPLE LED means failure to connect to console
- Single LIGHT GREEN flash then LED off means retrying connection.
- RED/BLUE flashing means Remote Play disconnected.
- STEADY GREEN means successfully connected.
Red LED (no Wi-Fi)
Make sure your Windows® PC is connected to the same Wi-Fi network as your PS5® (and of course make sure the PS5® is turned on and connected). If your computer is currently using a wired LAN (Ethernet) connection, temporarily disconnect the cable and switch to Wi-Fi.
Your Wi-Fi router must support the 2.4GHz band. Most modern Wi-Fi routers combine their 2.4GHz and 5GHz networks under the same Wi-Fi name SSID, so you typically won't need to worry about this step. However, if your router has separate SSID connections for each band, be sure to connect your PC to the 2.4GHz network specifically.
Tip: Remove special characters from your password if you're having trouble connecting (example: ! @ # $ % ^ & * ( ) - _ = + ?).
Random Disconnections
UPNP must be enable in the internet routers settings. Another solution is to put ZenLINK™ and the PS5® on a static IP address with port forwarding enabled (see the instructions for your router).
TCP port 9295 → 9295 TCP port 9304 → 9304 TCP port 8572 → 8572 UDP ports 9000-65535 → 9000-65535
No Wired Headset Audio
If your wired headset isn't working and your DualSense® is connected by USB cable to your Cronus Zen™, you will need to manually change the Remote Play Input Device to USB Headset on your PS5®.
⚙️ Settings > Sound > Microphone > Input Device > Select USB Headset
Wired headsets and the DualSense® controller speaker/mic is not supported when paired to the Cronus Zen™ using Bluetooth.
Console Name Not Set
Ensure your PS5® console has a name in its Console Information section prior to setup. It is given a name by default, but there is a chance you may have removed it at some point.
DualSense® Edge Curve
If you are using a DualSense® Edge controller, you must change the built-in Right Stick Sensitivity/Deadzone settings to default or it will break the functionality of many scripts.
- Go to Settings > Accessories.
- Select DualSense® Edge Wireless Controller > Custom Profiles.
- Select Create Custom Profile, call it CRONUS, then select OK.
- Select the profile you created and...
- Right Stick Sensitivity Curve: Default
- Curve Adjustment: 0
- Deadzone Adjustment: 0%
Important Notes
- ZenLINK™ MUST be within reasonable range of your wireless router/modem to ensure smooth operation; otherwise lag and disconnecting could occur. You should have a good idea from your other devices as to whether you are within a decent Wi-Fi signal range.
- ZenLINK™ uses similar technology to PlayStation® Portal and as such, it is subject to the same restrictions. For the best possible experience, minimize the amount of high bandwidth devices and apps like Netflix® running on your network while you are playing. If your internet is unstable or your network is prone to dropping out, it will affect the performance of ZenLINK™ .
- Connect your PS5® console via wired ethernet if possible. The PS5® puts out plenty of hot air near the ethernet connection, so if you see instances of your ethernet connection dropping out on your console, you may need a higher quality cable.
- Be aware that PS Remote Play® will disconnect from ZenLINK™ after an idle period.
Disclaimer
Zen LINK™ is a trademark of Collective Minds Gaming Co. Ltd. ©2013-2026. All product names, logos, brands, and other trademarks, images, or videos mentioned in this manual or on the website are used solely for identification purposes and remain the property of their respective trademark holders. These trademark holders are NOT affiliated with Collective Minds Gaming Co. Ltd., and they DO NOT sponsor or endorse its products, services, or websites.
The trademarks "Sony®", "PlayStation®", PlayStation®5", "PS5®", "PSN®", "DUALSENSE®", "DUALSHOCK®", and "PS REMOTE PLAY®" are owned by Sony Interactive Entertainment.
Copyright or trademark concerns should be directed to the owner or their legally authorized representative in accordance with the U.S. Copyright Act. We reserve the right to disclose infringement notices to involved parties, including the alleged infringer. For inquiries or to report concerns, please contact dmca (at) cronusmax.com