STEP 1: Update Firmware
It's important to have the latest Cronus Zen™ 2.2.14 firmware installed before using the Zen Studio software. It's packed with new features and bug fixes, including game-changing support for the powerful Zen LINK™ Wi-Fi Expansion Module (buy here).
Step-by-Step Guide
Setting up Cronus Zen™ requires that you are using a Windows® 10/11 PC with a good internet connection.
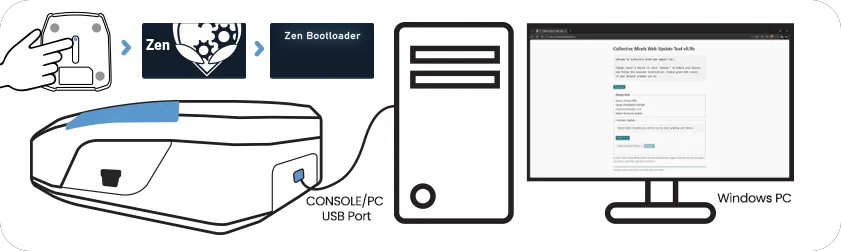
While pressing the small blue reset button, connect Cronus Zen™ to a Windows® PC: CONSOLE/PC USB
Let go of the button once the OLED screens displays Zen Bootloader with the RGB LEDs glowing Purple/Blue.
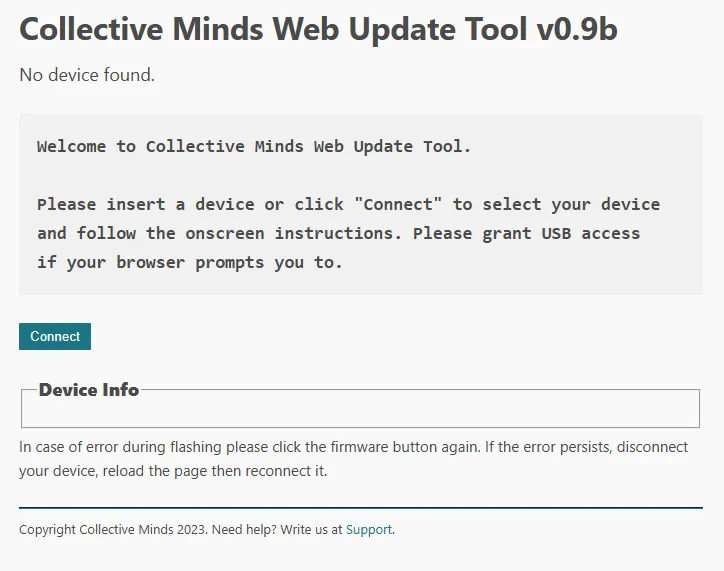
Open the Collective Minds Web Update Tool at cronus.support/fw using any Chromium based web browser such as Google® Chrome or Microsoft® Edge and click the Connect button. Note: Firefox & Safari browsers will likely not work.
Note: If you need to update the firmware again in future, you don't need to use a PC. You can use this online tool on most compatible devices, including your cellphone.
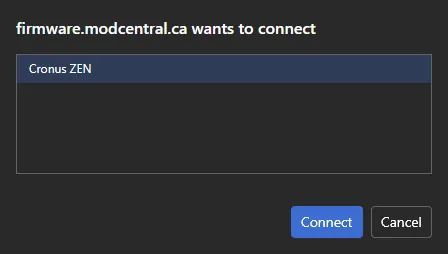
A window will popup saying firmware.modcentral.ca wants to connect. Select Cronus ZEN and click Connect.
If you do not see Cronus ZEN listed, make sure a working USB cable is connected firmly to the correct CONSOLE/PC USB Port at the back of the Zen, and that the OLED screen displays Zen Bootloader.
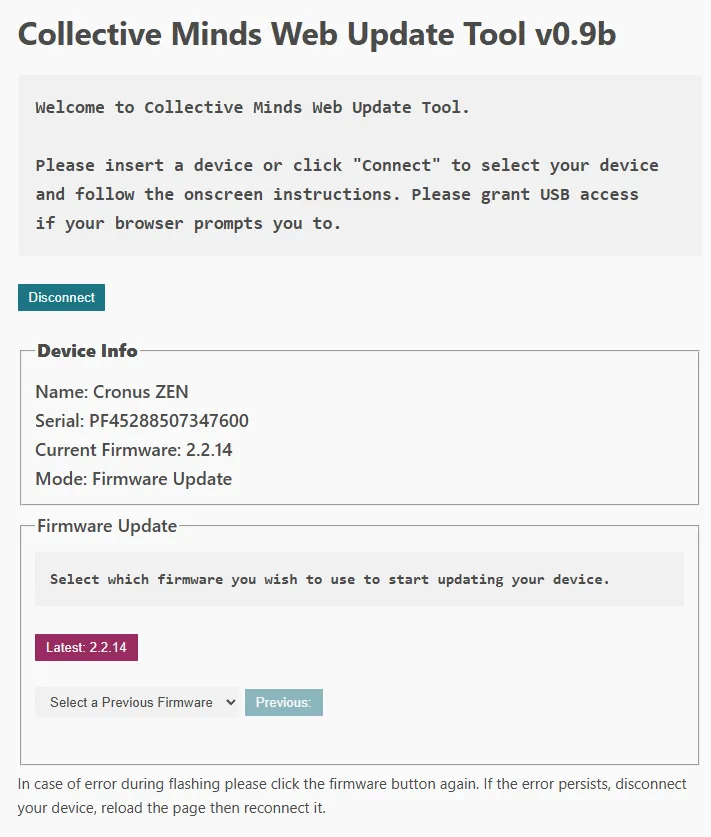
Click the button labelled Latest 2.2.XX and the update tool will display Programming Device, please wait. In less than 20 seconds, your Cronus Zen™ will be upgraded and ready to use with the Zen Studio software.
Once the firmware update has completed, the Cronus Zen™ RGB LED's will flash Red, Green, Blue and the OLED screen will display the Collective Minds Gear Head logo.

You can now proceed to STEP 2: Install Zen Studio